With the knowledge we have gained over the span of the last couple of lessons, We can easily allow the client to edit the Color Scheme of the site using the Customize Panel. All we have to do is create a couple of Color Controls and output some Dynamic CSS to the header portion of the site.
If you have any doubts from the previous lesson, they will be smashed by the end of this lesson.
First, let’s create a new “Colors Options” Section inside the “Theme Options” Panel by put the following code at the end of the nd_dosth_customize_register action:
// Color Options Section
$wp_customize->add_section( 'nd_dosth_color_options',
    array(
        'title'         => __( 'Color Options', 'nd_dosth' ),
        'panel'         => 'nd_dosth_theme_options'
    )
);
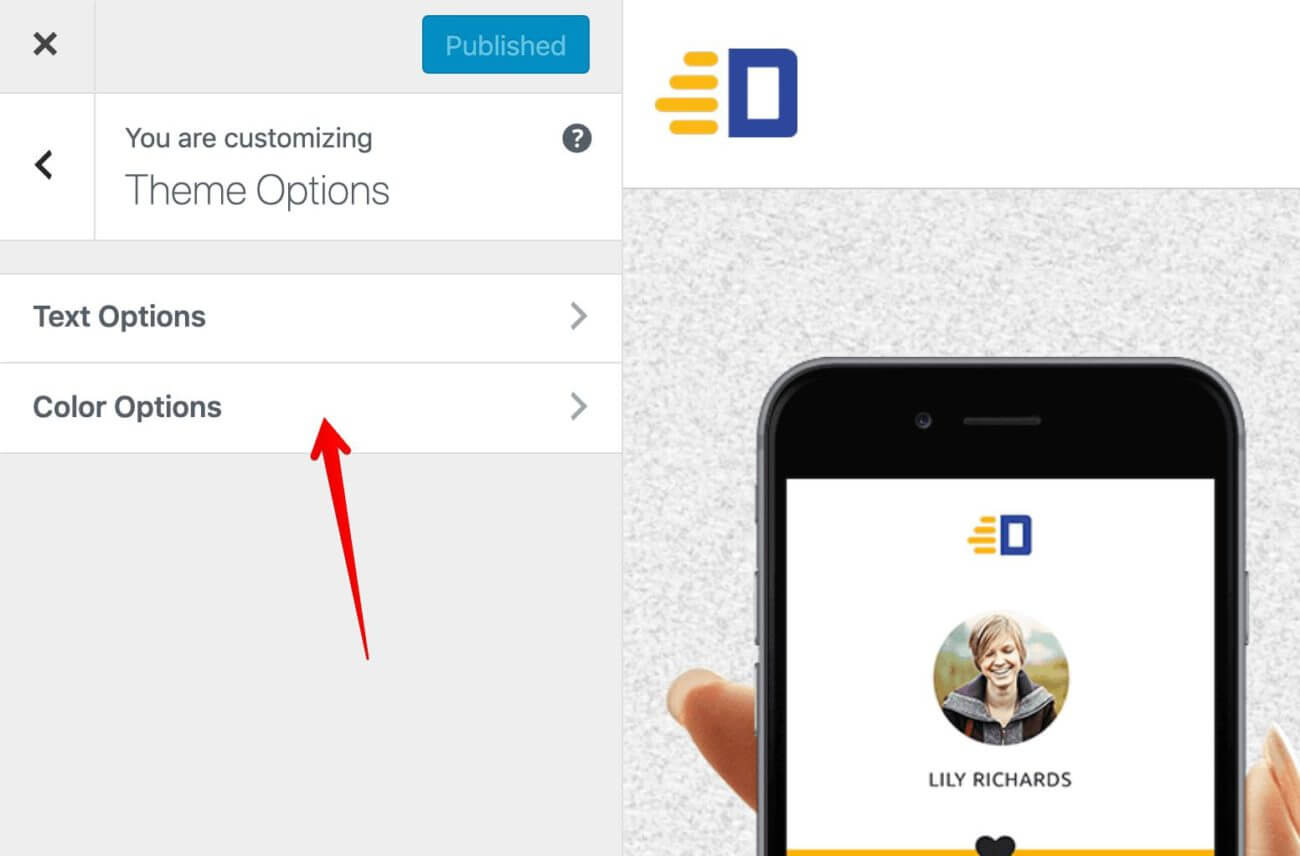
Every site’s Color Scheme consists of at least two Colors. We usually call them Primary and Secondary colors.
Our Dosth Site’s Color Scheme is Yellow and Blue.
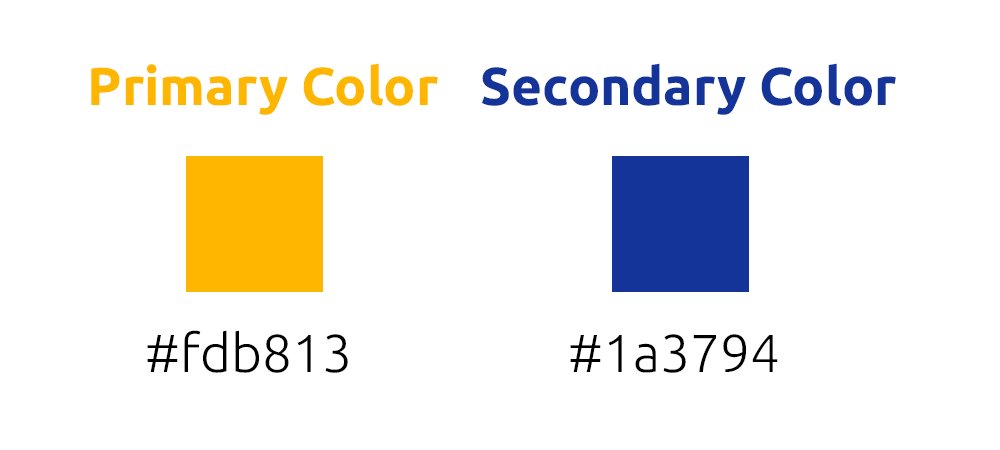
So, to allow the client to change the Color Scheme of Dosth Site, we have to create two Color Controls. One for Primary Color and one for Secondary Color.
We will start with by adding a “Primary Color” Control to the “Color Options” Section by putting the following code at the end of the nd_dosth_customize_register action:
// Add a new setting for primary color.
$wp_customize->add_setting( 'nd_dosth_color_primary',
    array(
        'default'              => 'fdb813',
        'sanitize_callback'    => 'sanitize_hex_color_no_hash',
        'sanitize_js_callback' => 'maybe_hash_hex_color',
        'transport'            => 'postMessage',
    )
);
// Add a control for primary color.
$wp_customize->add_control( new WP_Customize_Color_Control(
        $wp_customize,
        'nd_dosth_color_primary',
        array(
            'label'         => esc_html__( 'Primary Color', 'nd_dosth' ),
            'section'       => 'nd_dosth_color_options',
            'settings'      => 'nd_dosth_color_primary',
        )
    )
);
First, we are creating the Setting with ID nd_dosth_color_primary.
If you notice the default value for this Setting, we are providing a hexadecimal color code with no hash (#). This is a good sanitization practice.
Even if you put the hash (#) in front of the Color Code, the sanitize_hex_color_no_hash sanitization callback removes the hash (#) before storing it to the Database.
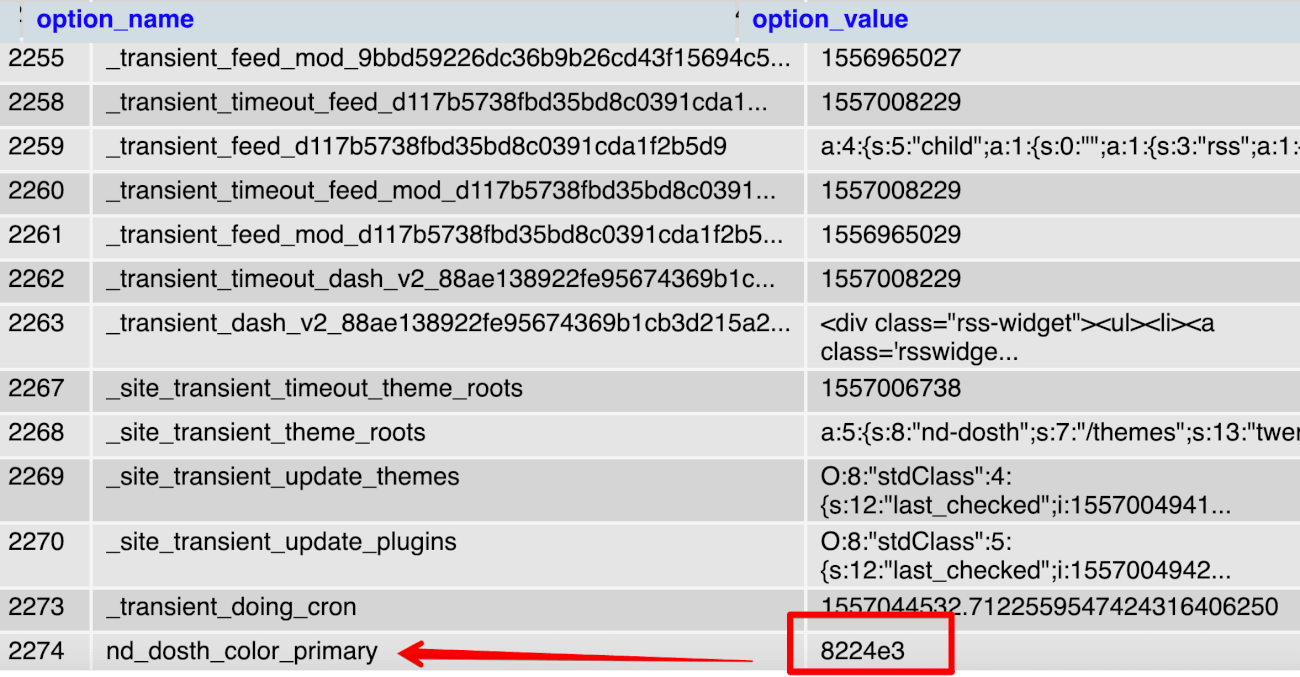
However, this is one of the sides.
On the other side, The Color Control needs a (#) in front of the color code, like this:
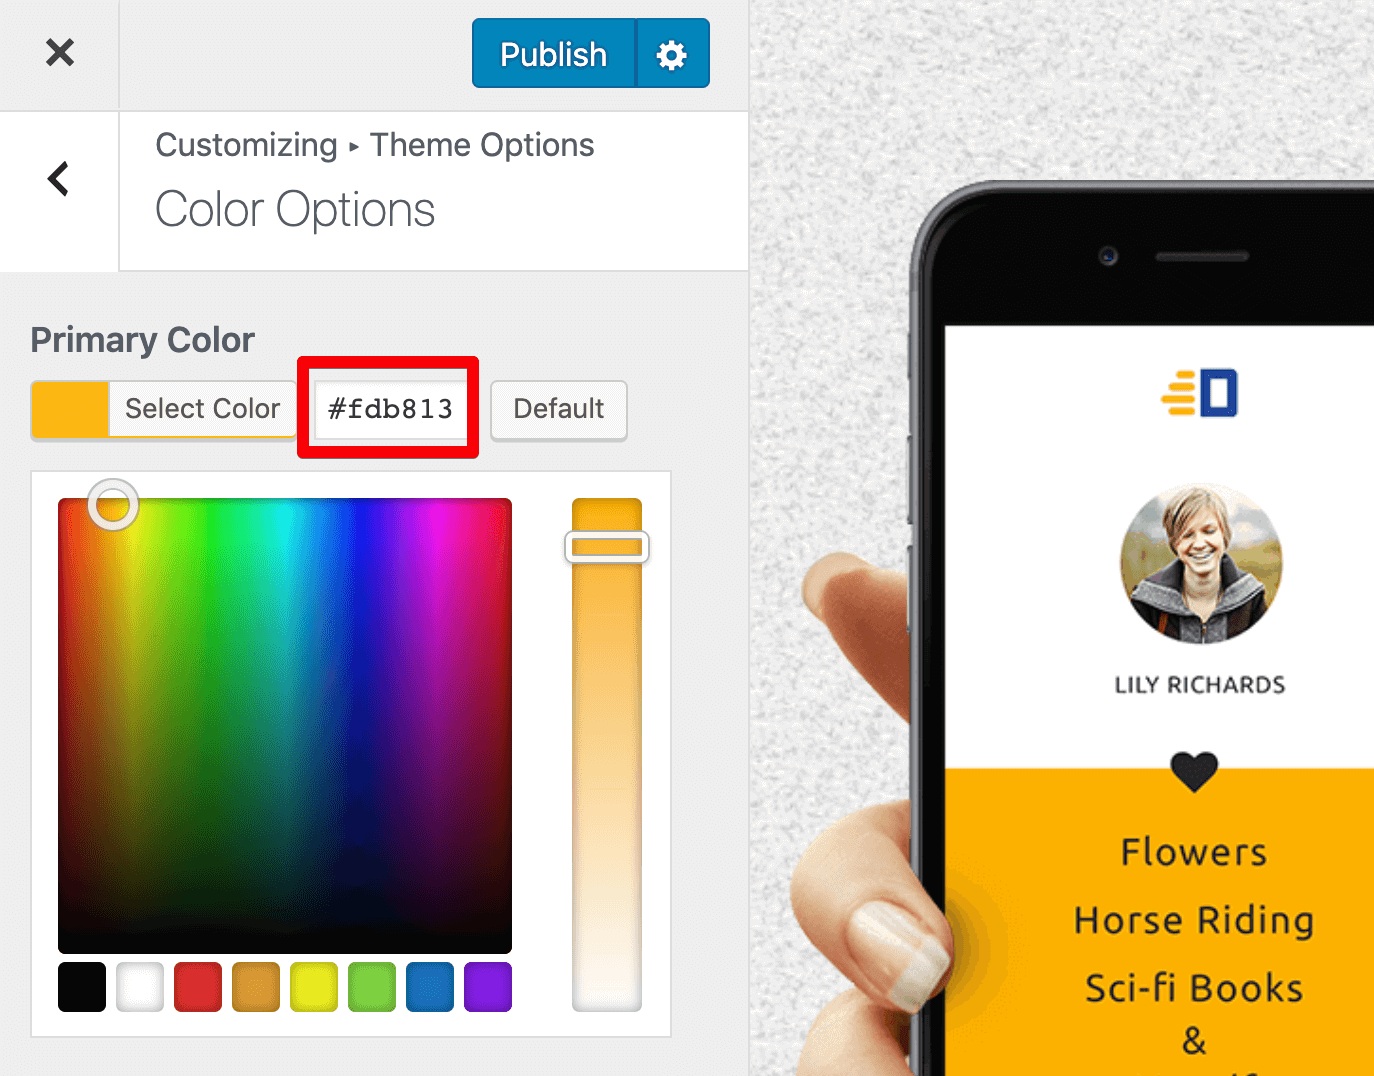
So, We are using maybe_hash_hex_color Javascript Sanitization Callback to output the color code with the hash (#) to the Color Control. The only responsibility of the maybe_hash_hex_color is to prepend the hash (#) before a hexadecimal color code.
Both sanitize_hex_color_no_hash and maybe_hash_hex_color callbacks ships by default with WordPress.
Clear?
Next, We are creating Color Control itself by instantiating the WP_Customize_Color_Control class.
The Constructor of this class accepts three parameters.
$wp_customize object itselfColor Control that ships WordPress is a complex Control. So does the Image Control.
So, every complex Control like Color Control will have its own class and accepts the parameters in the same way.
For example, this is how we create an Image Control for the Customize Panel:
$wp_customize->add_control( new WP_Customize_Image_Control(
        $wp_customize,
        'nd_dosth_retina_logo',
        array(
            'label'         => __('Retina Logo','nd_dosth'),
            'section'       => 'some_section_id',
            'settings'      => 'nd_dosth_retina_logo',
        )
    )
);
Arguments are pretty much the same except for the WP_Customize_Image_Control Class name, right?
Also, If you notice the code for any Complex Control, we are providing the Setting ID two times instead of once. Don’t ask me why 😛
Anyway, this is pretty much you add a Color Control to a particular Section inside the Customize Panel.
Now let’s go ahead and create another Color Control for the Secondary Color by putting the following code at the end of the nd_dosth_customize_register action:
// Add a new setting for Secondary color.
$wp_customize->add_setting( 'nd_dosth_color_secondary',
    array(
        'default'              => '1a3794',
        'type'                 => 'option',
        'sanitize_callback'    => 'sanitize_hex_color_no_hash',
        'sanitize_js_callback' => 'maybe_hash_hex_color',
        'transport'            => 'postMessage',
    )
);
// Add a control for Secondary color.
$wp_customize->add_control( new WP_Customize_Color_Control(
        $wp_customize,
        'nd_dosth_color_secondary',
        array(
            'label'         => esc_html__( 'Secondary Color', 'nd_dosth' ),
            'section'       => 'nd_dosth_color_options',
            'settings'      => 'nd_dosth_color_secondary',
        )
    )
);
Same deal!
We have used “postMessage” transport method for both the Settings. So, When you are interacting with them, the Site Preview will not refresh and we have to mimic the Color Scheme Changes using the Javascript.
Mimicking the Color Scheme changes in the Customize Panel involves two steps:
Step 1 ) Gather all the CSS styles that are related to the Color Scheme and put them in one place like this:
//Primary Color as Background Color
#site-footer .es_button input,
.slick-dots li.slick-active,
.menu-button a,
.content-container .page-title,
.pagination .nav-links a, .pagination .nav-links .current,
#commentform input[type="submit"]
{
    background-color:#fdb100;
}

//Primary Color as Text Color
#announcement .announcement-title,
.nd-dosth-reviews blockquote p,
.search-results .page-title,
.menu li:hover > a, .menu li a:focus,
.current-menu-item a,
#blog-sidebar .widget .current-cat a,
.previous-article{
    color:#fdb100;
}

//Secondary Color as Background Color
#announcement{
  background-color:#1a3794;
}

//Secondary Color as Text Color
.blog .page-title, .archive .page-title,
.blog-posts .blog-post h2 a:hover,
.blog-posts .blog-post h3 a:hover,
.read-more-link, .posted-in a,
.widget-title,
.single .article-info a,
.comment-reply-link,
.next-article,
.single .related-articles h2,
.search-results .search-query{
   color:#1a3794;
}
Most of the time, we apply colors for the text and the background, So I separated them.
I did not put the above-separated styles anywhere. I just gathered them for my reference.
Step 2 ) Put the following code inside the customize.js file:
/* Shows a live preview of changing the Primary Color of the theme. */
wp.customize( 'nd_dosth_color_primary', function( color_code ) {
    color_code.bind( function( updated_color_code ) {

        // Primary color as background color
        $( '#site-footer .es_button input, .slick-dots li.slick-active, .menu-button a, .content-container .page-title, .pagination .nav-links a, .pagination .nav-links .current, #commentform input[type="submit"]' )
        .not( '.archive .page-title, .blog .page-title, .search .page-title' )
        .css( 'background-color', updated_color_code );

        // Primary color as text color
        $( '#announcement .announcement-title, .nd-dosth-reviews blockquote p, .search-results .page-title, .current-menu-item a, #blog-sidebar .widget .current-cat a, .previous-article' )
        .css( 'color', updated_color_code );

    } );
} );
You already know what’s happening in the above code. We are getting the “Primary Color” Setting and passing the color code to the callback function. Then, inside the callback function, we are applying this color code to all the necessary CSS selectors we have gathered in Step 1. It is a very basic jQuery Code.
Common, let’s do the same for the Secondary Color.
Here is the final code for the customize.js file:
(function($){
    /* Show/Hide Read More link inside Site Preview */
    wp.customize( 'nd_dosth_show_readmore', function( value_of_show_readmore_setting ) {

        value_of_show_readmore_setting.bind( function( updated_value_of_show_readmore_setting ) {
            if( true == updated_value_of_show_readmore_setting ){
                $('.read-more-link').show();
            } else{
                $('.read-more-link').hide();
            }
        } );

    } );

    /* Shows a live preview of changing the Primary Color of the theme. */
    wp.customize( 'nd_dosth_color_primary', function( color_code ) {
        color_code.bind( function( updated_color_code ) {

            // Primary color as background color
            $( '#site-footer .es_button input, .slick-dots li.slick-active, .menu-button a, .content-container .page-title, .pagination .nav-links a, .pagination .nav-links .current, #commentform input[type="submit"]' )
            .not( '.archive .page-title, .blog .page-title, .search .page-title' )
            .css( 'background-color', updated_color_code );

            // Primary color as text color
            $( '#announcement .announcement-title, .nd-dosth-reviews blockquote p, .search-results .page-title, .current-menu-item a, #blog-sidebar .widget .current-cat a, .previous-article' )
            .css( 'color', updated_color_code );

        } );
    } );
    /* Shows a live preview of changing the Secondary Color of the theme. */
    wp.customize( 'nd_dosth_color_secondary', function( color_code ) {
        color_code.bind( function( updated_color_code ) {

            // Secondary color as background color
            $( '#announcement' )
            .css( 'background-color', updated_color_code );

            // Secondary color as text color
            $( '.blog .page-title, .archive .page-title, .read-more-link, .posted-in a, .widget-title, .single .article-info a, .comment-reply-link, .next-article, .single .related-articles h2, .search-results .search-query' )
            .css( 'color', updated_color_code );

        } );
    } );

})(jQuery);
Thanks to “postMessage” transport type and above code, we can preview the color changes right off the bat If we now interact with the Color Controls inside the Customize Panel.
Picking different colors indeed change the Color Scheme of the site.
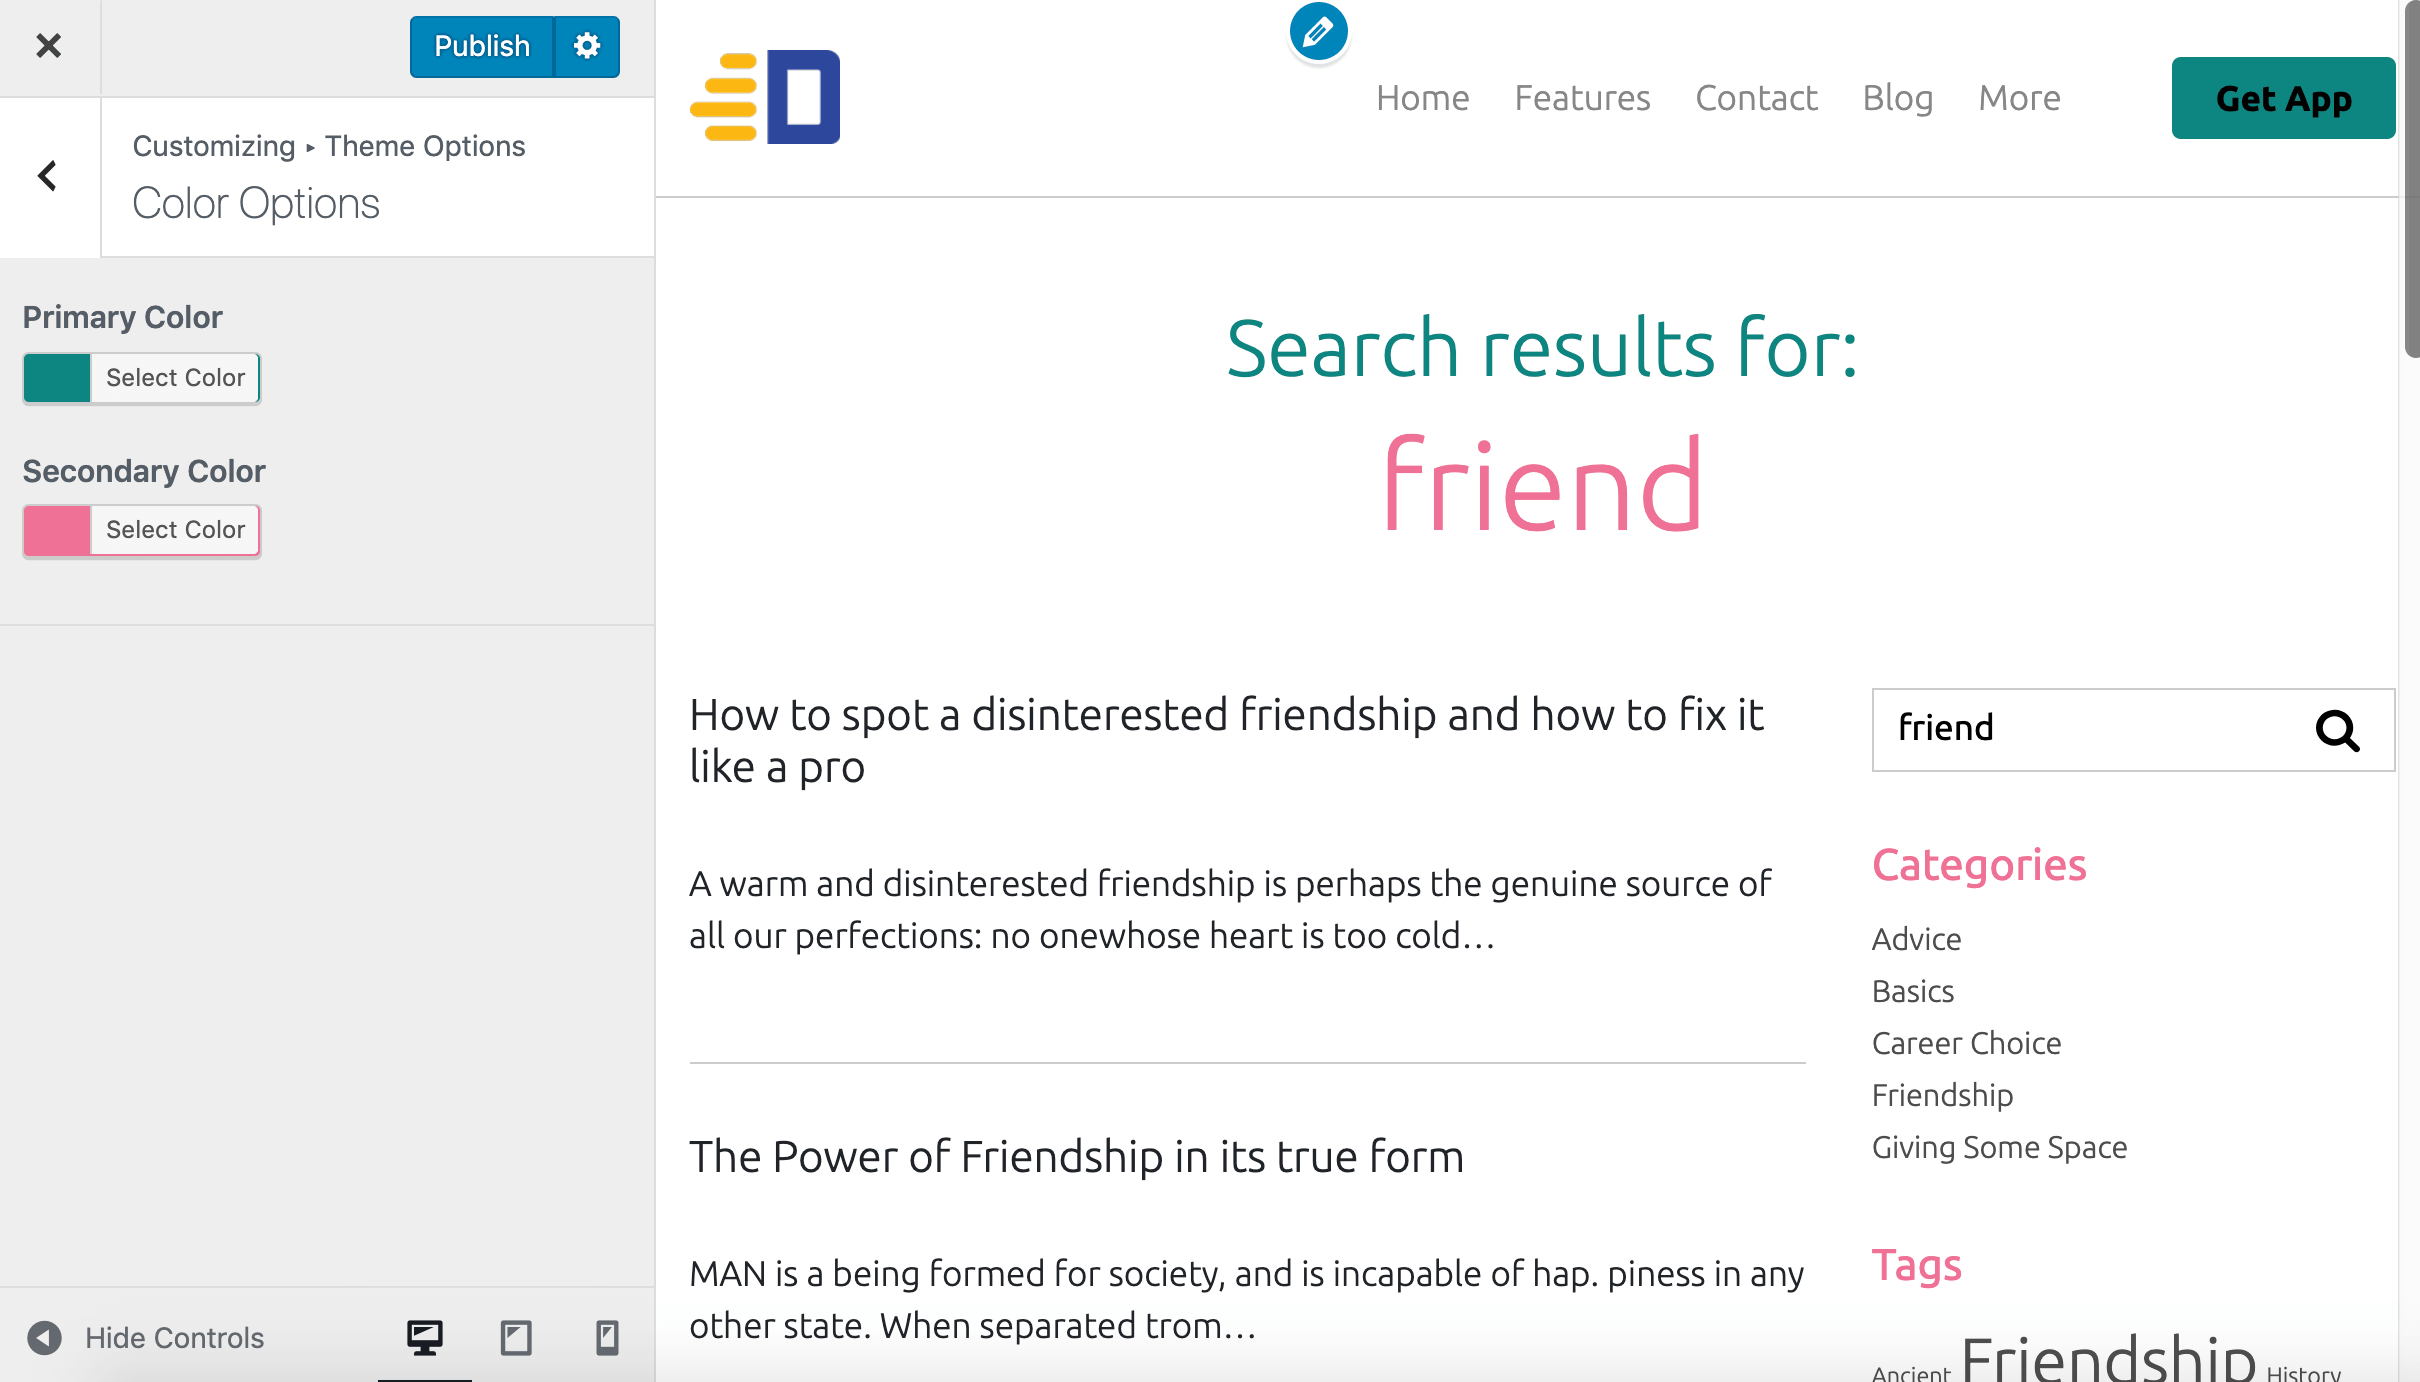
Common, Publish the changes and refresh the Customize Panel.
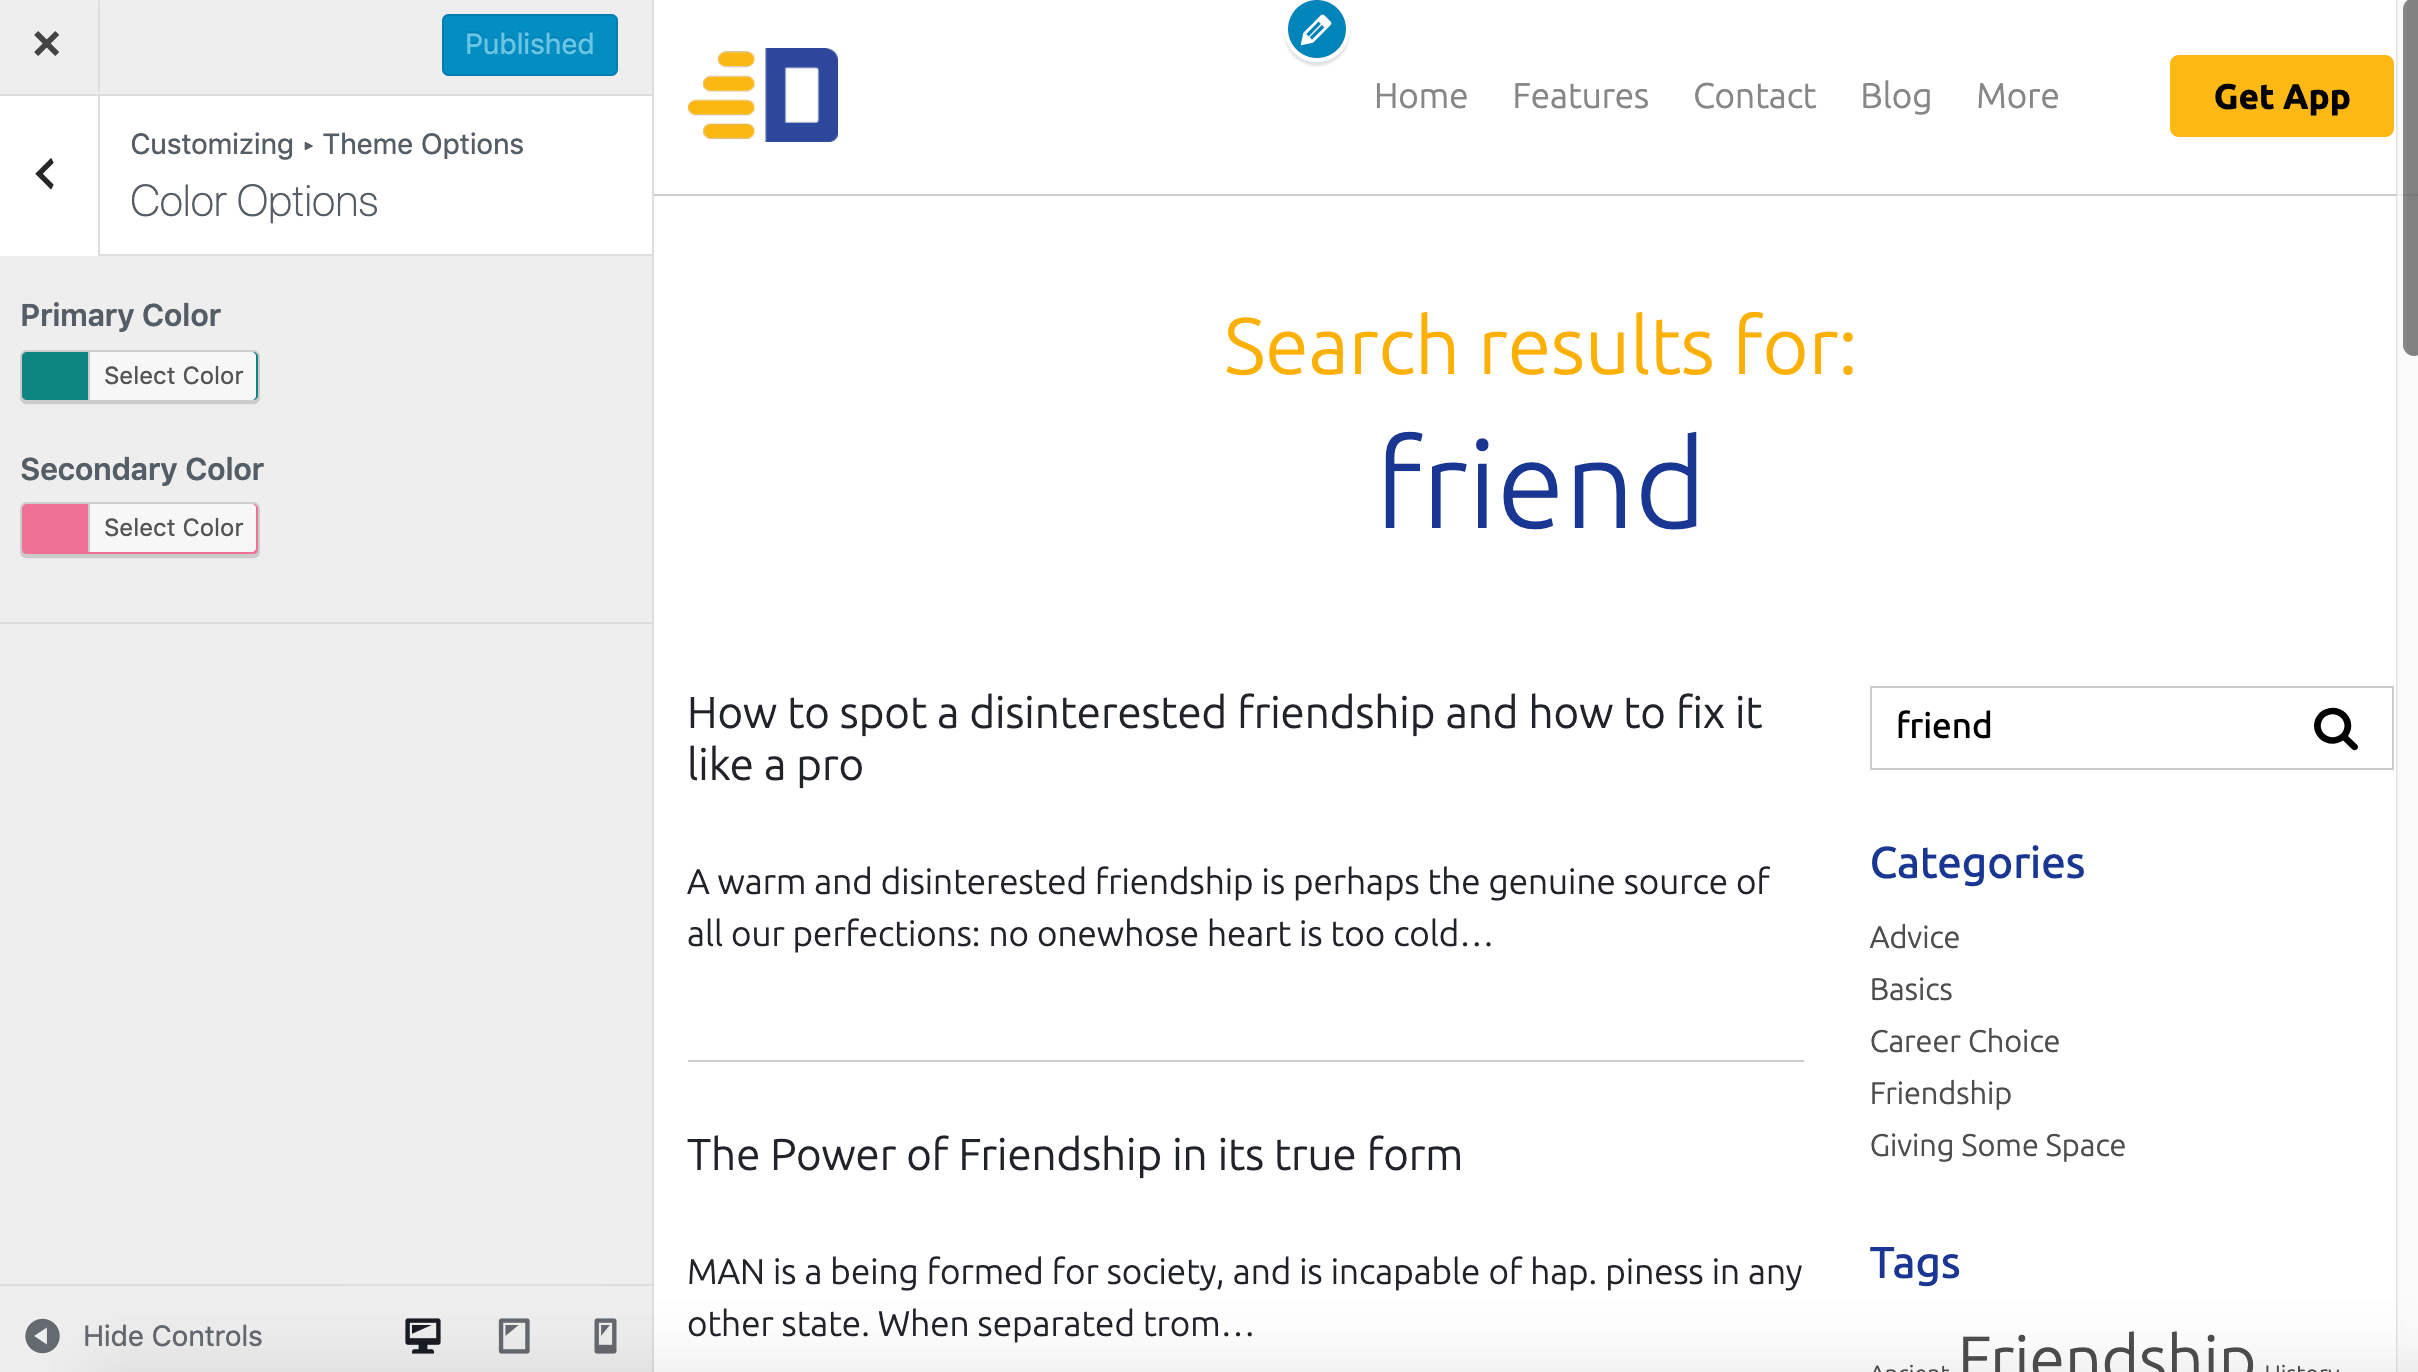
Oops! The Color Scheme of the Site is reverted back to Yellow and Blue.
But if you notice the Color Controls, our new scheme is indeed saved to the Database.
I can’t repeat it enough! The “postMessage” transport type only mimics the updated Color Scheme inside the Site Preview temporarily, it doesn’t affect the template files or the style.css file.
To make the color scheme permanent, we have to generate dynamic CSS with the new color Scheme and enqueue it to our frontend.
You already know how to do this, right?
Go back to the customize.php file and update the nd_dosth_customization_css action like this:
/**
* Generate Internal CSS from the values Customize Panel Settings
*/
function nd_dosth_customization_css(){
$style = '';
//Get Options from the Customize Panel
$show_read_more_link = get_option( 'nd_dosth_show_readmore' );
$primary_color_code     = get_option( 'nd_dosth_color_primary', 'fdb100' );
$secondary_color_code   = get_option( 'nd_dosth_color_secondary', '1a3794' );
// Hide ".read-more-link" element if the "Show Read More Link" Control is turned Off
if( false == $show_read_more_link ){
$style .= ".read-more-link{display:none}";
}
// Primary Color as Background Color
$style .= '#site-footer .es_button input,
.slick-dots li.slick-active,
.menu-button a,
.page-template-default .content-container .page-title,
.pagination .nav-links a, .pagination .nav-links .current,
#commentform input[type="submit"]
{ background-color: #'. $primary_color_code .'; }';
// Primary Color as Text Color
$style .= '#announcement .announcement-title,
.nd-dosth-reviews blockquote p,
.search-results .page-title,
.menu li:hover > a, .menu li a:focus,
.current-menu-item a,
#blog-sidebar .widget .current-cat a,
.previous-article
{ color:#'. $primary_color_code .'; }';
// Secondary Color as Background Color
$style .= '#announcement{ background-color:#'. $secondary_color_code .'; }';
// Secondary Color as Text Color
$style .= '.blog .page-title, .archive .page-title,
.blog-posts .blog-post h2 a:hover,
.blog-posts .blog-post h3 a:hover,
.read-more-link, .posted-in a,
.widget-title,
.single .article-info a,
.comment-reply-link,
.next-article,
.single .related-articles h2,
.search-results .search-query
{ color:#'. $secondary_color_code .'; }';
// Remove unnecessary spacing from the styles
$style = str_replace( array( "\r", "\n", "\t" ), '', $style );
// Put the final style output together.
$style = "\n" . '' . "\n";
// Echo it
echo $style;
}
add_action( 'wp_head', 'nd_dosth_customization_css' );
As usual, nothing complicated going on the above code.
First, we are gathering the primary and secondary color code using:
$primary_color_code = get_option( 'nd_dosth_color_primary', 'fdb100' );
$secondary_color_code = get_option( 'nd_dosth_color_secondary', '1a3794' );
Then we are appending the Color Scheme based Dynamic CSS rules to the $style variable, like this:
// Primary Color as Background Color
$style .= '#site-footer .es_button input,
.slick-dots li.slick-active,
.menu-button a,
.content-container .page-title,
.pagination .nav-links a, .pagination .nav-links .current,
#commentform input[type="submit"]
            { background-color: #'. $primary_color_code .'; }';
If you notice, we are outputting the color codes without the hash (#).
If you now go back the Customize Panel and refresh it:
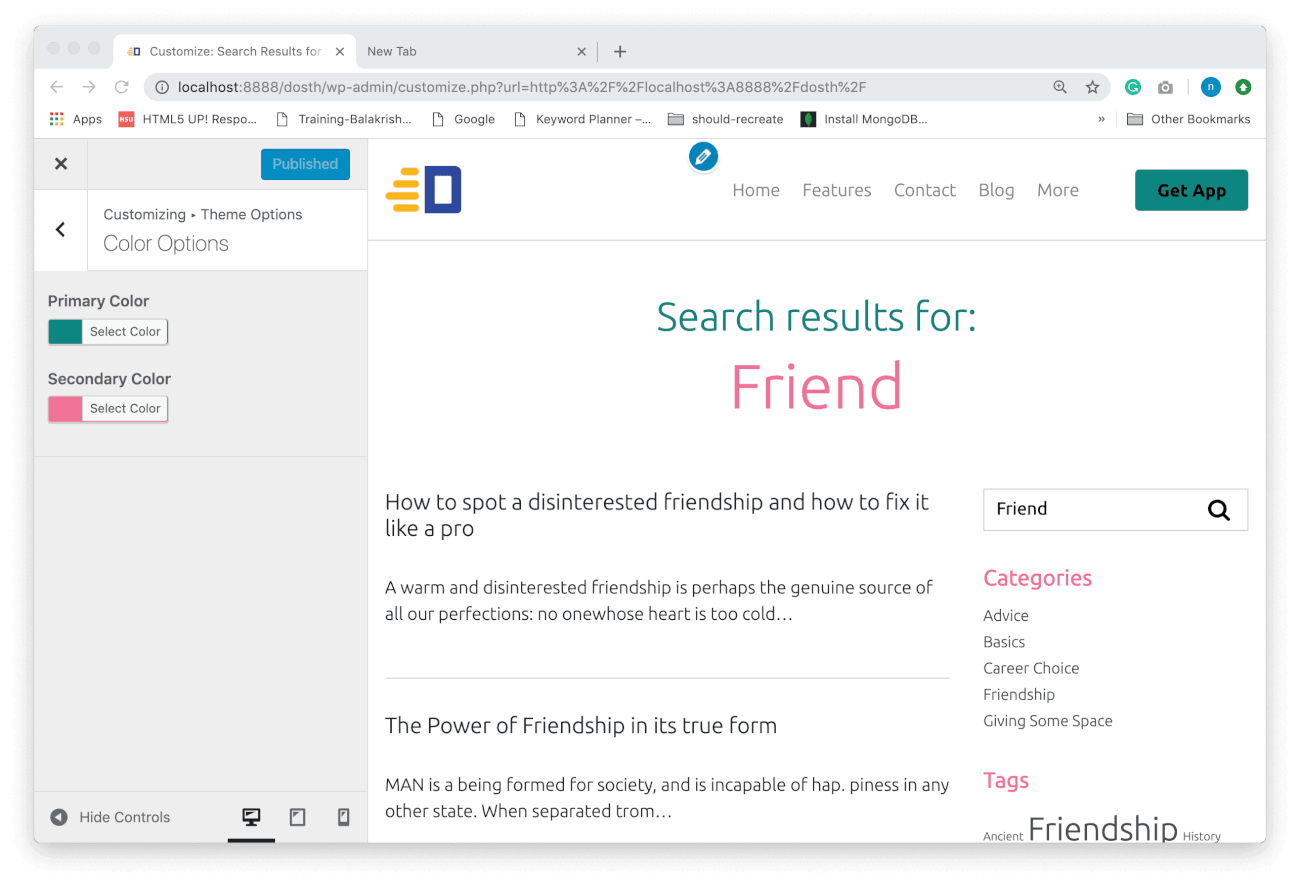
Aha! Finally, everything is working as expected and that’s it.
That’s pretty how we develop for the Customize Panel.
I know you are tired and exhausted. Sorry about that.
But you did it!
In the next lesson, I will give you some exercises.