Introducing Custom Fields and How to use them
When you are writing a post in WordPress, sometimes you might want to provide some additional information to the visitor.
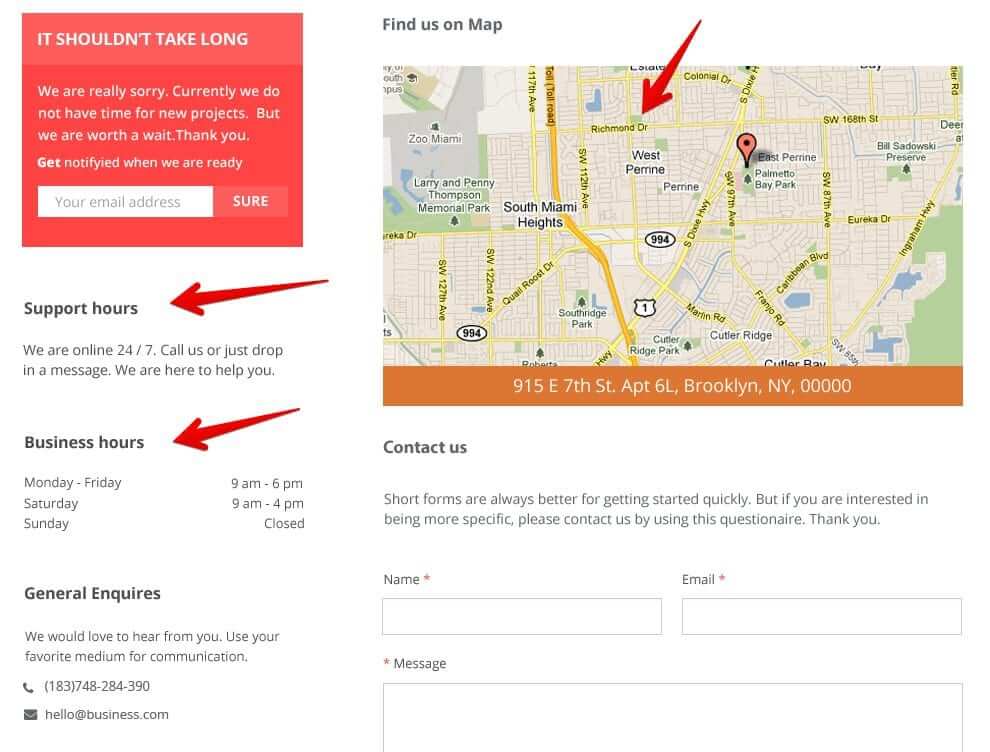
For Example, If you want your future clients to be visiting your physical office, you provide more helpful information about your availability such as:
- Office Business Hours
- Current Availability
- A Map
Similarly, An event host might want to showcase additional information about the event such as:
- Start Date
- End Date
- Organizer Phone Number
- Location of the Event
All these pieces of information require special attention and you don’t want them to get lost with the rest of the content.
WordPress calls this information as Meta Data or Post Meta. And, as a theme developer, we use Custom Fields to display this metadata because we need more control over their location on the page along with their styling.
Now don’t let the word “Meta” fool you. By using a bunch of Custom Fields, we can build pretty complex content.
WordPress is not opinionated. And this is why the developers in the WordPress community use Custom Fields.
“So, Where can I find these Custom Fields?”
We can attach some simple text-based metadata to a particular page/post by going to its edit screen.
For example, if you want to add some metadata to the Homepage, you have to go to:
Admin Dashboard -> Pages -> Home -> Edit
And, scroll down to the end of the Edit Post Screen to find the custom fields section.

Don’t panic if you can’t find Custom Fields Section, WordPress hides it by default.
Here is how you can bring it back:
1) Click on the “Three Vertical Dots” icon located at the top right corner of the screen to access Page Action Links dropdown and then click on “Options” link located at the end of the dropdown.

2) Next, you will get an Options Popup and inside this Popup, you’ll find a section dedicated to Advanced Panels. And, because we did not install any plugins yet, the only option you’ll find in this section is “Custom Fields”.

3) Finally, go ahead click on the “Custom Fields” option and as soon as you click on it, WordPress will get rid of the Options Popup and reloads the page.
4) If you now scroll down, you’ll find the Screen Options section at the bottom of the Page.

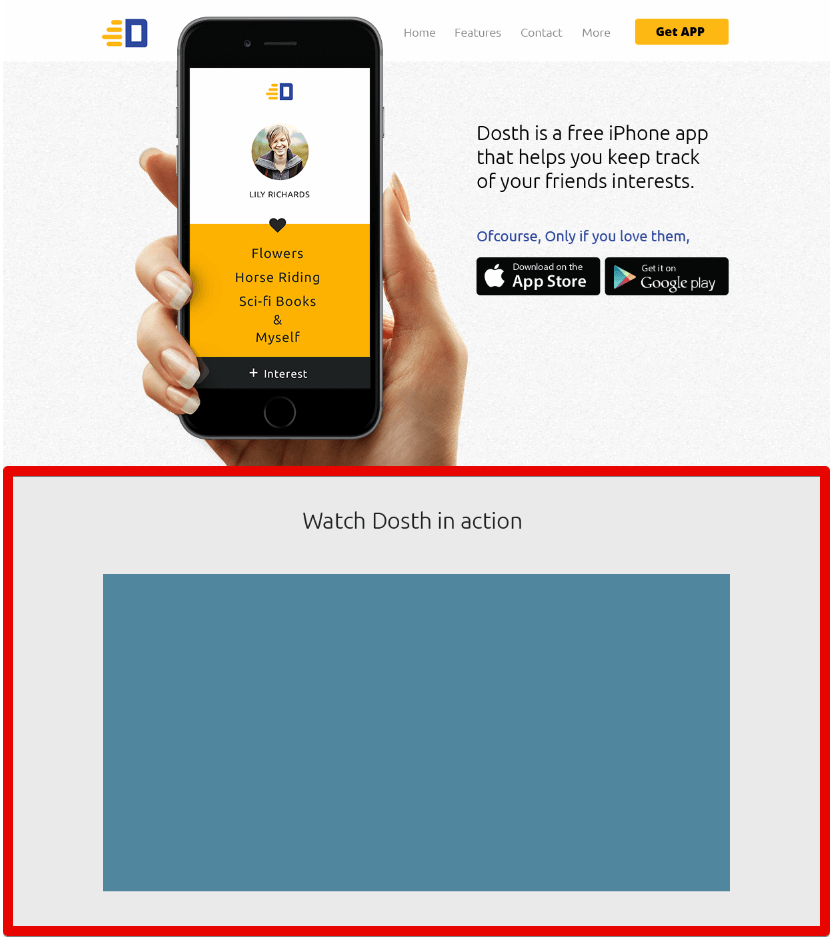
Now, let’s use Custom Fields to output “Watch Dosth In Action” section to our Homepage.
Inside Custom Fields Section, Go ahead and click on “Enter New” link located above the “Add Custom Field” button:

First, we have to enter a Name for our custom field. The Name field acts as a “key” to a particular custom field. WordPress calls this Meta Key.
Also, It should a proper PHP ID type of data.
For example:
“second_important_headline”
Although WordPress is liberal, It’s a big No No to capital letters and spaces characters between the words of the Name. This is because we will use this name to extract metadata ( post meta ) added to this Custom Field.
Again, this is a personal preference too. Also, most developers in the WordPress community suggest the same.
Anyway, now put the following ID inside the Name field:
“second_section_headline”
And enter the following text for the Value field:
“Watch Dosth in Action”

Finally, click on the “Add Custom Field” button.
As soon as you click on this button, WordPress reloads the page and add this Custom Field to the Custom Fields section.

If you want to update the name or the value of this custom field, you can edit them any time you want and then click on the “Update” button to save the changes you made to the custom field.
“Wait! there are two update buttons, one inside the custom field and the other on the top right corner of the page which updates the entire page. Which update button should I click?”
You can click any one of them. Click the “Update” button at the top right corner of the page updates the entire page including the values you entered inside a Custom field.
Clicking the “Update” Button that is specific to a particular Custom Field will update just that Custom Field.
So, it is totally up to you!
Next, let’s display this custom field on the Homepage.
Introducing get_post_meta()
We can retrieve any Meta Data ( Post Meta ) of a particular post on the frontend using the get_post_meta() WordPress function.
Remember, this function just retrieves the Post Meta but it doesn’t output it. So, we have to output it ourselves, for example:
echo get_post_meta( $post_id, $key, $return_single_value );
As you can see in the above line of code, this function accepts three parameters:
1) $post_id: ID of a particular post/page.

Usually, we will be retrieving the post meta inside the Loop. And inside the Loop, we can get the ID of the current Post in two ways:
a) Using the ID attribute of the global $post variable: $post->ID
b) Using the get_the_ID() template tag.
It is totally ok whichever method you want to go with. I personally prefer to use get_the_ID() inside the Loop.
2) $key: The Meta Key (Name) we entered while creating the custom field.

3) $return_single_value: We have to provide either True or False. False is the default value.
This parameter tells WordPress whether to return just the value of the custom field in plain string format or to return the value by putting it inside an array, like this:

Most of the time, we will just the value of the custom field in plain string format, so we almost always end up specifying True for this parameter.
Alright, it’s time to put this function to use.
Open up the front-page.php file and place the following code after the <div class="actual-content above-the-fold"> element and within the Loop.
<section id="watch-dosth-in-action">
    <h2><?php echo get_post_meta(get_the_ID(), 'second_section_headline', true ); ?></h2>
</section>
Nothing new in the above code. You already know what is happening with all the parameters and why we are using PHP echo statement.
Here is the updated code of the Loop:
<?php while( have_posts() ): ?>
    <?php the_post(); ?>
    <div class="actual-content above-the-fold">
        <div class="container">
            <div class="row">
                <div class="col-sm-12">
                    <?php the_content(); ?>
                </div>
            </div>
        </div>
    </div>
    <section id="watch-dosth-in-action">
        <h2><?php echo get_post_meta(get_the_ID(), 'second_section_headline', true ); ?></h2>
    </section>
<?php endwhile; ?>
Now, let’s check out the output of the Homepage in the browser.

Next, let’s also output a youtube embed using a new Custom Field.
So, Go back to the Homepage Edit screen and create a new Custom Field with the following metadata and update the newly created Custom Field.
“section_two_content” as the Meta Key ( Name ) field and the following Youtube embed for the Meta Value:
<iframe width="560" height="315" src="https://www.youtube.com/embed/dGiQaabX3_o" frameborder="0" allow="accelerometer; autoplay; encrypted-media; gyroscope; picture-in-picture" allowfullscreen=""></iframe>
I really love the videos of Kurzgesagt. Of course, you can embed any video you want.

After adding the second custom field. Here is how the Custom Fields section looks like.

As you can see, the Meta Value field can handle HTML just fine.
Next, go back to the front-page.php file and place the following code inside the <div id="watch-dosth-in-action"> element and after the <h2> element.
<div class="section-content">
    <?php echo get_post_meta(get_the_ID(), 'section_two_content', true ); ?>
</div>
Here is the updated code of the Loop:
<?php while( have_posts() ): ?>
    <?php the_post(); ?>
    <div class="actual-content above-the-fold">
        <div class="container">
            <div class="row">
                <div class="col-sm-12">
                    <?php the_content(); ?>
                </div>
            </div>
        </div>
    </div>
    <section id="watch-dosth-in-action">
        <h2><?php echo get_post_meta(get_the_ID(), 'second_section_headline', true ); ?></h2>
        <div class="section-content">
            <?php echo get_post_meta(get_the_ID(), 'section_two_content', true ); ?>
        </div>
    </section>
<?php endwhile; ?>
Next, Let’s go back to the Homepage in the browser and refresh it:

Fantastic! Right?
Now let’s style it.Add the following CSS to the style.css file to style this section:
.home .above-the-fold .wp-block-column:first-child,
.home .above-the-fold .pull-me-up{
    margin-bottom:0;
}

/*-------------------------------------------------------------------------------
  9.Homepage Section Two Styles
-------------------------------------------------------------------------------*/
#watch-dosth-in-action{
    padding:60px;
    background-color:#eaeaea;
    text-align: center;
}
#watch-dosth-in-action h2{
    margin-bottom:50px;
}
#watch-dosth-in-action .section-content{
    max-width:940px;
    margin:0 auto;
}
@media only screen and (max-width:767px){
    #watch-dosth-in-action{
        padding:40px 15px;
    }
}
I also removed the bottom gap of iPhone Image and here is the output in the browser:

If you notice, the Video Embed’s aspect ratio is slightly off. Let’s fix this by using FitVids Javascript plugin.
The easy way to add Fitvids to our site is using the Fitvids WordPress plugin.
But, every plugin that we install slows down our site’s page load speed at least by some extent. So, whenever there is a chance, we have to choose the manual method.
So go ahead and visit https://github.com/davatron5000/FitVids.js and download the latest jquery.fitvids.js file and copy the file to the assets/js directory.

Here is the updated version of the assets/js directory inside visual code editor.
Now that we have everything set up, let’s go ahead and enqueue this file.
You already know how to enqueue a script. So, here is the updated nd_dosth_enqueue_scriptsaction from the functions.phpfile.
function nd_dosth_enqueue_scripts() {
    wp_enqueue_script(
        'modernizr',
        get_stylesheet_directory_uri() . '/assets/js/modernizr.min.js',
        array(),
        '1.0.0',
        true
    );
    wp_enqueue_script(
        'superfish',
        get_stylesheet_directory_uri() . '/assets/js/superfish.min.js',
        array('jquery'),
        '1.0.0',
        true
    );
    wp_enqueue_script(
        'fitvids',
        get_stylesheet_directory_uri() . '/assets/js/jquery.fitvids.js',
        array('jquery'),
        '1.0.0',
        true
    );
    wp_enqueue_script(
        'main-js',
        get_stylesheet_directory_uri() . '/assets/js/main.js',
        array('jquery'),
        '1.0.0',
        true
    );
    $translation_array = array(
        "email_placeholder" => esc_attr__( 'Enter your email address here', 'nd_dosth' ),
        'ajax_url' => admin_url('admin-ajax.php'),
    );
    wp_localize_script( 'main-js', 'translated_text_object', $translation_array );
}
Next, let’s initialize it inside our main.jsfile.
Open up the main.jsfile and put the following code after the Placeholder fix for Email input field :
/* ------------------------------------------------------*/
/* Adding fitvid
/* ------------------------------------------------------*/
$('body').fitVids();
Fitvids plugin must be initialized on the Container element of the Video/ Video Embed. And, we never know where we might end up placing any video on our site. So we are initializing the plugin on the <body> element.
Here is the updated main.jsfile:
(function($){
    /* If this line runs, it means Javascript is enabled in the browser
     * so replace no-js class with js for the body tag
     */
    document.body.className = document.body.className.replace("no-js","js");

    /* -----------------------------------------------------------------*/
    /* Activate accessible superfish
    /* -----------------------------------------------------------------*/
    $('.primary-navigation').find('.menu').superfish({
        smoothHeight    : true,
        delay           : 600,
        animation       : {
            opacity :'show',
            height  :'show'
        },
        speed           : 'fast',
        autoArrows      : false
    });
    /* -----------------------------------------------------------------*/
    /* Add Placeholder to the Email input field of "Email Subscribers" widget
    /* -----------------------------------------------------------------*/
    if( $( '.elp-widget input[type="email"]' ).length ){
        $( '.elp-widget input[type="email"]' ).attr('placeholder', translated_text_object.email_placeholder );
    }
    /* ------------------------------------------------------*/
    /* Adding fitvid
    /* ------------------------------------------------------*/
    $('.page-wrapper').fitVids();

})(jQuery);
Alright, if we now refresh our Homepage in the browser, this is how it looks like:

Perfect! Fitvids is working its charm <3
And this is how the Custom Fields work in WordPress. First, you create them, then you add data to them and WordPress stores this data in Database. Finally, we display them using the get_post_meta() WordPress function.
However, the interface of the default Textarea based Custom Field that ships with WordPress is not that client friendly and is not really useful for creating complex content.
Also, Clients/Content Editors are habituated to WYSIWYG editors. So, we have to make them feel comfortable at the end of the day.
We can’t ask them to type an Image tag to add a new image, right?
Of course, WordPress allows to code Advanced Custom Fields ourselves. It provides us with all the programming API to do so.
All we need to do is use add_meta_box() function and add_meta_boxes action hook with a bit of custom coding.
But, we can not create those using our theme. If we do that, all those fields will be lost if the client shifts to a different theme. So, the client ends up losing access to this data.
Even if we put them inside our plugin, it is extremely timing consuming and becomes a maintenance overhead for us.
But hey! Why re-invent the wheel?
This is where Advanced Custom Fields plugin comes in handy. It allows us to create content-rich Custom Fields that are not only user-friendly but easy to create. Simply put, with the ACF’s beautiful UI, we can create advanced fields like Image Upload, File Upload, WYSIWYG based Textarea and much more within just minutes.
And we can still access these fields using the same get_post_meta() WordPress function. Because, ACF Plugin uses the same add_meta_box() function and add_meta_boxes action hook behind the scenes to let us create Custom Fields.


I am not saying it is completely Safe to use ACF plugin, but you are in good hands!
So, in the next lesson, we will install the Free Version of the ACF plugin to build the rest of the content of the Homepage.
 © 2026 UsableWP. A project by Naresh Devineni.