Every Homepage of a site will have some extras in it along with the main content. And, a Testimonials/Reviews section is the best example of a Homepage extra.
But for theme developers like us, the actual question is:
“How do we build this Reviews section on the Homepage? How do we let the client edit and manage the content of these reviews?”
We can not use Custom Fields or the WordPress default post types like Post or Page. Their purpose is different.
Reviews thrive businesses. Reviews are an integral part of any site that promotes a service or a product. So, most of the time, we will end up showcasing reviews all over the site. Not just on the Homepage.
So, we have to use a Custom Post Type for managing the Reviews and Custom Queries to display them where ever we want on the frontend.
As you already know, WordPress ships with two default post types:
1) Page – We use this post type for site pages like About Us, Contact Us, etc.
Advantage: We can establish parent-child relationships between pages. WordPress calls these relationships as Hierarchical Relationships.
Limitation: We can not organize these pages into taxonomies like category. 2) Post – We generally use this post type for blog posts. It is not written anywhere that we have to use post type of “post” for blog posts only. It is merely a standard.
Limitation: We can not establish parent-child relationships between blog posts.
Advantage: We can organize blog posts into multiple categories and tags. In the World of WordPress, a category or a tag is a Taxonomy.
The thing is, the above-mentioned advantages and limitations play a vital role when choosing a particular post type for a particular piece of content.
For example, an About Us page is a perfect fit for a Page post type because although this page could have other child pages like “Our Team”, it doesn’t require a Taxonomy like Category.
Similarly, a blog post is a perfect example for the Post post type because a blog post is an independent component of the blog with no strings attached. Plus, we need to categorically divide blog posts to make the content consumption easy for visitors and feed machines alike.
Also, Websites these days are complex. There are tons of content types like:
And, all these content types come with their own type of display requirements and challenges.
This is where WordPress Custom Post Types come in. They bring us the best of both worlds. We can create a Custom Post Type which is both Hierarchical like Pages and have Taxonomies like category and tag to organize the posts created with it.
Simply put, we can fine-tune the custom post type to fit our needs. We are the captain. We get to decide which features we want to enable for our Custom Post Type.
Important Realization: We can still use the most fitting default post type for the above content types. But it gets cluttered. Each of the above content types could have dozens of posts. Lack of proper organization of posts will make their content management very difficult.
This tells us one more thing. Using a Custom Post Type also help us organize the content of our site with a fine grain control. It makes the life of the clients and content administrators easier too.
If it is not for the Reviews of our site, there is no better time to create a Custom Post Type.
WordPress allows us to create a Custom Post Type using the init action hook and register_post_type() function.
Note: WordPress triggers the init action hook after the theme setup is done.
Common, go ahead and paste the following code at the end of our theme’s functions.php file:
/**
 * Register Custom Post Types.
 *
 * @link https://codex.wordpress.org/Function_Reference/register_post_type
 */
function nd_dosth_register_custom_post_types(){
    //Register Reviews Post Type
    register_post_type( 'dosth_reviews',
        array(
            'labels'  => array(
                'name'           => __( 'Reviews', 'nd_dosth' ),
                'singular_name'  => __( 'Review', 'nd_dosth' ),
                'add_new'        => __( 'Add Review', 'nd_dosth' ),
                'add_new_item'   => __( 'Add New Review', 'nd_dosth' ),
                'edit_item'      => __( 'Edit Review', 'nd_dosth' ),
                'all_items'      => __( 'All Reviews', 'nd_dosth' ),
                'not_found'      => __( 'No Reviews Found', 'nd_dosth' ),
            ),
            'menu_icon'             => 'dashicons-format-quote',
            'public'                => true,
            'exclude_from_search'   => true,
            'has_archive'           => true,
            'hierarchical'          => false,
            'show_in_rest'          => true,
            'rewrite'               => array( 'slug' => 'reviews' ),
            'supports'              => array( 'title', 'editor', 'custom-fields', 'thumbnail', 'excerpt', 'revisions', 'page-attributes' ),
            //'taxonomies'          => array( 'category', 'post_tag' )
        )
    );
}

add_action('init', 'nd_dosth_register_custom_post_types');
That’s all it takes to create a Custom Post Type in WordPress. Easy, right?
We can register multiple custom post types inside the above nd_dosth_register_custom_post_types action. You are not limited to register only one custom post type per one action.
Once we register a custom post type, a new panel will be added to the admin dashboard for managing its content.
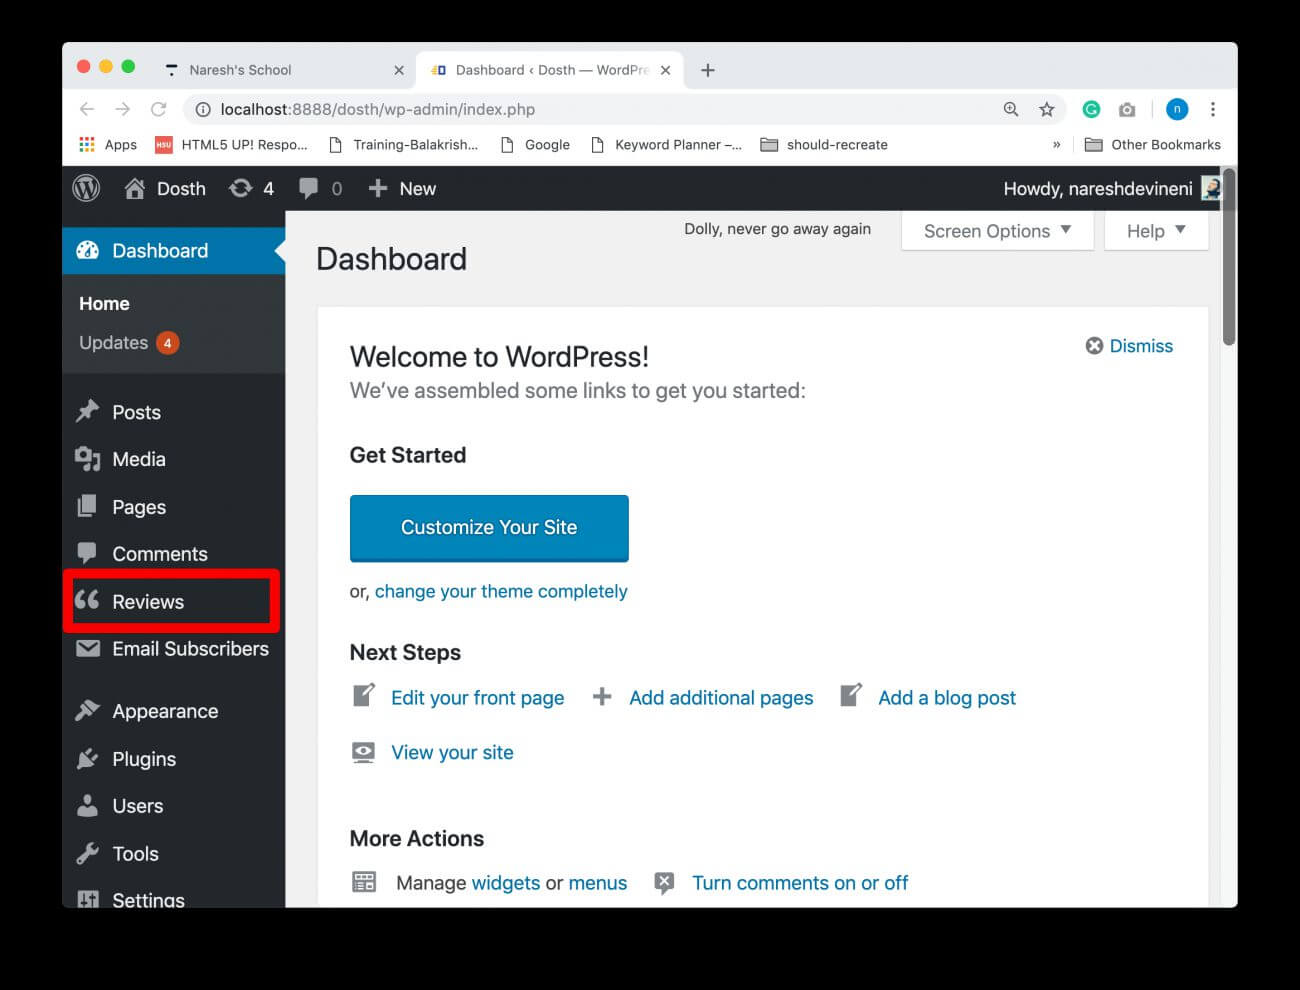
In our case, a new panel called “Reviews” is added to the Admin Dashboard Menu.
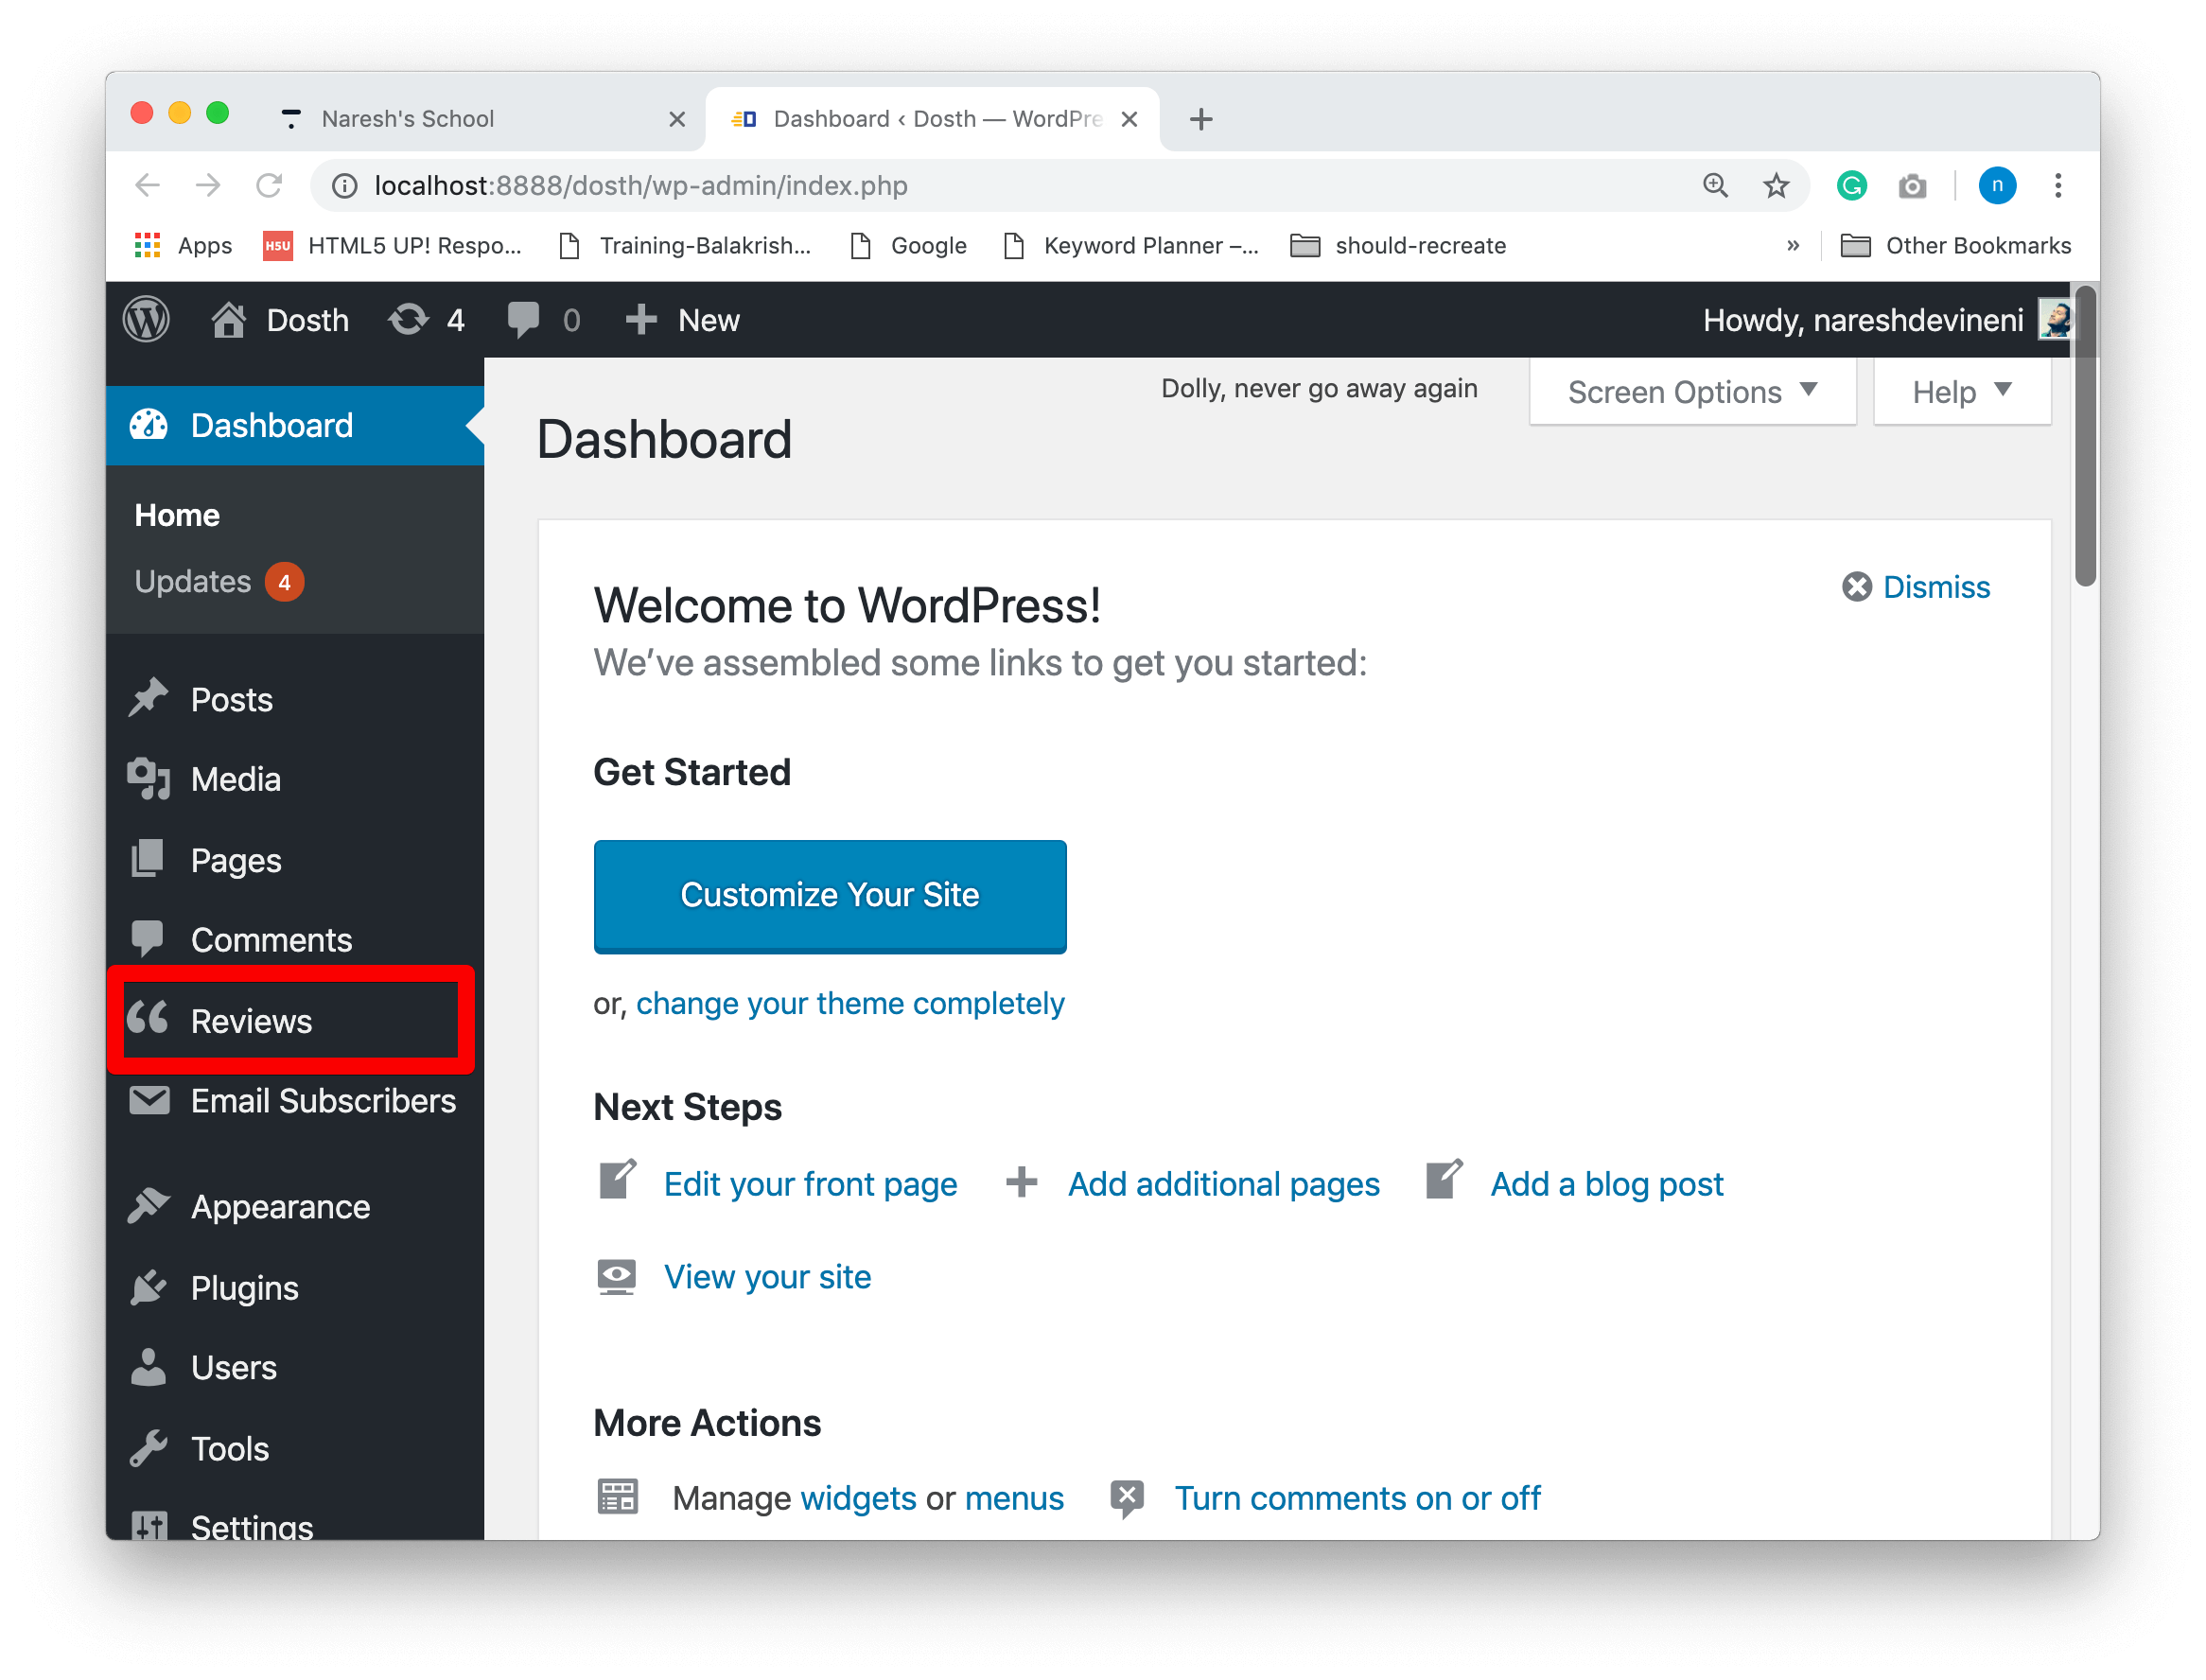
Now, let’s break down the above code.
First of all, we are registering a new post type called “dosth_reviews” using the register_post_type() function call.
The register_post_type() function accepts two parameters.
First one is the Unique ID of the Custom Post Type. We use this ID when we are writing Custom Queries to output the Posts of this Custom Post Type to the frontend.
The second parameter is a configuration array we must provide to fine tune the Custom Post Type for our needs. It is this array that tells WordPress “Hey! I don’t need this but I need that feature for my custom post type!”
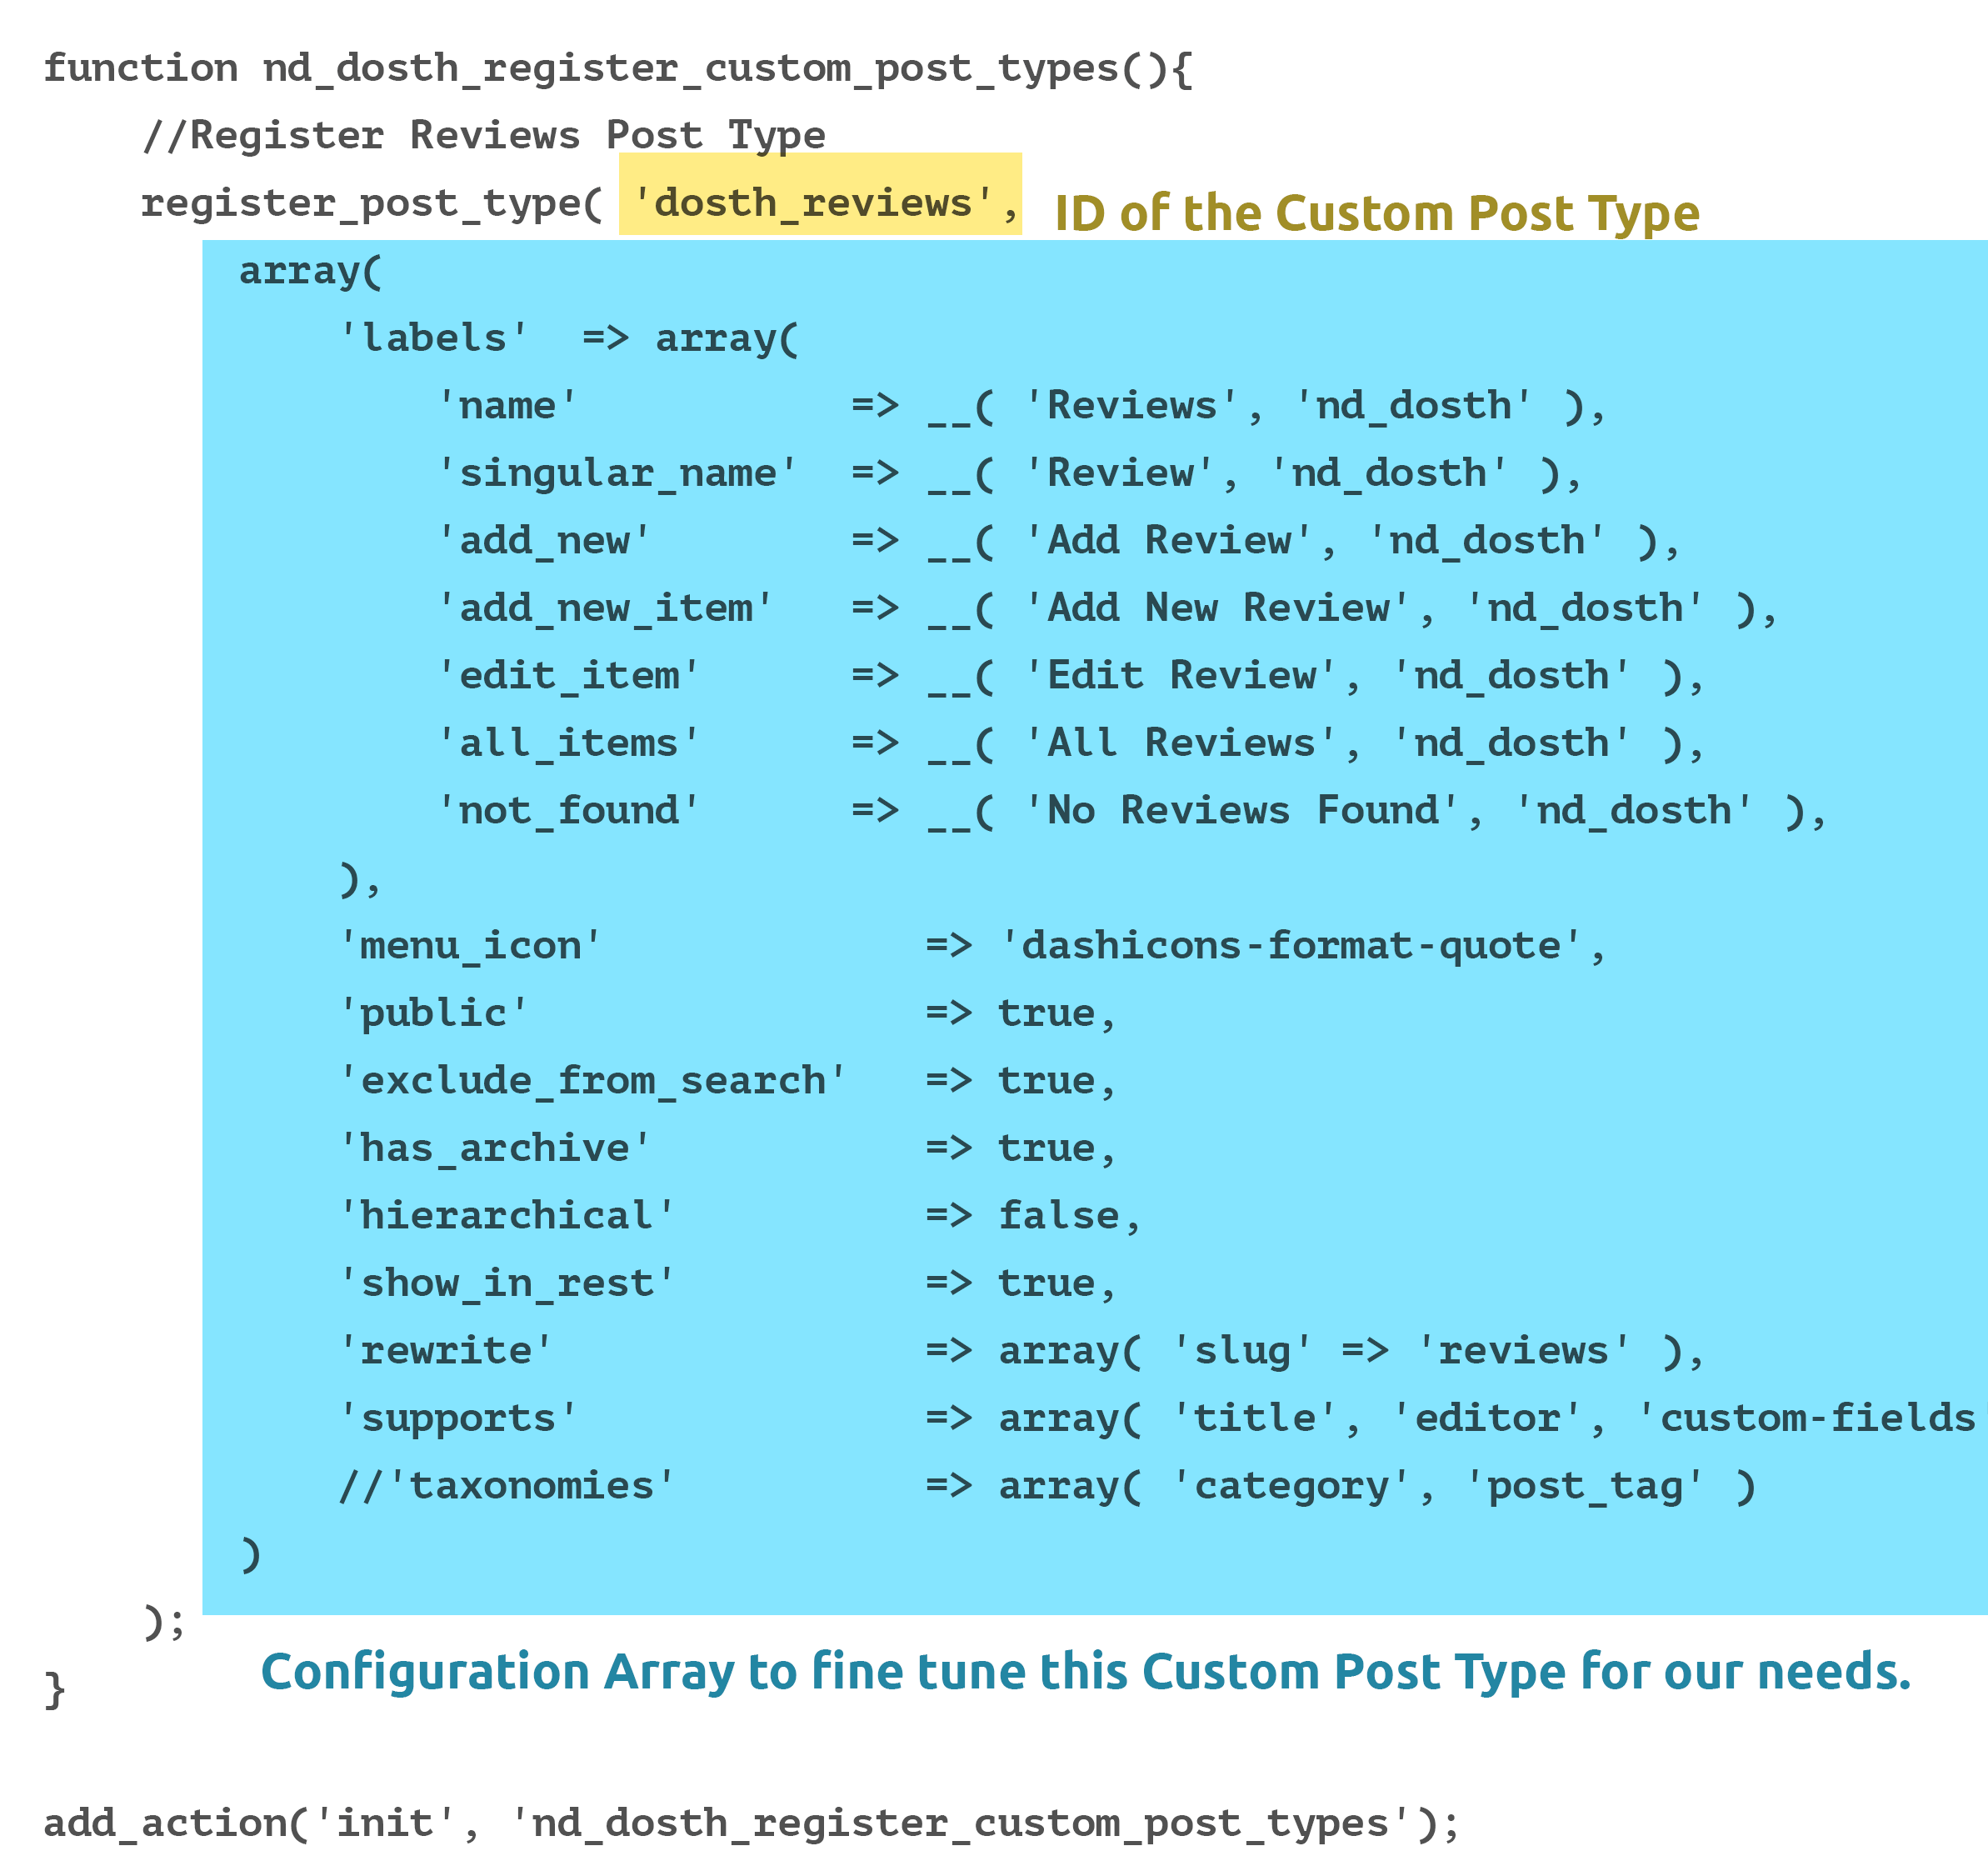
In our case, the ID of our Reviews post type is “dosth_reviews”.
Note: The ID we provide shouldn’t be longer than 20 characters. If we cross the character limit, WordPress will not register the post type and throws the following notice:
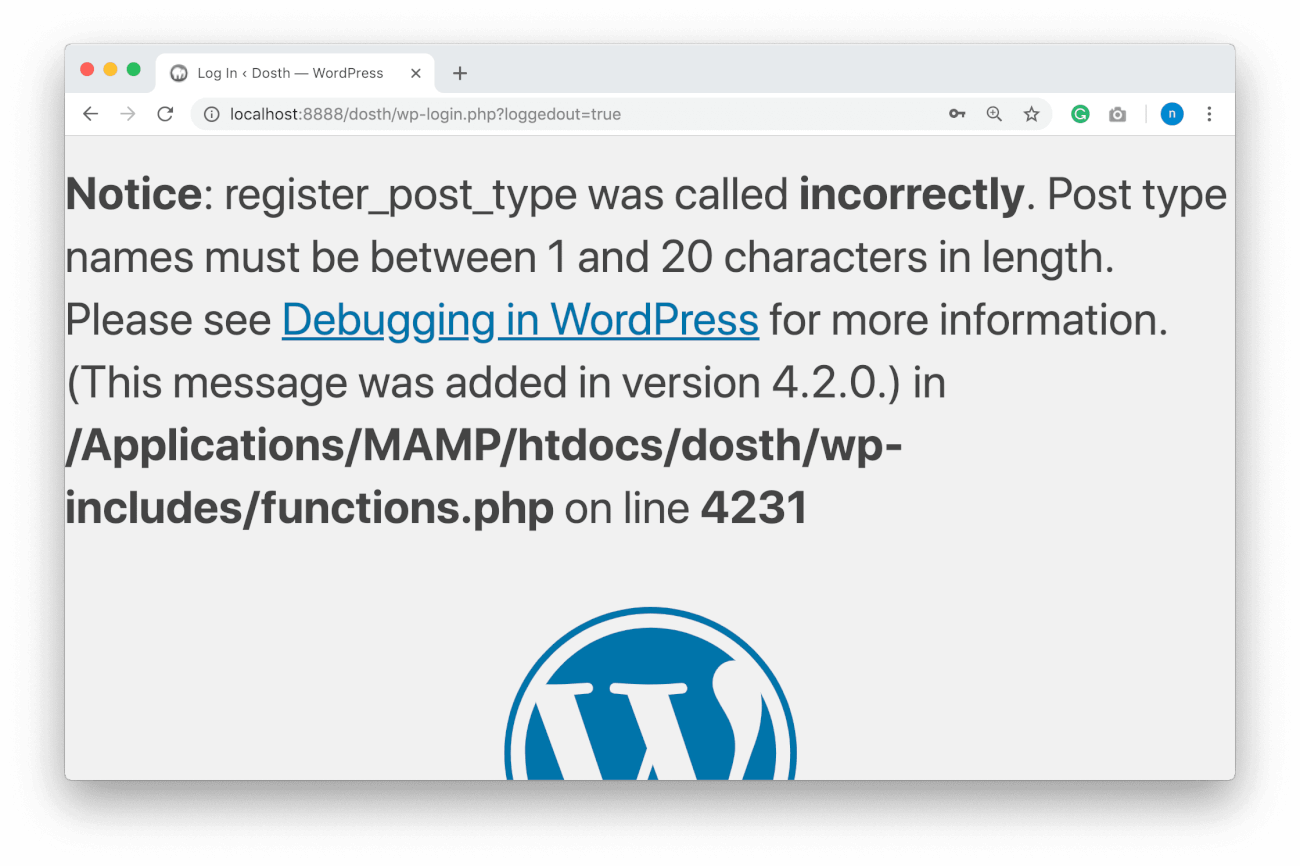
Important Note: We could have just put “reviews” as the ID, but there are so many review plugins out there in the market. If the client installs one of them and if that plugin also uses the word “reviews” as the ID, WordPress will throw an error. So, just in case, we are adding “dosth_” namespace for the ID to make it unique.
For the Second Parameter, we provided an array full of configuration options. Let’s go through them one by one.
The first item inside this array is another array called ‘labels’.
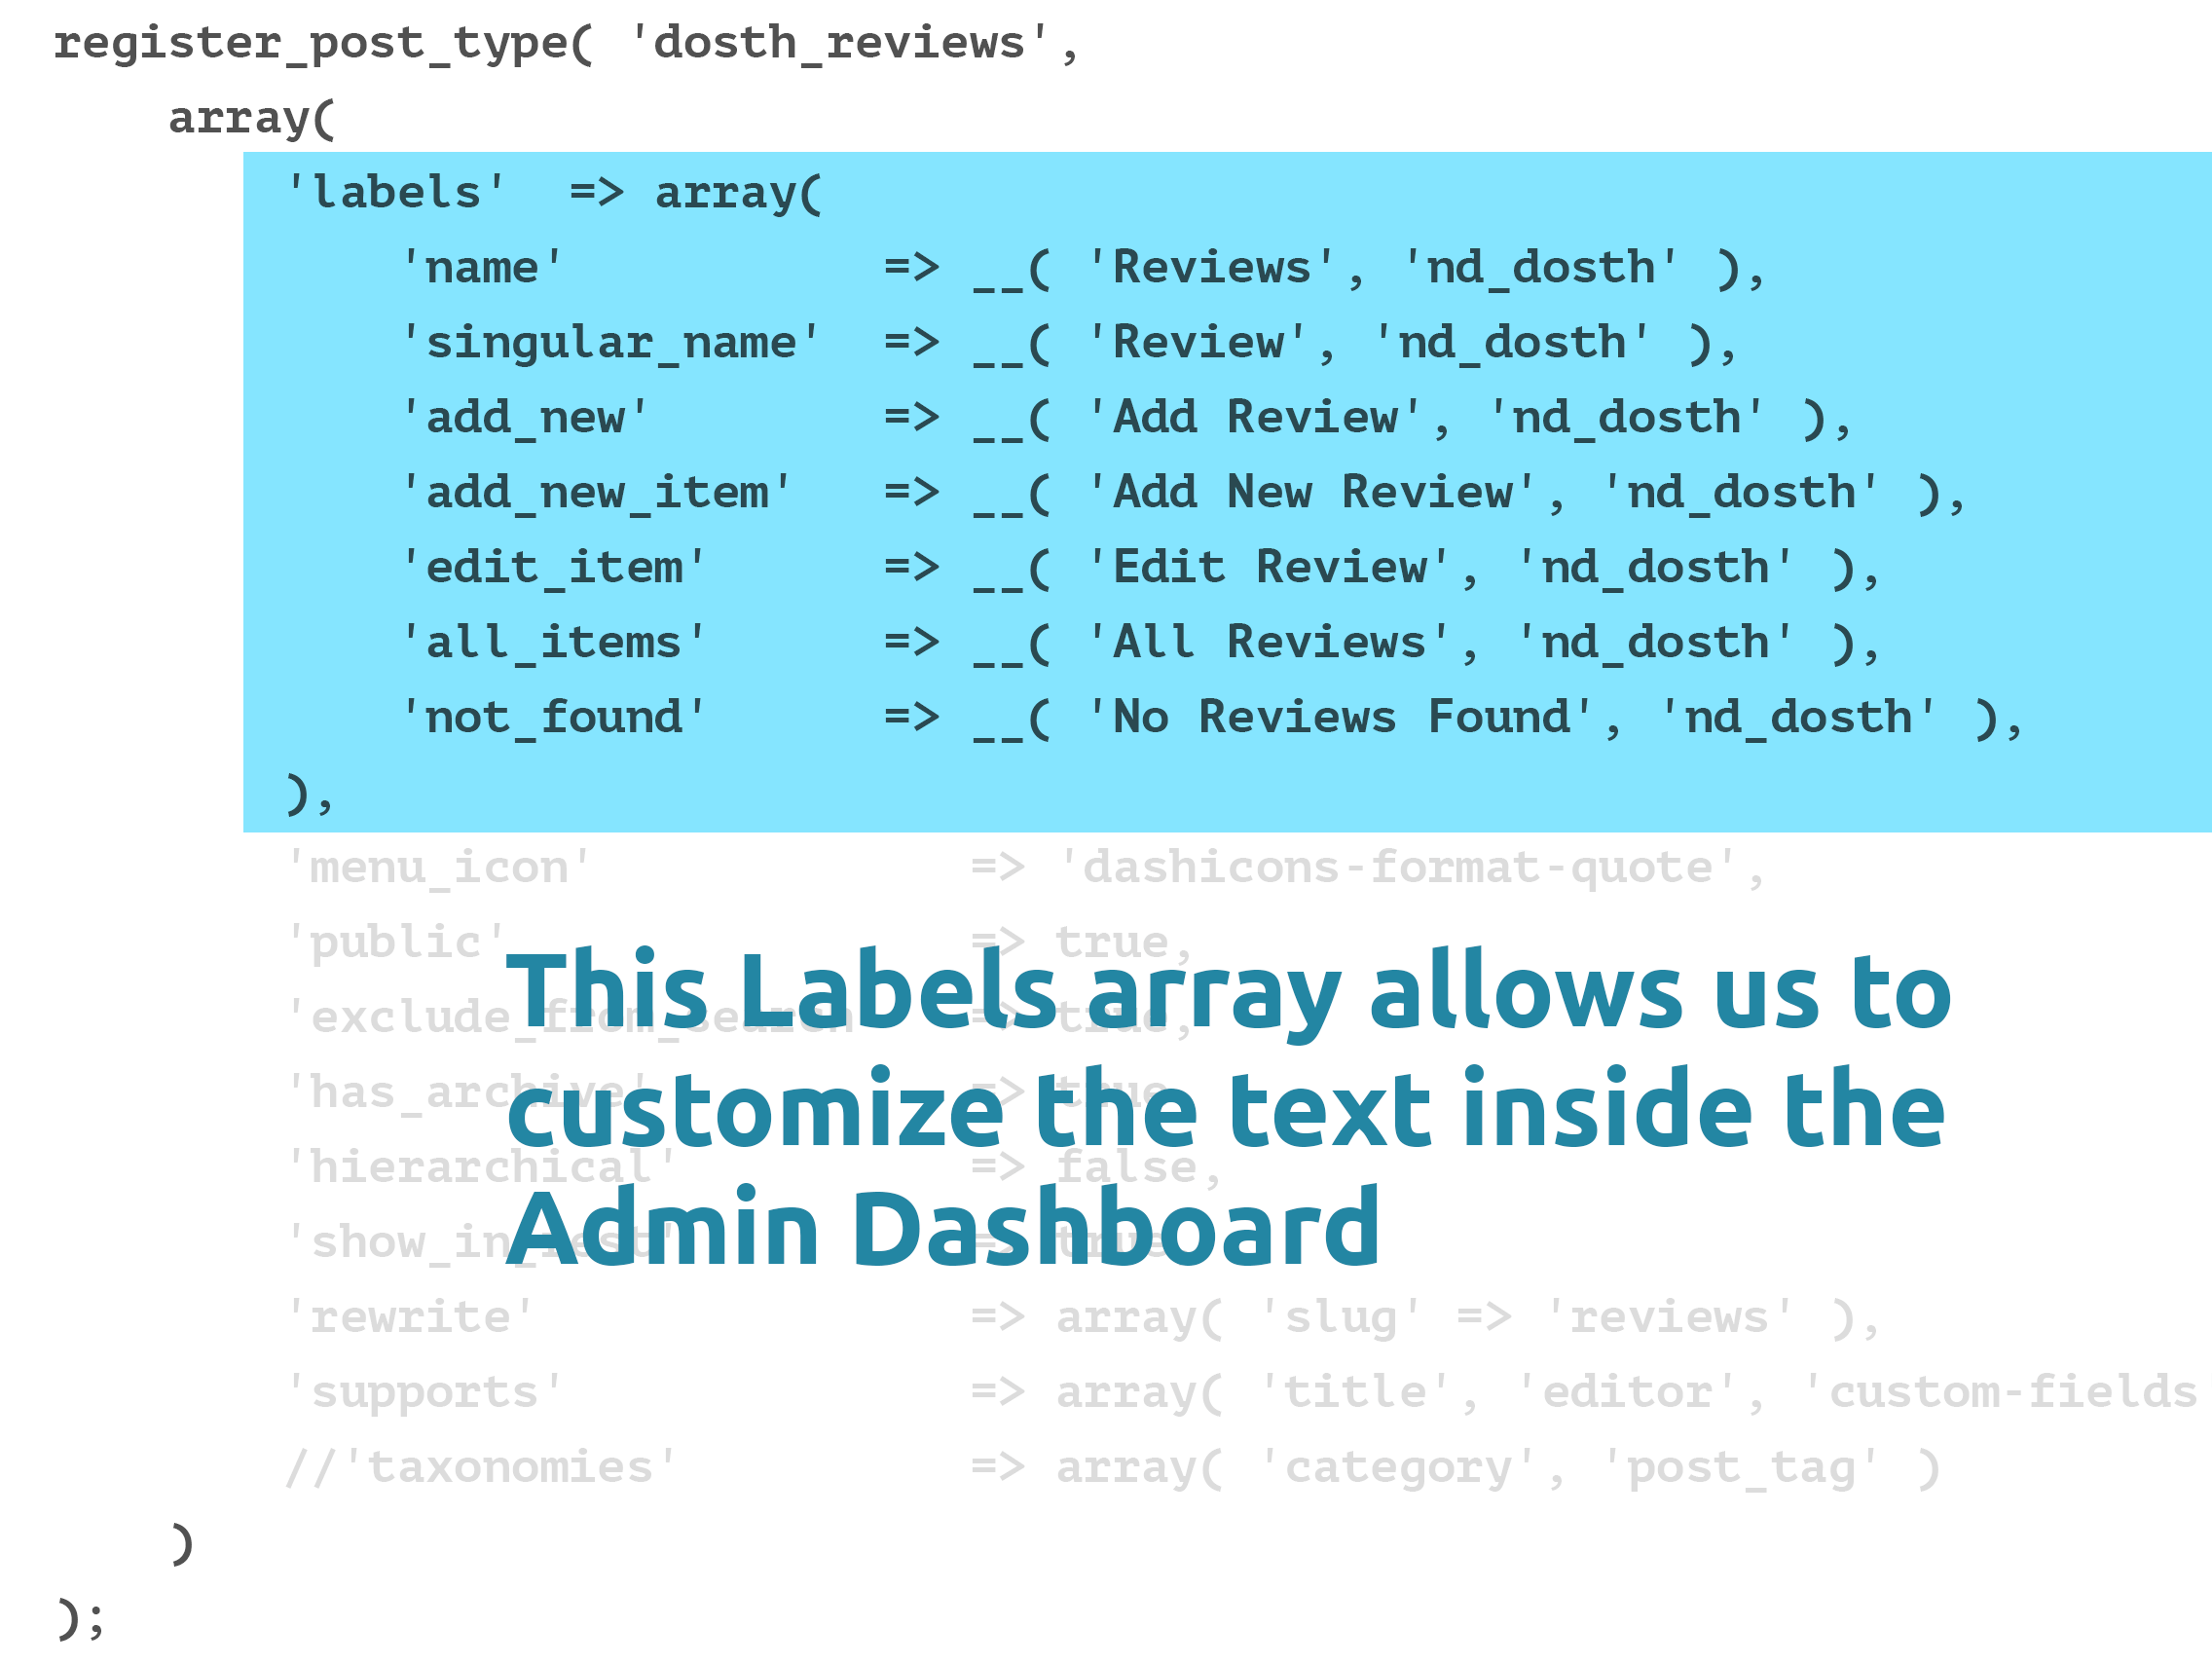
The labels we have provided via this array is used by WordPress to change the default text of the newly Custom Post Type in the Admin Dashboard.
Let’s check out how this Labels array is put to use by going to the Admin Dashboard.
The first item in the Labels array is ‘name’. For this item, we must provide a general name of our Custom Post Type. A plural version of the name is preferable. This name will be used as the Menu name in the primary of navigation of the Admin Dashboard.
Next label in the array is ‘singular_name’. The value we provide for this item should answer the following question:
“How would you like to call the individual post of this Custom Post Type?”
In our case, we would like to call the individual post of our Reviews Post type as Review.
Next comes ‘add_new’. This value we provide for this label is being used for the “Add New” button inside the Reviews Panel.
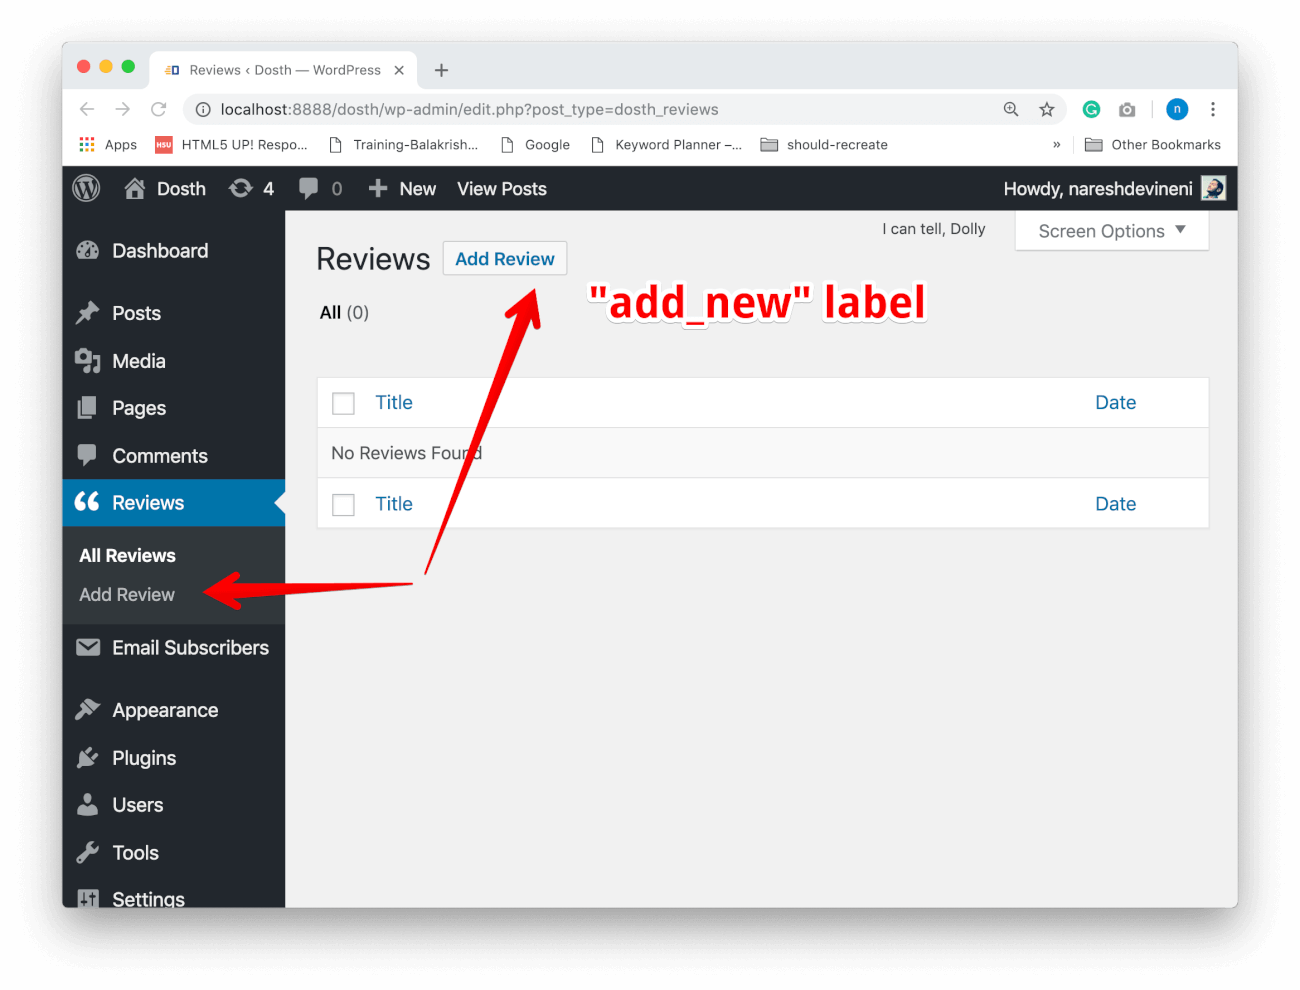
Finally, the remaining two labels are being put to use as follows:
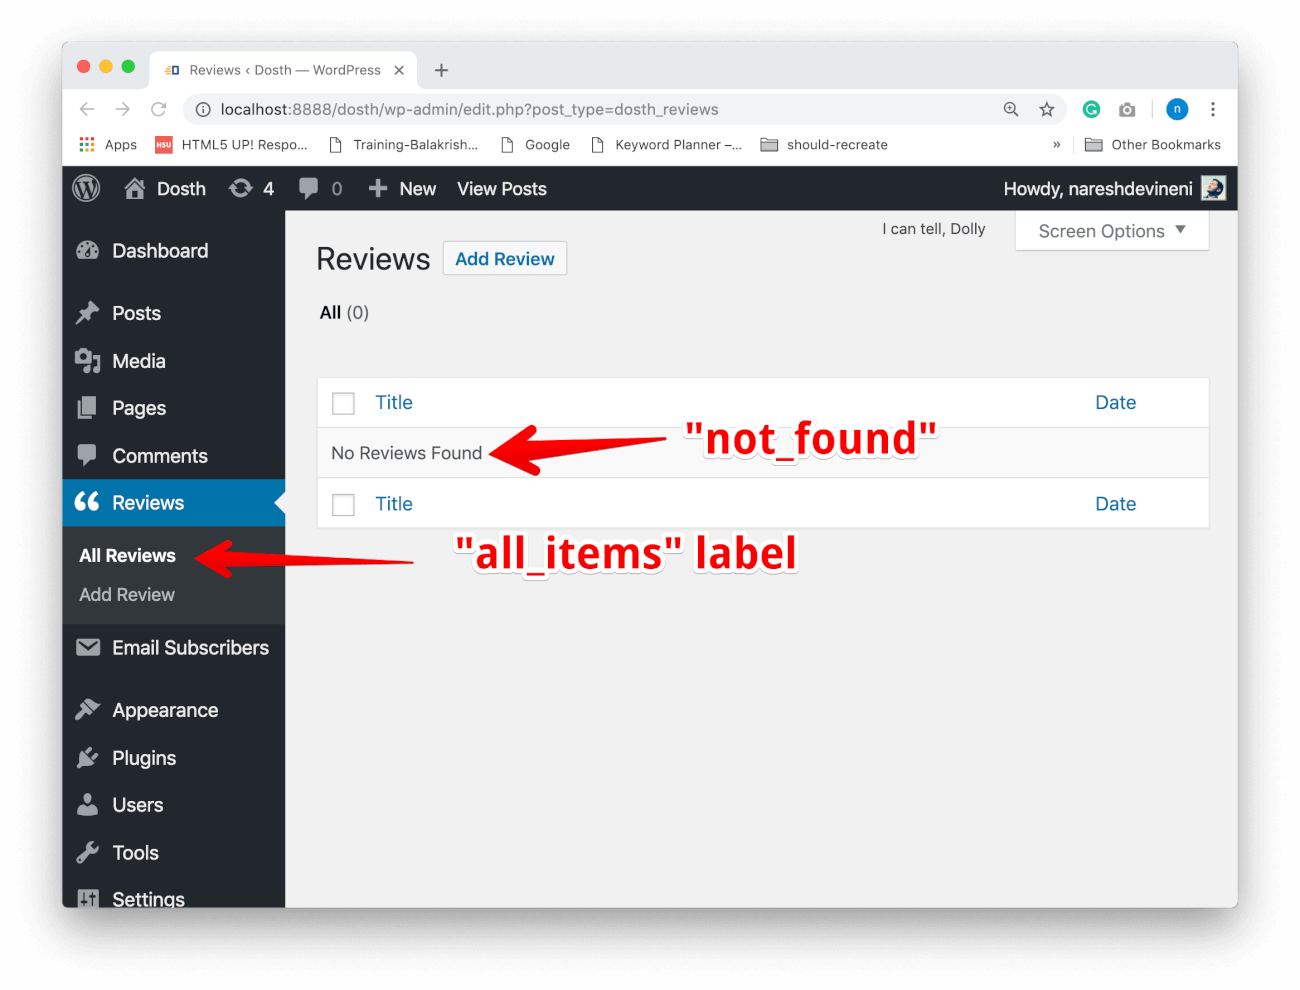
You get the idea, right?
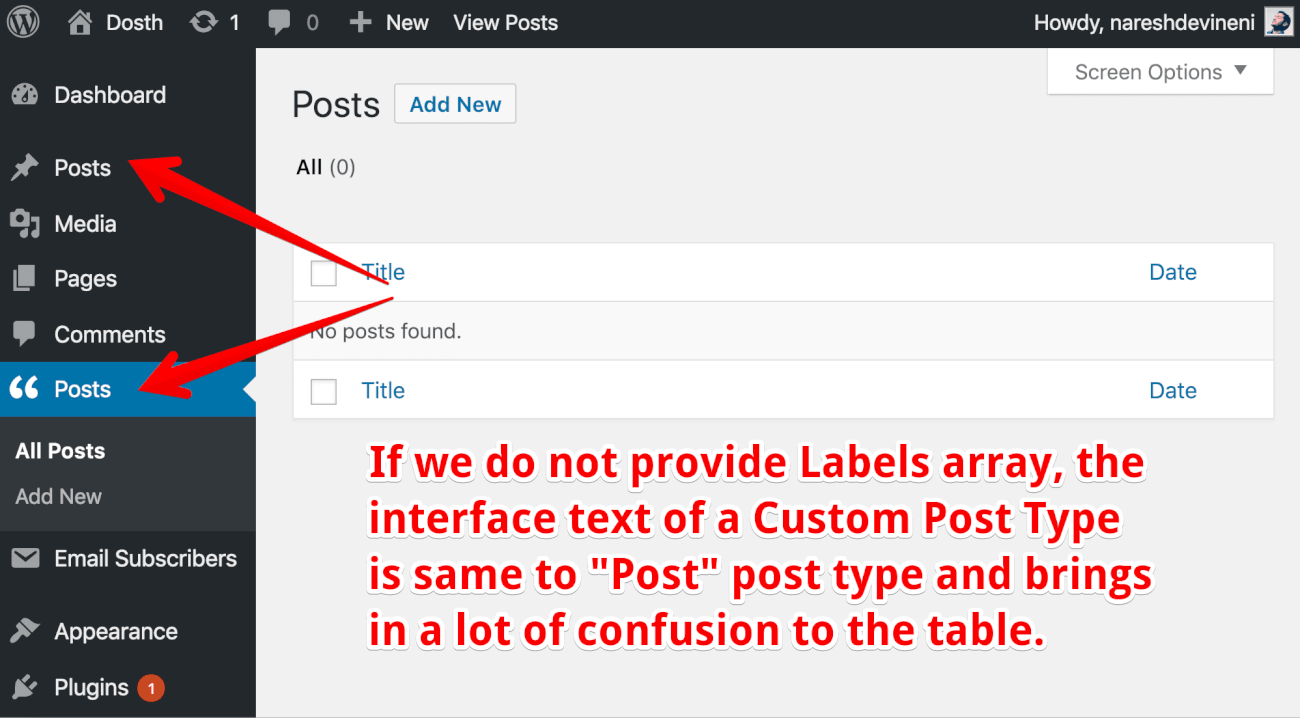
Also, It is totally fine to not provide the Labels array at all. But if we do so, the interface text of our “Reviews” Custom Post Type is the same as the text interface of default “Post” post type. So, It confuses everyone.
The above list of labels we put to use is not final. We are only making use of five according to our needs. But there are many. For further customization of labels, visit the Labels section of the following WordPress Codex Page:
https://codex.wordpress.org/Function_Reference/register_post_type
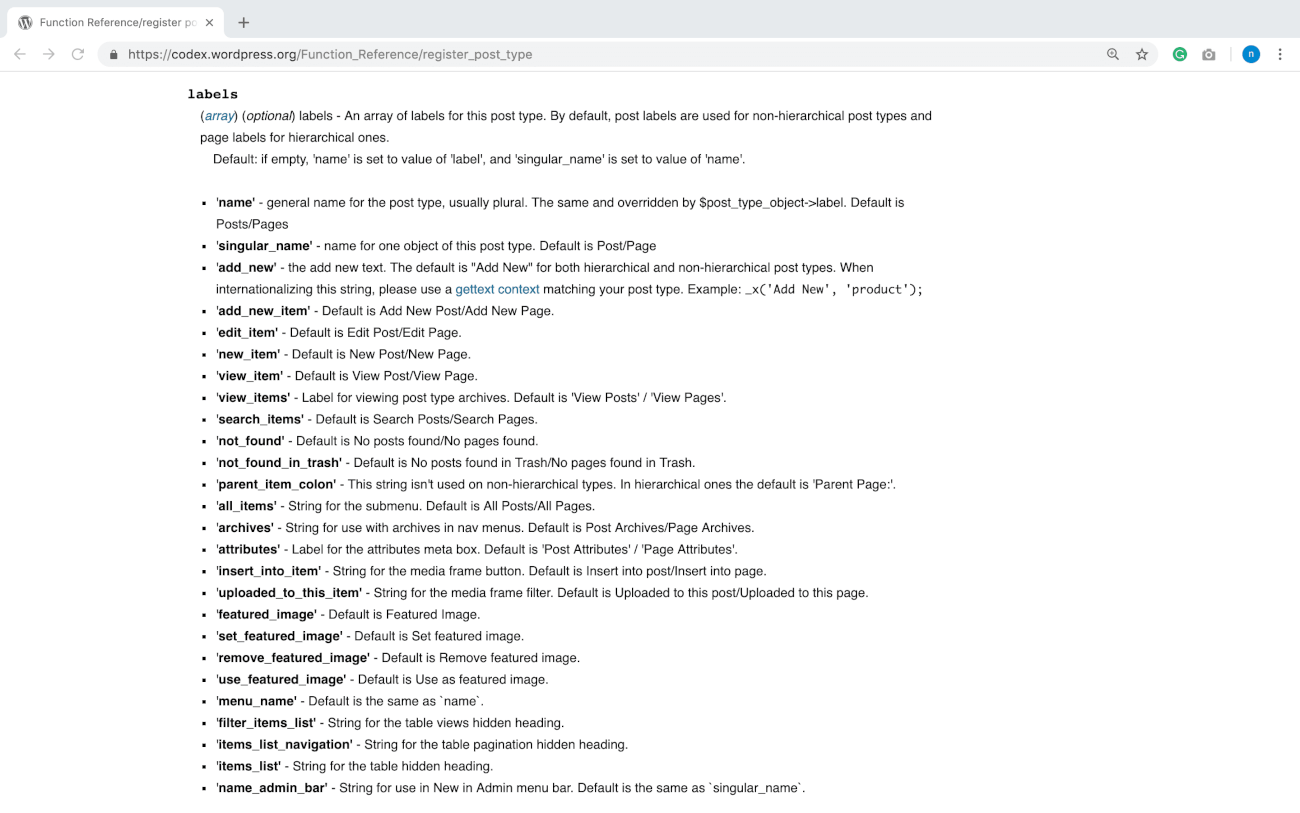
Now that you have a good idea about custom post type labels, let’s take a look at the remaining items of the configuration Array.
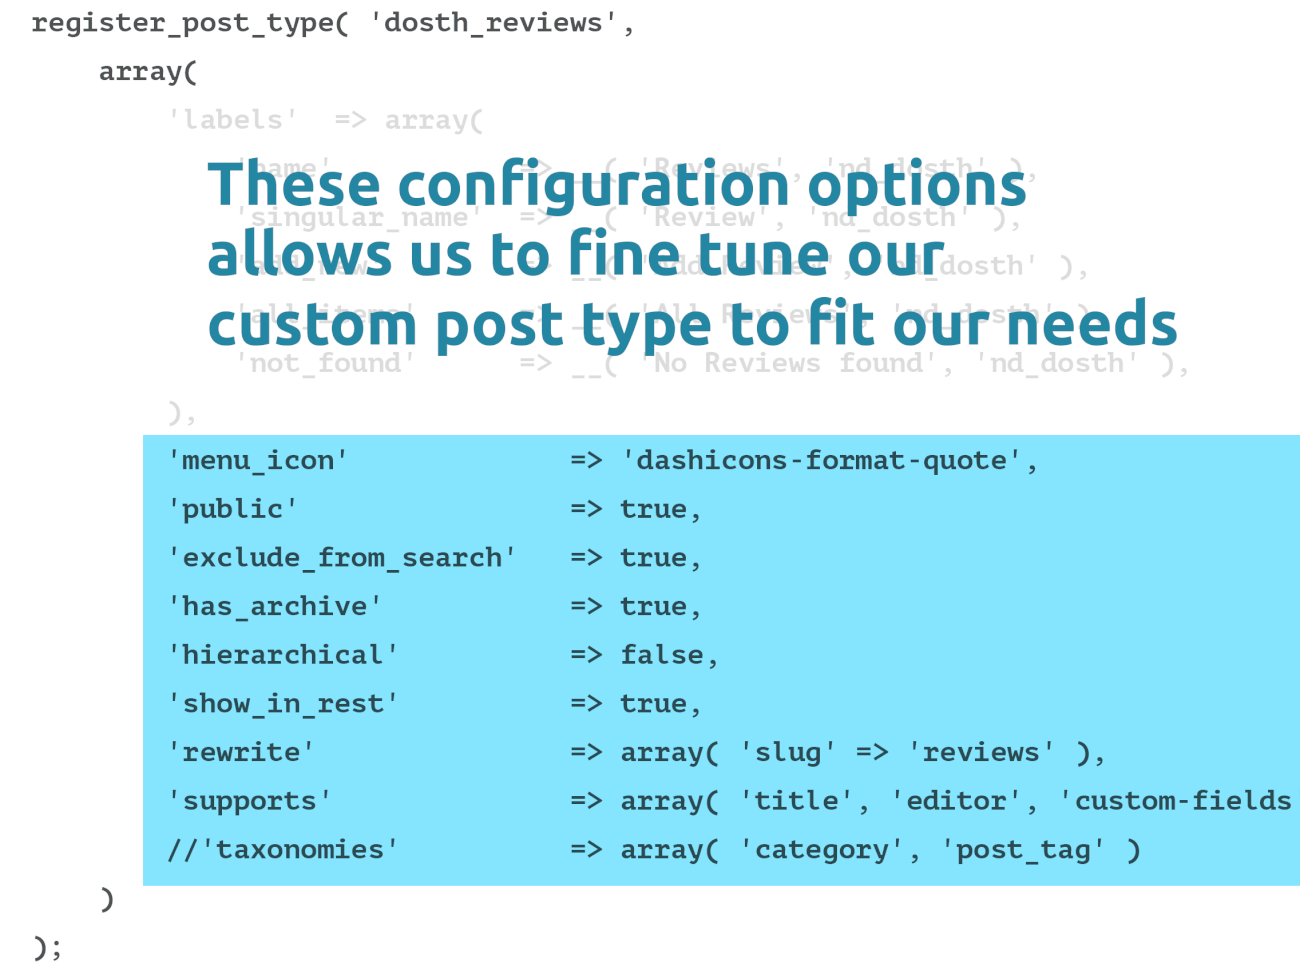
Let’s go through the above arguments one by one.
This option allows us to change the icon of custom post type in the Dashboard.
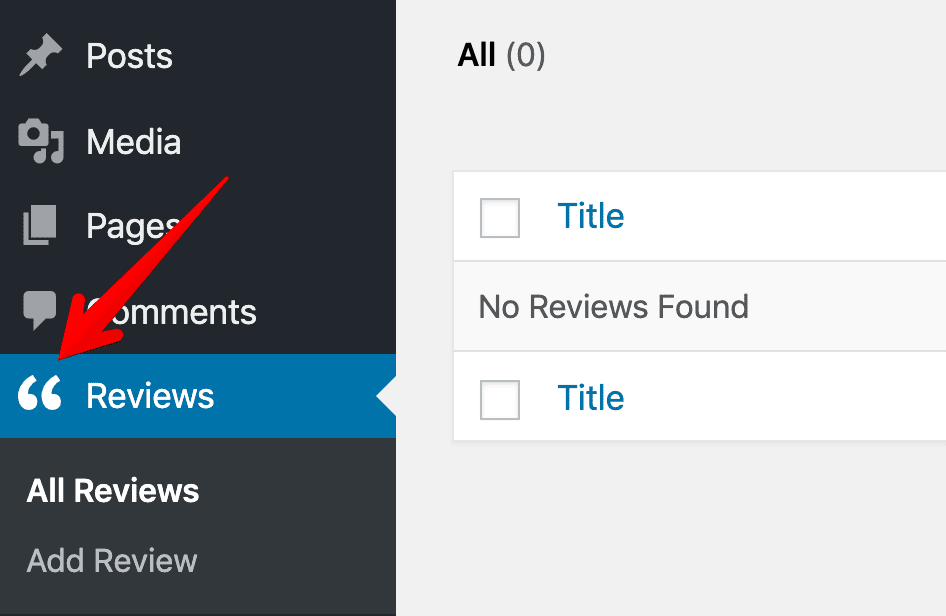
It is not mandatory but you can provide two types of value for this argument:
In our case, we are going with the DashIcon’s‘dashicons-format-quote’ icon as the value. For a full list of DashIcons, please visit the following URL:
I honestly don’t know why the default value is set to false. I never really came across a scenario where I would want to set the “public” argument to false.
Of course, the way we code websites is changing now. People started using Javascript frameworks like ReactJS and AngularJS to manage the content of a WordPress site. But this doesn’t mean you should set “public” argument to false. I don’t want to get into this argument.
Anyway, the bottom line is, if we want to access and manage a Custom Post Type inside Admin Dashboard or Frontend, we have to set this argument to true. As mentioned before, I always set this value to true.
If we set this default to false, WordPress throws the following error if we try to access the Reviews Post Type using the Admin Dashboard:
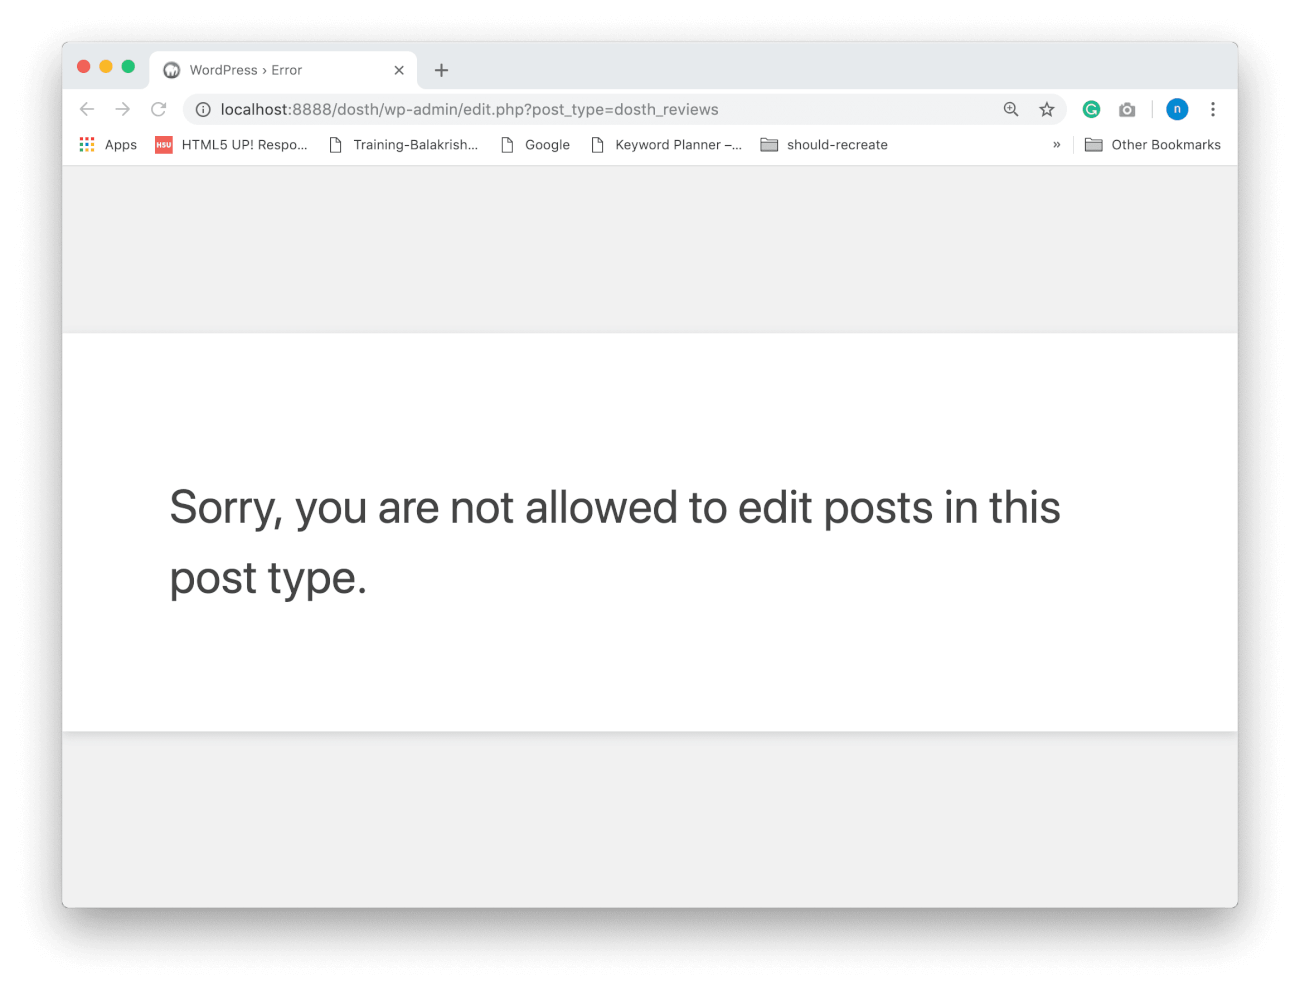
Setting up the $public argumentto a certain value also effects other arguments of configuration array automatically.
For example, If we set the $public argument to True:
1) $exclude_from_search argument will be set to False internally. That means, when someone uses the site search, based on the search term, the posts from this custom post type would also be included inside the search results returned by WordPress.
2) $publicly_queryable argument will be set to True internally. That means, when someone enters the following URL into the browser, WordPress queries the database for the posts of a particular Post Type.
http://localhost:8888/?post_type={post_type_key}
For example, if the user enters the following URL into the browser, WordPress queries the Database for the posts that belong to the “dosth_reviews” custom post type.
http://localhost:8888/?post_type=dosth_reviews
It’s harmless most of the time. So, most clients prefer to leave the $publicly_queryable argument to True.
Anyway, These are the most important arguments that I usually care about when setting up the $public argument. There are a couple more arguments which get affected and you can read more about them in the Codex:
https://codex.wordpress.org/Function_Reference/register_post_type
You get the idea, right? Let’s quickly go through remaining arguments that we have provided for our Reviews Post Type.
Because we have set the $public argument to True, the $exclude_from_search argument will be set to false internally. That means, when someone uses the site search, based on the search term, the posts from our Reviews Post Type would also be included inside the search results returned by WordPress.
But most of the clients do not want reviews to appear inside search results, so, in our case, we are manually setting the $exclude_from_search argument to True.
As you already know, an archive is nothing but a posts index belonging to a particular category, tag, author, published month or published year.
WordPress does not support archive for pages. Only blog posts need this.
Most of the time, most clients want to display reviews in a dedicated page and there are two ways to achieve this.
If we set this $has_archive argument to True and if the user visits the following URL in the browser, WordPress will display all the Reviews automatically using the Default Plain Loop inside an archive based template file of our theme.
http://localhost:8888/{post_type_slug}
http://localhost:8888/reviews
Easy, right?
But, If you want to display Reviews only using Custom Queries, you can safely set this to False.
In our case, we will be displaying the reviews using the archive approach, so I set this to True.
Again, this will make sense in a future lesson.
Do you want the Reviews to have parent-child relationships like the ‘Page’ post type? If yes, the set this argument to True.
But if you want Reviews to be individual and independent posts like blog posts, set this argument to False.
In fact, a review is a perfect example of an independent post. So, in our case, I set this argument to False.
“Hey! Could you give an example for a custom post type where this argument is set to true?”
Why not!
A Course Post Type would be a perfect example. A course is divided into multiple sections and each section would have multiple chapters. Without setting the $hierarchial argument to true, managing and displaying the lessons of a Course post type could be so much difficult.
Get it?
“Yep!”
Good to know that!
If you are familiar with the concepts of REST API and Single Page Applications, setting this argument to true will let you access the posts of a Custom Post Type using the REST API.
I usually set this to True depending on the client’s future goals and their likeliness to experimentation.
If you are not familiar with these concepts, that’s totally ok, you can ignore this argument without worrying about it.
Simply put, this argument lets us customize the URL structure of the Custom Post Type.
For example, by default, in our case, if we don’t specify this argument, WordPress displays the archive of reviews when a user visits the URL with Custom Post Type ID, like this:
http://localhost:8888/dosth/dosth_reviews
If you remember, we gave “dosth_reviews” as the ID to our Reviews Post Type.

But that doesn’t look good, right? Clients always want the URL of the Reviews page to be like:
http://localhost:8888/dosth/reviews
And the $rewrite argument lets us do just that. It helps us use the desired URL for the archive of our custom post type.
The $rewrite argument allows us to fine tune the URL mechanism of our Custom Post Type by accepting sub-arguments in the form of an Associated array.
In our case, we are only using the ‘slug’ sub-argument to specify the ‘slug’ of our Reviews archive page.
Honestly, apart from the ‘slug’, I have never used other sub-arguments. So, you’ll do just fine without ever knowing them. Anyway, you can always learn more about them by visiting the following Codex page:
https://codex.wordpress.org/Function_Reference/register_post_type
With the help of $support argument, we can specify which features we need for the individual post of our custom post type.
In our case, we are supporting the following features:
'supports' => array( 'title', 'editor', 'custom-fields', 'thumbnail', 'excerpt', 'revisions', 'page-attributes' )
These are the features that you’ll find when you are on the edit screen of a particular post.
The thing is, whatever feature you did not specify for this argument will not appear on the post edit screen.
For example, if we have decided to not support the editor, it will be hidden when you add/edit a new review:
'supports' => array( 'title', 'custom-fields', 'thumbnail', 'excerpt', 'revisions', 'page-attributes' )
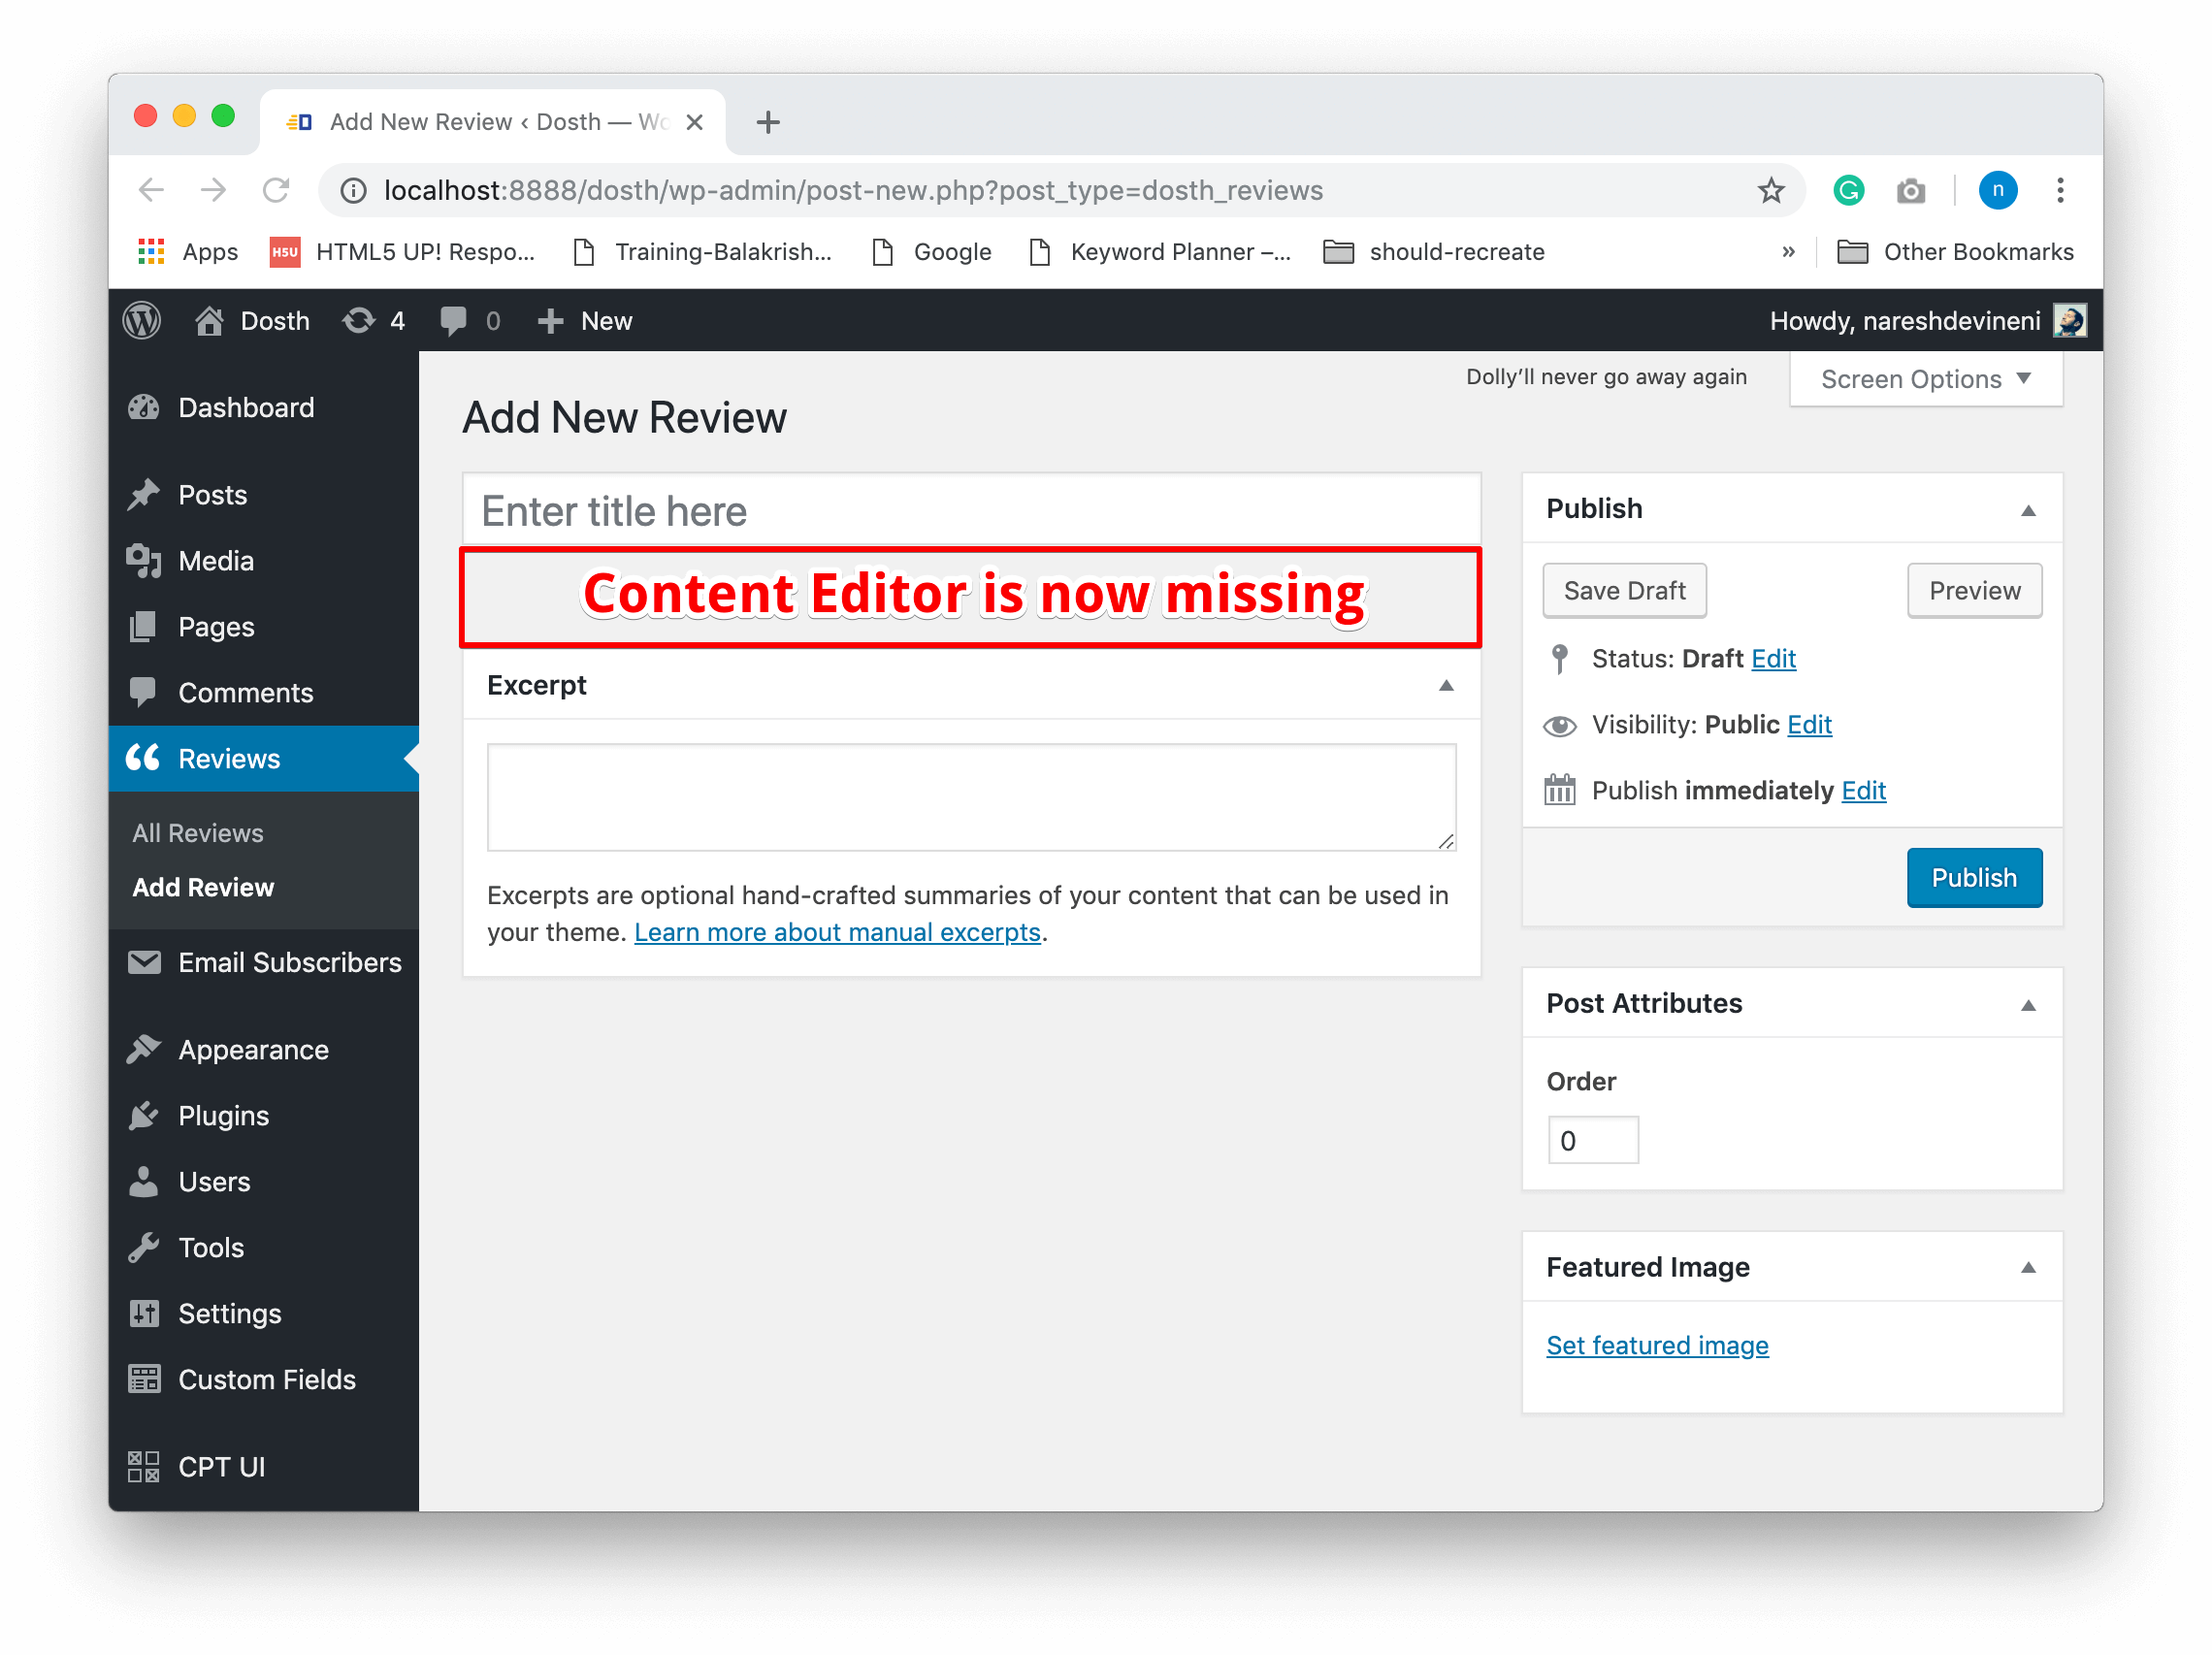
But as you can see, the remaining features that we have specified are available for us to use.
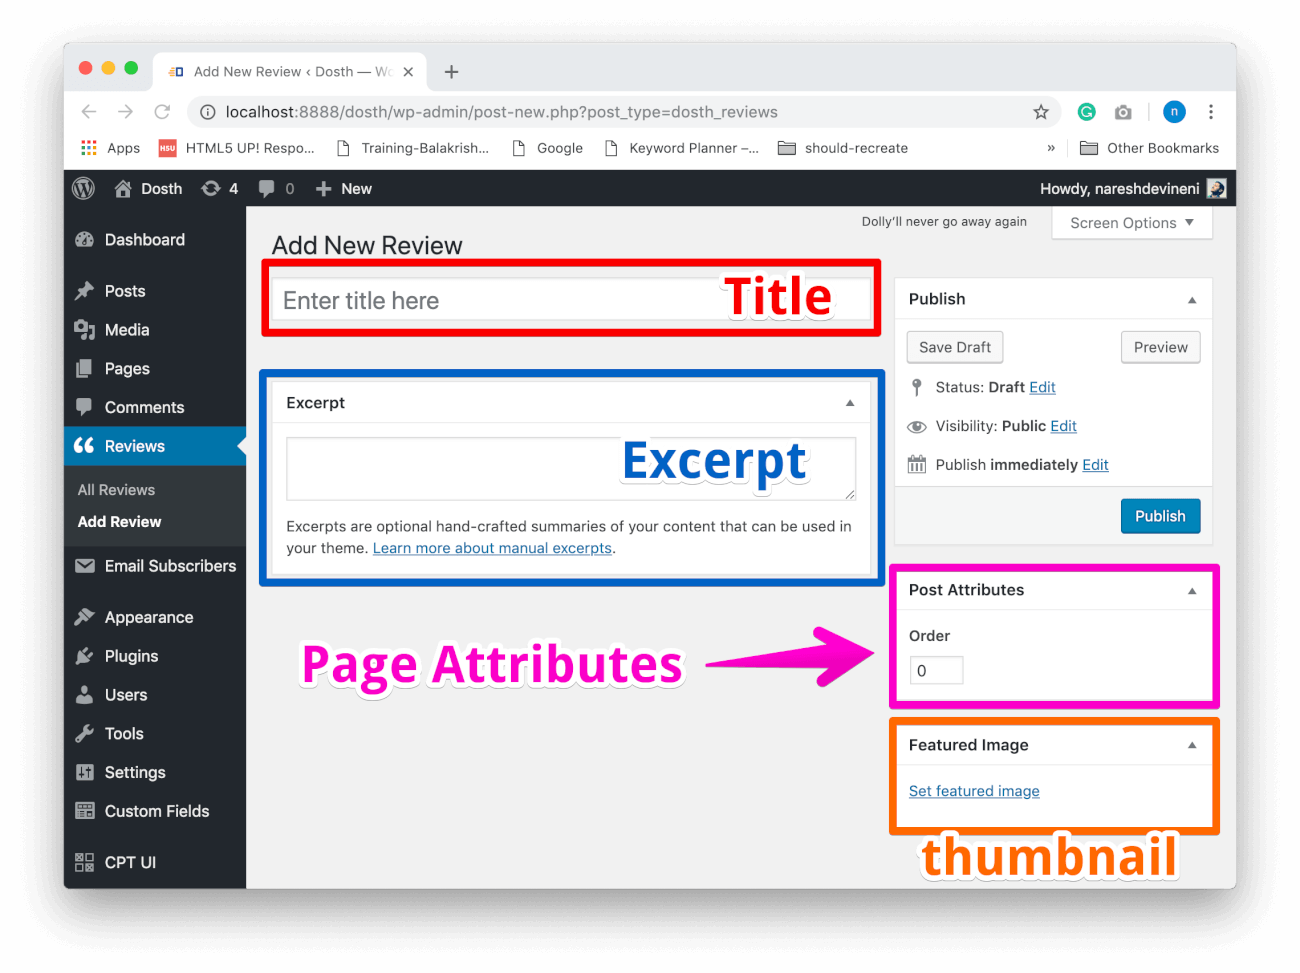
Anyway, we will be using the editor to enter the review of a customer itself.
We will be using the Title field for the name of the customer.
Also, if a custom post type supports editor field, WordPress uses the Gutenberg Editor instead of the classic editor.
“Hey! What about Page Attributes? Do we need that? Also, WordPress is spelling it as Post Attributes.”
Yep! We need this feature 100%. Pages have a feature to adjust their order after creating them. But this is not the case with blog posts. Blog posts cannot be re-ordered once they are created.
The problem is, we will be receiving a lot of requests to adjust the display order of the posts in the frontend. Especially for content like reviews and FAQs.
So the Page Attributes feature helps us specify the order of the posts we have created for a particular post type. Especially It allows us to use the following argument when writing custom queries:
<?php
    $reviews_query = new WP_Query(
        array(
            'post_type' => 'dosth_reviews',
            "posts_per_page" => -1,
            "orderby" => 'menu_order'
        )
    );
?>
The “menu_order” value in the above custom query forces WordPress to output the reviews according to the “Page Attributes” order value.
Post with an order value of 0 will be outputted first. Post with high order value such as 10 will be outputted last in the list.
And, When it comes to “WordPress is spelling it as Post Attributes Instead of Page attributes”, it is just a naming convention. Don’t think too much about it.
If we want to categorize the posts of our custom post type, we have to provide a taxonomy when registering a custom post type.
WordPress supports two default taxonomies.
You can provide both default taxonomies and custom taxonomies for the $taxonomies argument.
This argument accepts an array of taxonomies. So, you can assign any number of taxonomies for a particular post type.
For example, If you uncomment the taxonomies argument in our custom post type code for reviews, you should be able to assign reviews to whatever the categories and tags that we create for our site’s blog and vice versa.
function nd_dosth_register_custom_post_types(){
    //Register Reviews Post Type
    register_post_type( 'dosth_reviews',
        array(
            'labels'  => array(
                'name'           => __( 'Reviews', 'nd_dosth' ),
                'singular_name'  => __( 'Review', 'nd_dosth' ),
                'add_new'        => __( 'Add Review', 'nd_dosth' ),
                'add_new_item'   => __( 'Add New Review', 'nd_dosth' ),
                'edit_item'      => __( 'Edit Review', 'nd_dosth' ),
                'all_items'      => __( 'All Reviews', 'nd_dosth' ),
                'not_found'      => __( 'No Reviews Found', 'nd_dosth' ),
            ),
            'menu_icon'             => 'dashicons-format-quote',
            'public'                => true,
            'exclude_from_search'   => true,
            'has_archive'           => true,
            'hierarchical'          => false,
            'show_in_rest'          => true,
            'rewrite'               => array( 'slug' => 'reviews' ),
            'supports'              => array( 'title', 'custom-fields', 'thumbnail', 'excerpt', 'revisions', 'page-attributes' ),
            'taxonomies'          => array( 'category', 'post_tag' )
        )
    );
}
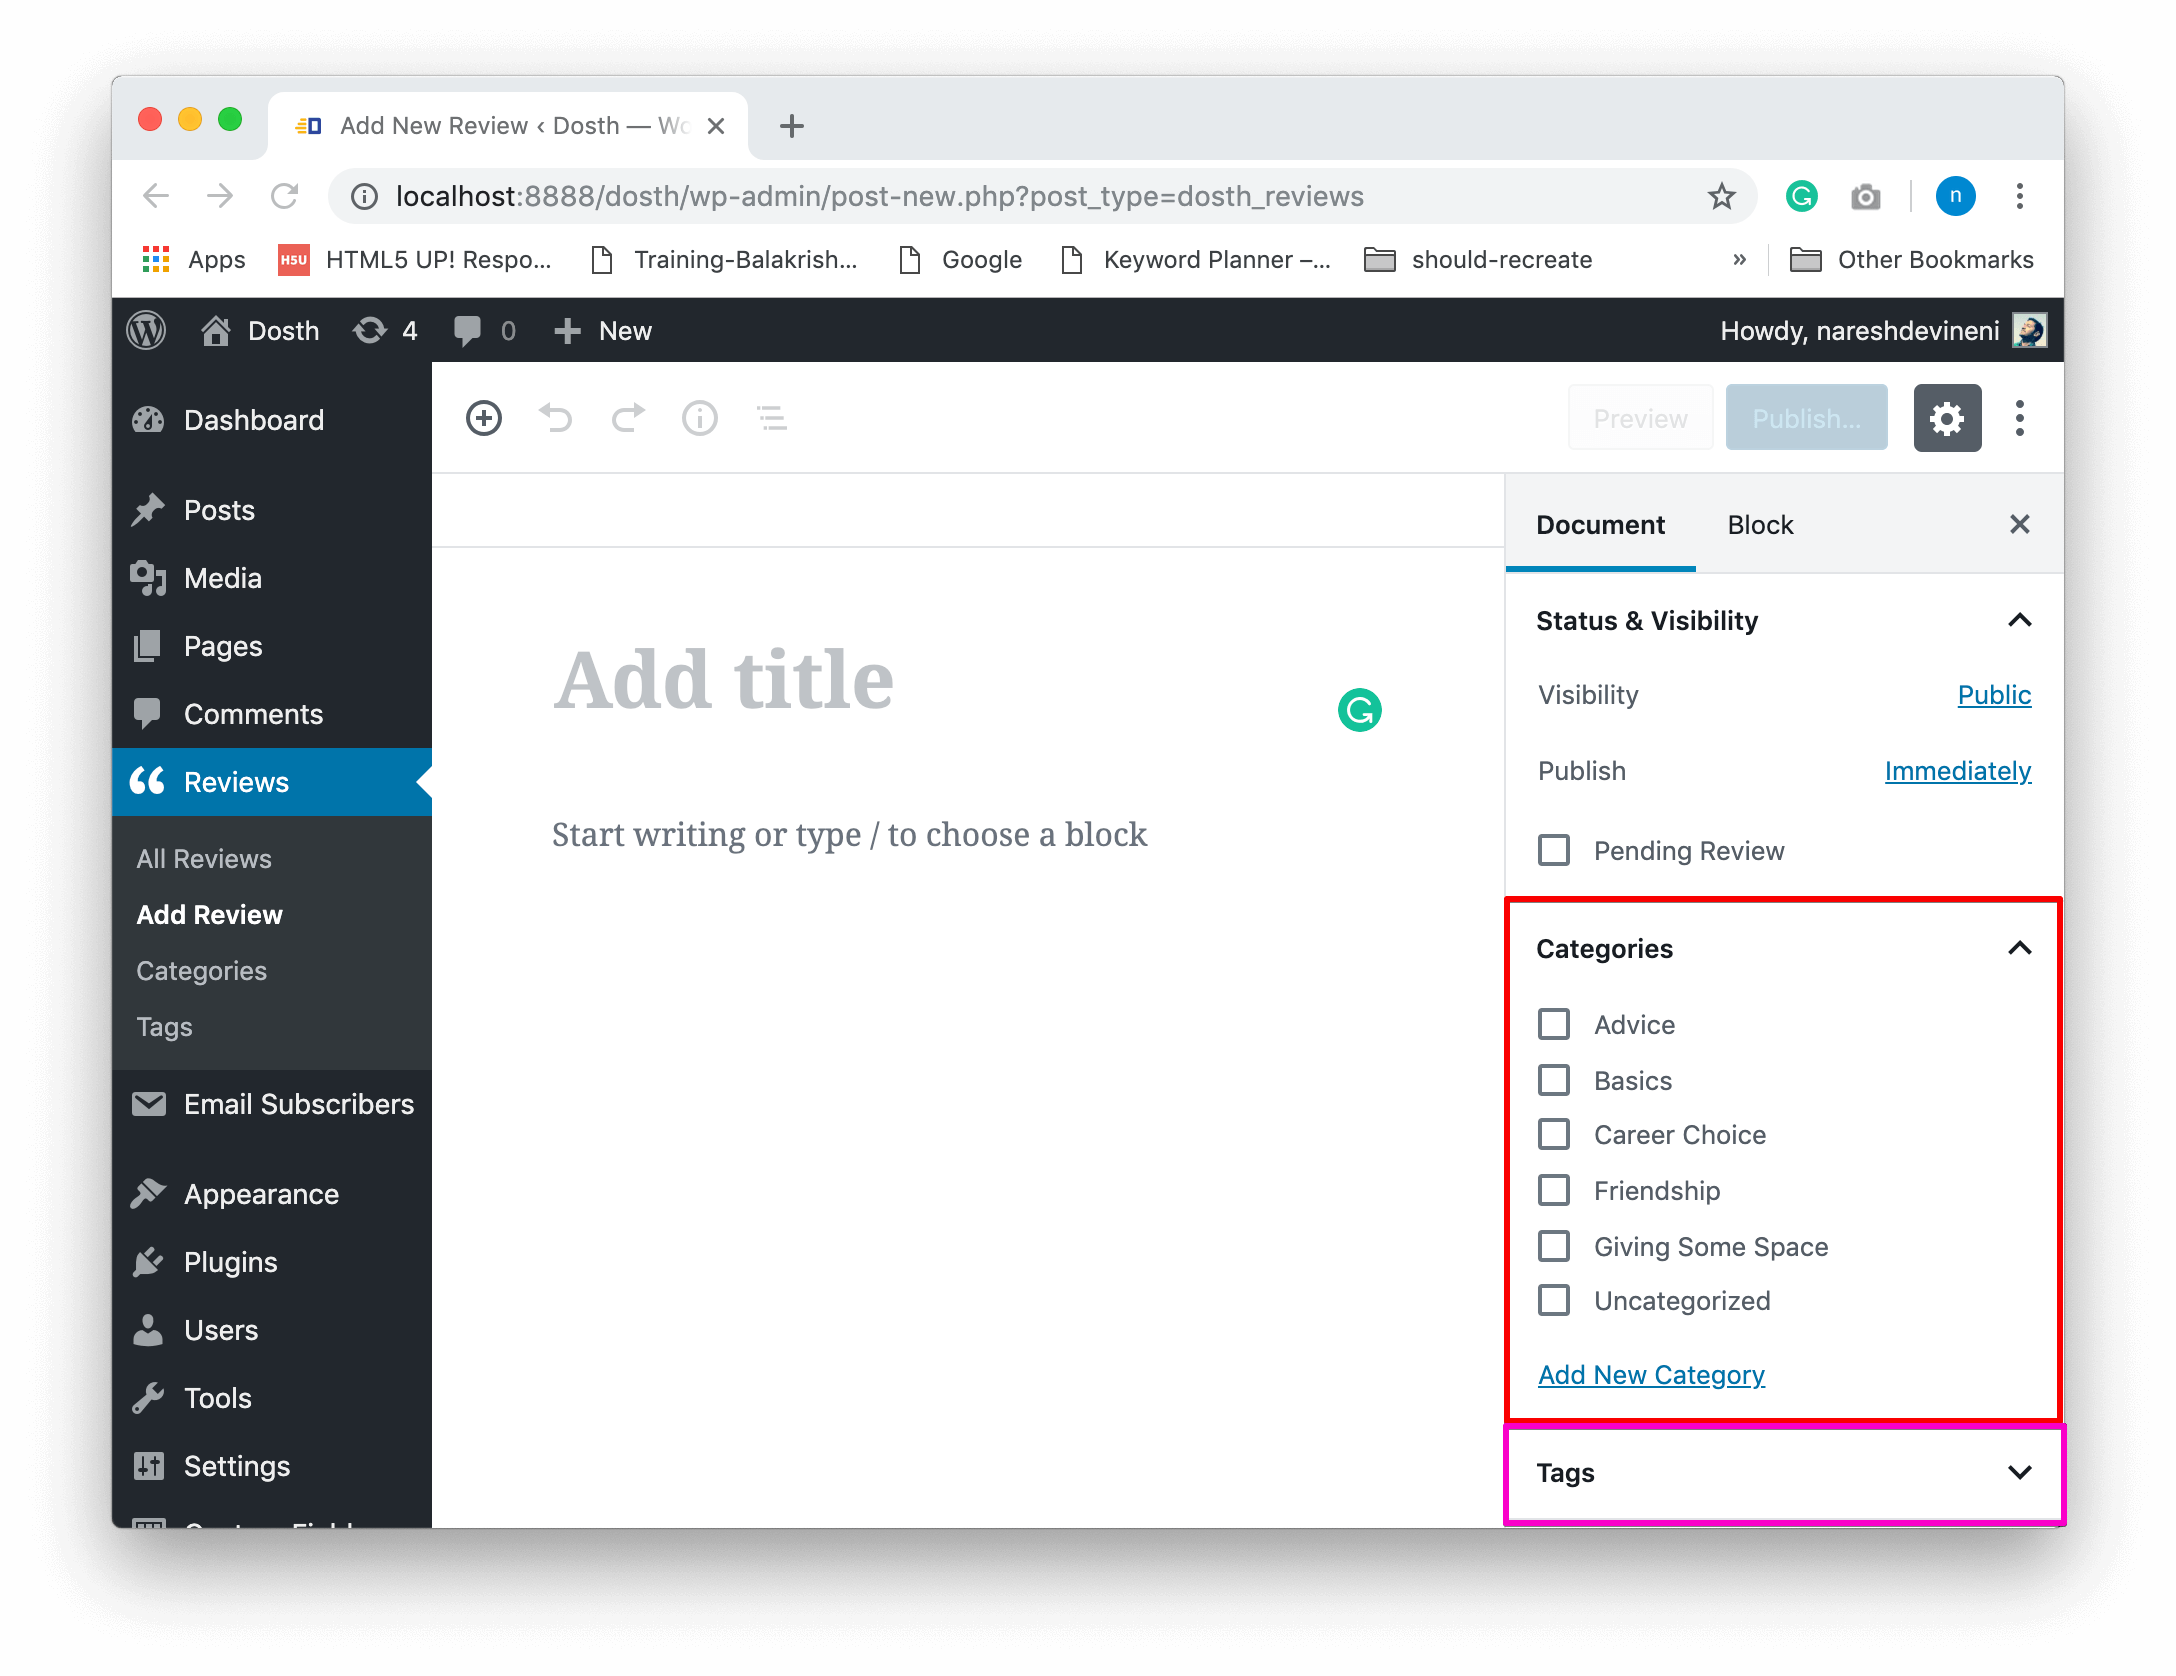
For most of the scenarios, using the default taxonomies are not ideal. So, most of the time we will end up creating custom taxonomies.
Linking taxonomies between multiple post types will increase clutter. And every custom post type we create will have a unique purpose, right? So, technically, we do not have to share a particular taxonomy’s terms with the other post type.
So, if you have uncommented the taxonomies argument, comment it back. Here is the final custom post type registration code for reviews.
register_post_type( 'dosth_reviews',
    array(
        'labels'  => array(
            'name'           => __( 'Reviews', 'nd_dosth' ),
            'singular_name'  => __( 'Review', 'nd_dosth' ),
            'add_new'        => __( 'Add Review', 'nd_dosth' ),
            'add_new_item'   => __( 'Add New Review', 'nd_dosth' ),
            'edit_item'      => __( 'Edit Review', 'nd_dosth' ),
            'all_items'      => __( 'All Reviews', 'nd_dosth' ),
            'not_found'      => __( 'No Reviews Found', 'nd_dosth' ),
        ),
        'menu_icon'             => 'dashicons-format-quote',
        'public'                => true,
        'exclude_from_search'   => true,
        'has_archive'           => true,
        'hierarchical'          => false,
        'show_in_rest'          => true,
        'rewrite'               => array( 'slug' => 'reviews' ),
        'supports'              => array( 'title', 'editor', 'custom-fields', 'thumbnail', 'excerpt', 'revisions', 'page-attributes' ),
        //'taxonomies'          => array( 'category', 'post_tag' )
    )
);
In the next lesson, we will use a custom query to output some reviews on the Homepage.
This series is really cool, it would be great to make a video course based on it. Best regards