Styling the single post page
Go ahead and put the following CSS at the end of the style.css file:
/*-------------------------------------------------------------------------------
  16.Single Blog Post page styling
-------------------------------------------------------------------------------*/
.single .full-width-featured-image{
    min-height:500px;
    display:flex;
    justify-content: center;
    align-items: center;
    background-repeat: no-repeat;
    background-size:cover;
    background-position:center center;
    position:relative;
}
.single .full-width-featured-image h1{
    color:white;
    position:relative;
    z-index:2;
    font-size:50px;
    text-align:center;
    max-width:1000px;
    margin:0 auto;
}
.single .full-width-featured-image:after{
    width:100%;
    height:100%;
    content:"";
    background-color:rgba(0,0,0,0.8);
    position:absolute;
    top:0;
    left:0;
}
.single .article-info h4{
    color:#bfbfbf;
    font-size:20px;
    text-transform:lowercase;
    margin-bottom:10px;
    margin-top:30px;
}
.single .article-info a{
    font-size:16px;
    color:#1a3794;
}
.single #actual-article{
    padding:30px 0;
}
.single #actual-article p{
    font-size:16px;
}
Here is the updated style.css file outline:
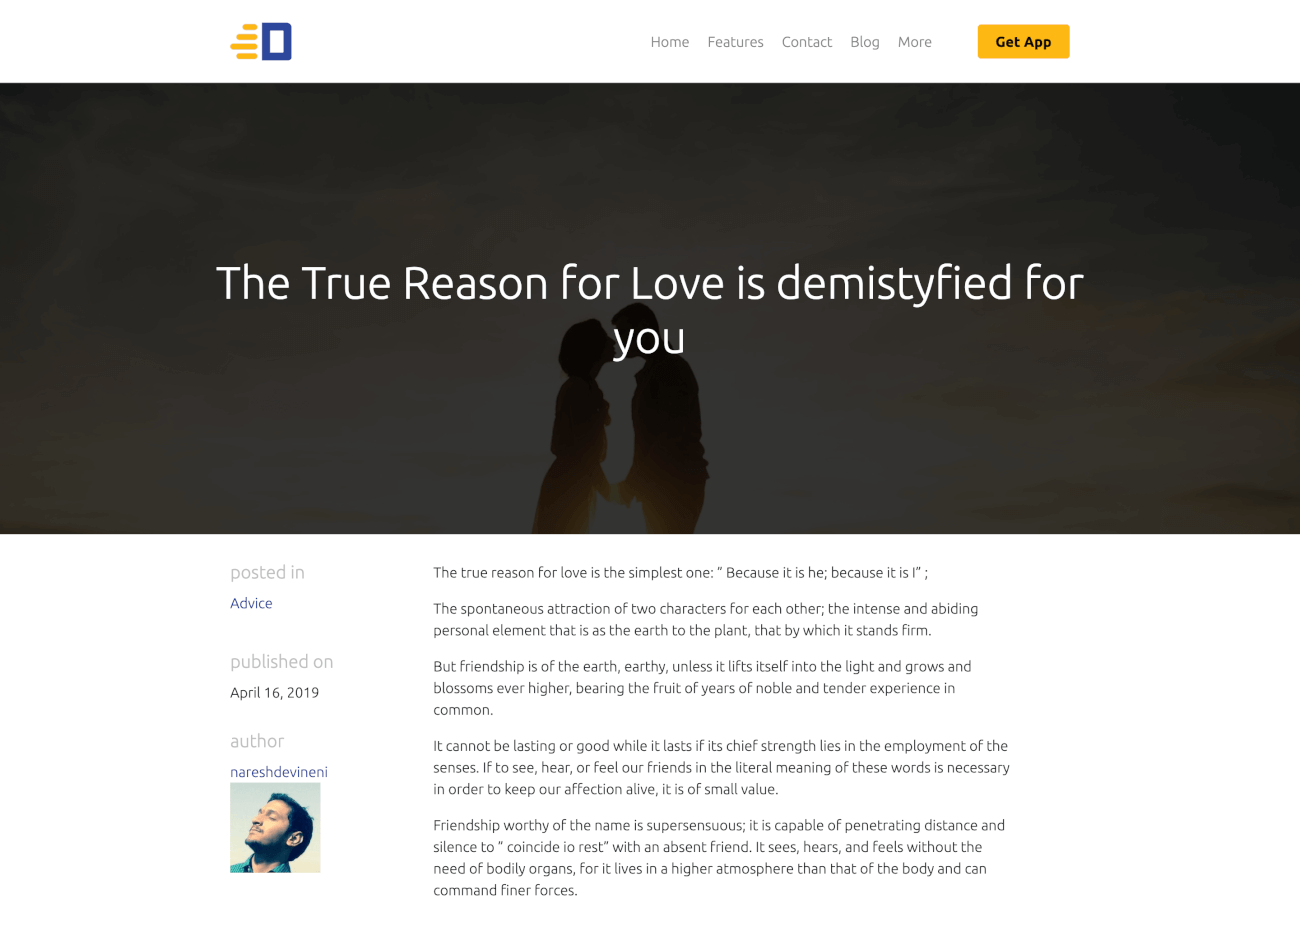
If you now visit a single blog post in the frontend, this is how it looks like:
In the next lesson, we will learn how to add the comment form to a single blog post.
 © 2026 UsableWP. A project by Naresh Devineni.