
Best practices for your WordPress Website
Improve the health of your WordPress website by reducing errors and eliminating unreliability.
Hosting
Save money and headaches by picking the right host
Pending
Hosting
Images
An image can speak thousand words but don't let that slow down your website
Pending
Images
Maintenance
Keep your website up-to-date to avoid serious threats and costs later.
Pending
Maintenance
Plugins
Manage the custom functionality of your site like a pro
Pending
Plugins
Themes
Control the look and feel of your website
Pending
Themes
Troubleshooting
Find out what's wrong with your website.
Pending
Troubleshooting
Hosting
Invest in high-performance hosting if you are serious about your business website
Let me be blunt.
Stay away from shared hosting companies like Hostinger, A2 Hosting, Bluehost, Hostgator, etc.
Me personally and my clients had terrible experiences with these hosting services.
Some of my clients run ads on Google and other social media platforms.
But most people who click on those ads are not visiting the website because the website is not loading in the first place. So, a lot of their ad money went down the drain because of their hosting service.
So be very careful with your web hosting service.
Don’t fall for the ads and affiliate scammers saying that these hosting services are great.
Having said that…
There are tons of web hosts for WordPress
Some of them are good, some of them are bad and some of them are exceptional so you could just blindly purchase their service.
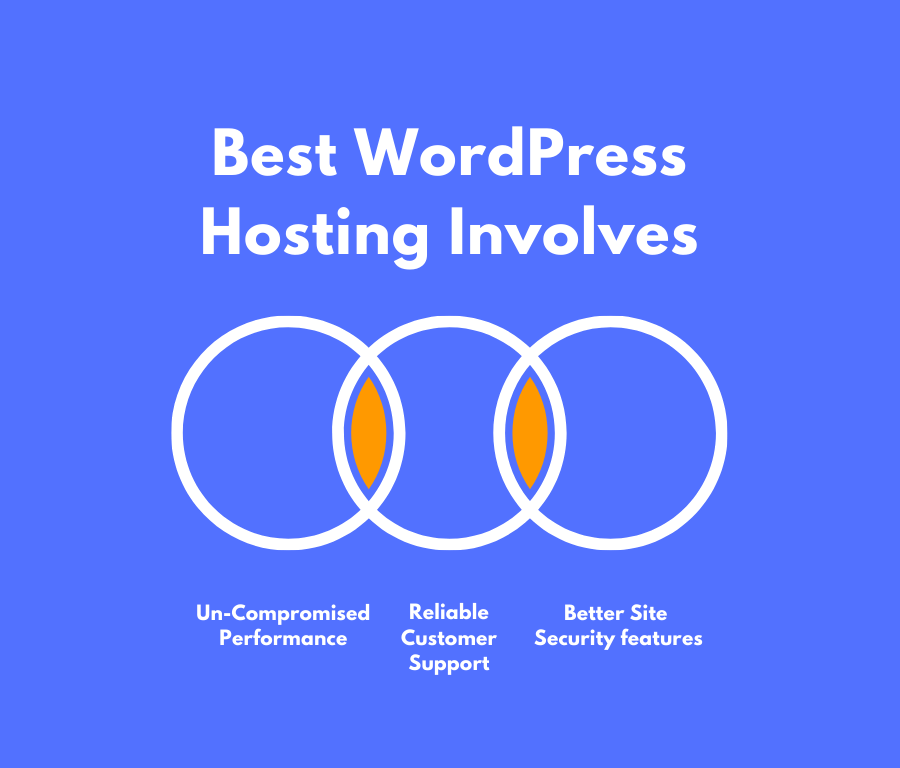
So, when it comes to the best WordPress Hosting, the only three things that come to my mind are:
- Un-Compromised Performance because Google loves fast-loading websites
- Reliable Customer Support experience because you might need it.
- Better Security Features because you need peace of mind.
And only managed hosting services like Rocket.net and cloud hosting services like Cloudways can provide these things.
Also, if you are serious about your website, you should allocate at least 30$ per month on your wordpress hosting expenses.
Although it is a fair price, I understand that 30$ a month budget is not cheap.
But that kind of monthly budget for hosting will give you the best quality hosting and peace of mind.
And here are some of the best hosting services I recommend based on my personal experience and my clients’ experience:
- Rocket.net – Known for its exceptional performance and customer support. My client’s Divi website is loading so much faster than it made me move my website here and experience good speeds when compared to Cloudways.
- Cloudways – I hosted my website here for two years and never had any complaints. Support is great.
- WPEngine – Hosting service and support are great. What I love about WPEngine more specifically is that it comes with 30-day backup retention. It saved most of my client’s businesses. On top of that, it makes my development job really easier with its support for LocalWP software.
Make sure to use a hosting service that supports creating staging websites
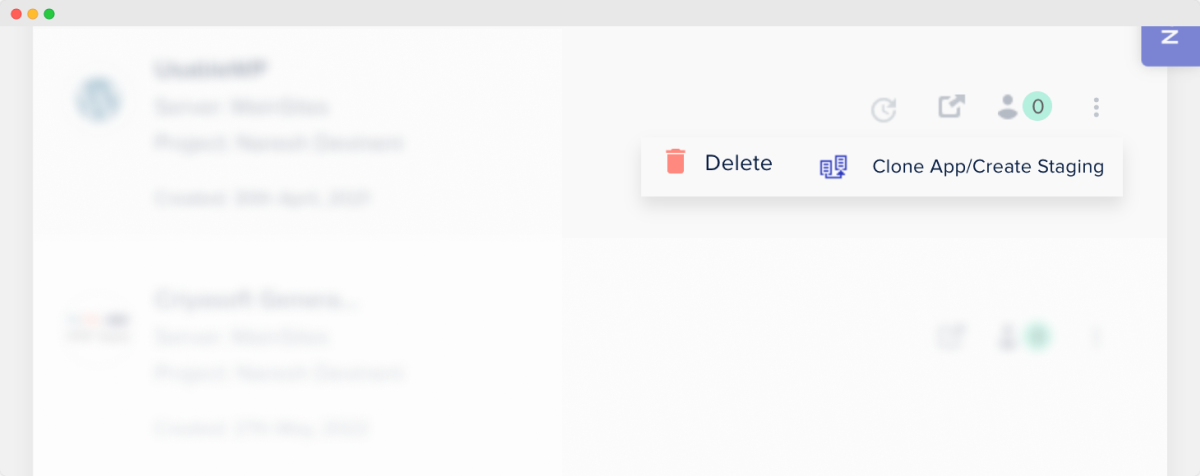
A staging website is nothing but a clone of the live website.
We create a staging version of our live website in order to:
- Test out new plugins and features of WordPress
- Check if the website is working as expected after performing WordPress, theme, and plugin updates.
- For troubleshooting why something went wrong with your website and fixing it.
Honestly, any WordPress developer who has standards will never perform any changes on the live website directly.
They will first work on the staging site and only if everything goes well, they make the same changes on the live website.
To be more clear, a staging website is more like a lab rat that goes through a lot of medical experiments for us.
That’s how important a staging website is for you.
But sadly, most hosting services make it really difficult to create a staging website.
So, before purchasing a hosting plan, ask customer support about the staging feature.
Some of the best hosting services with good staging features are:
I can’t stress it enough.
The importance of having an easy way to clone the website saves you a lot of time and headaches if you’re running a busy business website.
Use a hosting service with at least 10 days of backup retention and restore features
Although WordPress core software is reliable, most developers are not.
An inexperienced developer or a website manager could mess up a lot of things.
Most website owners face a lot of problems because of this very reason.
Here are some most common problems:
- Website getting hacked
- Fatal error after activating new plugins
- Fatal error after performing some changes inside the theme
- Messing up the design of the website while performing some CSS changes
And fixing these problems is not easy.
I charge 300$ at least to start troubleshooting these problems.
And for most website owners, 300$ is a lot even though it is just a starting fee.
So, wouldn’t be nice if there is a free way to restore your website to the point where it was working properly?
And just at the click of a button?
Indeed there is a way.
This is where the Backup Retention and Restore features of the web host come in.
Web hosting companies like Rocket.net and WPEngine take a backup of your website every day and store them for at least 10 days.
And if something goes wrong, they also provide an easy way to restore the problem-free version of the website from those backups.

Trust me, these features let me help a client big time who is running a woocommerce store.
A developer messed up the website and didn’t know how to fix the problem.
And when the client reached to out me, all I had to do was restore the website from a week ago and it was working just fine.
Thank god the client was using the WPEngine web hosting service and I was easily able to restore a backup from 4 days ago.
So, make sure to enquire about these features because you’ll need them for sure.
Images
Avoid using plugins for image compression
Once you realize that you have to optimize images on your website, it could feel like a daunting task.
It is a lot of hard work if we are going with a manual route.
So, to avoid this manual work, most people look for WordPress plugins that could automatically optimize all the images on the website.
Some good options are Imagify, EWWW, Smush Pro, etc.
But sometimes, these plugins often destroy the quality of the image in the name of compression.
If you notice the image, it is damaged and pixelated because of too much compression.
After all, plugins are not humans when it comes to judging the quality of the images by visually looking at them, right?
They also impact the performance of the website negatively during the time of image compression activity.
They are server-resource intensive in terms of disk space too because they keep a copy of the original image and the compressed image on the server disk.
So, it is better to compress the images manually if you can.
If you can compress images manually:
- You can have better control over the quality of the image
- You can save some disk space on the server
- You can save server resources
- You can save some money because WordPress compression plugins are not cheap,.
“Got it, but I have thousands of images, and I can’t compress them manually :(“
I can understand.
If you can’t compress them manually, then go with the image compression plugins but first try using them on a staging site.
This way, you can experiment with various compression settings, and even if images get destroyed, you have nothing to lose.
Fair enough?
“Yep! Yep! but what is a staging site?”
A staging site is nothing but a clone of your live website.
And because it is just a clone, you can perform experiments without worrying about the images or website getting permanently damaged.
Choose jpeg format over png for smaller image file sizes
If the image is not losing its quality, choose JPEG format over PNG for your images.
Images in JPEG format are usually smaller in file sizes when compared to PNG format.

For example, if you notice in the above screenshot, both the images are 1000px wide and compressed using Tinypng.
But the image in JPEG format is almost 70% smaller in file size.
This logic is especially true for Photographs.
Make sure all your Photograph based images are in JPEG.
And for images that represent Screenshots, Illustrations, and paintings, first, go with PNG format.
If the file size is less than 150kb, stick with PNG so that the quality of the image is not weird.
Compress images before uploading them
Most website owners upload images with huge dimensions such as 2000px in width.
The bigger the dimensions of the image, the bigger the file size.
For example, an image with a 2000px width would have a file size of 1.5 MB at least.
And, the bigger the file size, the bigger the negative impact on the performance of the website.
So, to fix this problem, first, resize the image according to its display size as mentioned in the previous tip.
Next, compress the resized image using a tool like Tinypng.

If you notice in the above screenshot, Tinypng reduced the image sizes by 76%.
Make sure images are lazy loaded
On a webpage, images can be present at the top, middle, and bottom of the page.
In fact, A webpage like a blog post can have 100s of images.
If we try to load all those 100s of images in a single go, the webpage takes forever to load.
If it takes forever to load, the user will move on to another website and you’ve lost a potential customer.
So, to avoid this issue, it is ideal to load images only when their need comes.

Simply put, they must be loaded only when the user passes through their location on the web page.
So, it is okay to load the images at the top of the page as soon as the user visits the page.
But images located halfway down the page must be loaded only when the user starts scrolling down the webpage to their location.
In other words, we have to load images on demand.
This on-demand way of loading images is called Lazy loading images.
How to lazy load images
Newer versions of WordPress support Lazy loading by default.
So, you don’t have to do anything if you’re okay with not supporting older browsers.
But if you want to support older browsers as well, use a plugin like Perfmatters.
Resize images based on their display size
On a web page, every image will occupy a certain amount of space on the screen.

For example, in the above screenshot, each image is occupying 454px of width on a desktop screen.

Similarly, the featured image in the above screenshot is occupying 900px of width on the screen.
We call this occupying space of the image as the “Display Size” of the image on the screen.
But the problem is, most website owners will upload images with huge dimensions such as 2000px even though the image is only occupying 900px of width on the computer screen.
And these huge images will impact the server space and performance of the website negatively.
So, please figure out the display size of the image and resize it accordingly using a tool like Online Image Resize:
https://www.onlineimageresize.com/
Add room for retina devices
If the image’s display size is 400px, go with 500px so that it doesn’t look too pixelated on retina screens.
Simply put, add 100px of extra width to the actual display size.
Maintenance
Always keep the plugins up to date for better security

Outdated plugins are one of the main reasons why websites are hacked.
Plugin developers release new versions of their plugins with security fixes.
So, it is important you update your active plugins regularly.
“Oh! but some of my plugins are not getting updated, How do I fix that?”
Got it.
It means it could be a premium plugin and the license of the premium plugin must be activated to get new updates.
New updates for premium plugins are available only when the plugin has an active license.
So, try to see if you active subscription for the plugin, if not, get a new license by purchasing the plugin.
But you must update the plugin no matter what.
Having said that, new plugin updates could cause:
- Fatal errors
- Design changes on the frontend
For example, the “The Events Calendar” plugin’s 6.0 update was a major update, and most websites suffered from errors and design changes on the front end.
So, it is ideal to test the plugin update on a staging site (a clone of your live website for testing purposes).
If everything goes well on the staging site:
- Take a backup of the live website
- And then perform the plugin update on the live site.
Back up your website on a daily basis (automatically)
First of all, don’t use a plugin to back up your site because if something goes wrong, restoring your website is not easy.
I have tried and tested many plugins but when the time came, all of them cost me at least 2-3 hours to restore a fully working version of the site.
They also hurt the performance of your website.
Instead, first, check if your web host is providing automatic backups. If yes, then try out their “Restore from a backup” feature using a staging site.
If the restore feature is working as expected without any hiccups, then you’re lucky.
If not, Web hosting companies like Rocket.net and WPEngine take a backup of your website every day and store them for at least 14 days.
And if something goes wrong, they also provide an easy way to restore the problem-free version of the website from those backups.
In fact, WPEngine stores a backup for 30 days and its “Restore” feature is extremely reliable. It saved many websites of my clients when something went wrong.
Delete post and page revisions regularly
If you are an author, chances are you’ll keep tweaking the content of a post until you’re happy with it.
In this process, you’ll be hitting the update button quite frequently.
And every time you click the update button, WordPress will save changes related to that particular update as something called a revision.
For example, when I was creating a landing page, I hit the update button 50+ times 😅

And this happens every time you create a new post or a page.
The thing is, once we are refining the content of that post, we no longer need those revisions.
So, we need to delete them to stop the database size from growing because a big-sized database is one of the key factors of a slow WordPress site.
“Got it, But how do I delete them? I am not a developer!”
Oh, don’t worry.
You don’t have to be a developer to delete post revisions. It is usually a harmless process.
How to delete post revisions
If you have an optimization plugin like WP Rocket already installed, they already ship with options for cleaning the database revisions.

But if you don’t have it installed, don’t worry.
All you have to do is install the free WP-Optimize plugin.

Next, to delete the post revisions:
- Go to Admin Dashboard -> WP-Optimize -> Database
- Look for the “Clean all post revisions” option and make sure it is turned on
- Finally, click on the “Run Optimization” button.
That’s all. It is that easy to clean up the post-revisions in WordPress.
After you have cleaned it up, make sure to delete the plugin to improve the performance of the website.
And then, after a week, install the plugin again to clean up the revisions and delete it after the work is done.
Try to repeat this process every week :)
“Nice! but what about deleting page revisions?”
Ah! Good question!
When the WP-Optimize plugin says “Post revisions”, it also means “Page revisions”.
This is true with any plugin that lets you optimize your database.
Delete unused images to save disk space and hosting fees
If you post regularly on your WordPress website, you could be uploading a lot of images.
But sometimes, you may end up not using some of the uploaded images as part of a messy process.
It is common but there is a big problem with it. The disk space gets wasted.
And this is a big problem because most good hosting services charge based on how big your site is in terms of disk space.
For example, Cloudways charge $14 for a site that occupies 25 GB and $28 for a site that occupies more 25Gb.
Even automatic backups take a lot of time if the site is big. It is not a good sign either.
So, as the years pass by, you’ll be paying unnecessary additional hosting fees for the images that you are not using at all.
Most website owners realize this pretty late.
Don’t be that website owner!
So, every week, try to find images that are not being used and delete them to save good money in the long run.
Update WordPress core software regularly
The WordPress core software is actively developed by thousands of open-source contributors from all over the world.
Every day, they are striving to rollout:
- New features
- Bug fixes
- Security fixes
So, it is important that you update the WordPress core to avoid being hacked or to not miss out on a better WordPress website.
Having said that, make sure your active theme and active plugins are compatible with the latest version of WordPress core software.
Test out the compatibility on a staging site.
If they are throwing any errors, wait until the theme and plugins become compatible with the latest version of WordPress core.
Popular plugins and themes are mostly up-to-date with WordPress core. So no worries there!
The problem is actually with themes and plugins that are not being actively maintained by the developer.
So, keep an eye on them.
P.S. WordPress core software always try to take advantage of the latest version of PHP. So, in most cases, it is compatible with the latest version of PHP. So, you don’t have to worry about it.
Upgrade to the latest version of PHP
WordPress is powered by a PHP programming language.
And every now and then, a new version of PHP is released with:
- Performance fixes
- Security fixes
- Bug fixes
- New programming features that make developer life easy
For example, there is a good performance boost from PHP 6.0 to PHP 7.0.
The performance gap only got better with PHP 8.0.

So, if your site is still running on PHP 6.0 or 7.0, it is missing out on the much-needed performance boost.
Having said that, upgrading to the latest version of PHP is never easy because of its compatibility issues with third-party themes and plugins.
Most plugin developers don’t follow good coding practices and one of them is not making their code compatible with the latest version of PHP.
So, if you’re trying to upgrade to the latest version of PHP with an outdated set of plugins, your site will break by throwing fatal errors.
The same logic applies to themes as well.
So, before upgrading to the latest PHP version, make sure your plugins and themes are compatible with the new version of PHP.
Use a staging site for testing new updates
WordPress is a busy ecosystem that receives regular updates for:
- WordPress core software
- Plugins
- Themes
- PHP programming language
Usually, there are a few good reasons behind every update released:
- New features
- Bug fixes
- Security fixes
Now, each of these above updates could easily break your site or change the look and feel of your website.
So, it is important that you test these updates first on a staging site and see if anything breaks.
If nothing breaks, then you can perform these updates on the live site.
If your site doesn’t have a staging feature at all, then trust me, it is a good idea to move to a web host that has a staging feature inbuilt.
It will save you a lot of time and money in the long run.
According to my experience, WPEngine has the best staging site functionality.
I can’t stress it enough.
The importance of having an easy way to clone the website saves you a lot of time and headaches if you’re running a busy business website.
Plugins
Avoid plugins that are not being actively maintained
No matter how good the plugin is, sometimes, due to many reasons, the plugin developer will stop maintaining the plugin with new fixes and updates.
And this makes the plugin incompatible with the current version of WordPress core software.

So, before installing a plugin, always look for the yellow box that says:
“This plugin hasn’t been tested with the latest 3 major releases of WordPress.”
If you find this, it is better to stay away from the plugin and find well-maintained alternatives.
Don’t worry, there are tons of good alternatives for every plugin.
If you want to use the old plugin anyway, try testing it on a staging site.
If everything goes well, then install it on the live website with the caution that it could break your website anytime.
Make sure your active plugins are compatible with the latest version of PHP
WordPress is a CMS software written using the PHP programming language.
And just like any programming language, new versions of PHP will get released every year.
With every new version release of PHP, these things happen:
- New features will get shipped
- Some of the old features will get deprecated (can no longer be used)
- WordPress core software is always two steps ahead and supports the new version of PHP.
- Your web host (if any good) will automatically upgrade their servers to use the latest version of PHP.
Because of these things, if your plugins are not compatible with the latest version of PHP, WordPress will throw fatal errors that look ugly to our front-end visitors and destroys the website’s reputation.
This happened to many of my clients who were using plugins that were using old PHP code without updating them to newer standards and it proved costly to them.
So, it is important for you to make sure your plugins are compatible with the latest version of PHP.
If not, find other good alternatives because there are many :)
Read reviews before installing a plugin
Plugin reviews can tell a lot about the negative impacts of the plugin.

For example, these are the negative reviews of the Far Future Expiry plugin.
The last review clearly mentioned it throws 500 internal server errors.
And that is what exactly happened to my client’s website as well.
So, make sure to read negative reviews before installing the plugin.
And as a rule of thumb, don’t try to install any plugin with a rating of fewer than 4 stars.
It is not worth the panic or stress that you may up end up going through.
Reduce the active plugin count for better security and performance
A high number of active plugins is associated with:
- Reduced website performance
- Increased hacking attacks
- Increased errors on the website
And the reason behind this is pretty simple.
Many plugin developers don’t know or care about code quality.
Only some developers make it their priority to write good-quality plugins.
So, most plugins out there in the WordPress community are of:
- Low quality in terms of performance
- Error-prone
- Lacks security best practices
So, by keeping your plugin count to a minimum, you can reduce the above-mentioned risks.
“Okay! But how do I know which plugin is good or bad”.
It is tough, but you can:
- Read the plugin reviews before installing it
- See if the plugin is being actively maintained
That is all you can do.
“Nice! What is the best plugin count?”
There is a silver bullet here because every site’s purpose is different.
Having less than 20 active plugins is ideal but this is impractical for complex websites.
The plugin count on my business websites is usually less than 10.

Remove plugins that are not being used frequently
Some plugins are only for temporary use and their necessity is infrequent.
For example, we only need the “Regenerate thumbnails” plugin when we have created custom thumbnail sizes for our website and this is pretty rare.
So this plugin’s use is temporary and must be deleted as soon as the use is over.
Here is the list of such plugins:
- Migration plugins like Duplicator, WP DB Migrate Pro, etc.
- Image compression plugins like Imagify, EWWW, Shortpixel, etc.
- Database cleanup plugins
- File manager plugins like Firebird, File Manager Advanced, etc.
- Page duplication plugins such as “Page Duplicator”
Don’t let them impact your website negatively.
So, delete them as soon as their usage is over and install them back when you need them again.
Themes
Avoid custom functionality inside your theme
Be it a custom theme or a third-party theme, a WordPress theme should only deal with the look and feel of the website.
It shouldn’t deal with the content or functionality of the website by any means.
This is to ensure that no content on your website is lost when you switch themes.
So, make sure your theme doesn’t contain:
- Registration of custom post types
- Registration of custom taxonomies
- Hard-coded content inside the theme’s template files
If your theme has any of these, move them to a custom plugin.
Avoid themes that come with built-in page builder functionality
Long theory short
Avoid themes that come with built-in page builder functionality or prepare yourself to rebuild the entire content of the website in the long run.
Long theory
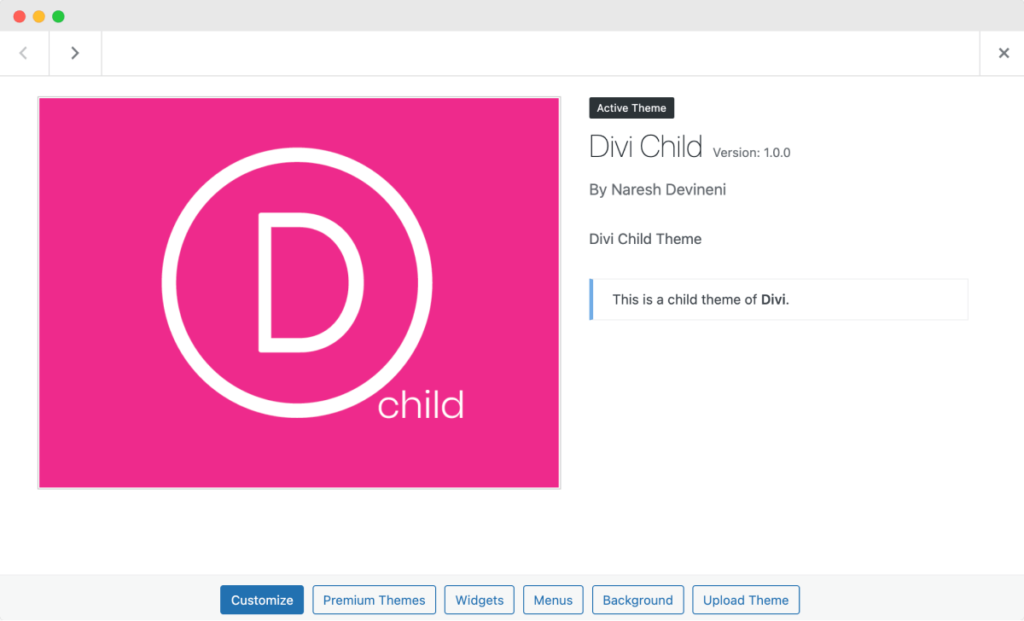
The most popular theme with an inbuilt page builder is Divi.
It has a huge fan base for good reasons.
A small business owner with little to no budget can build a really good-looking and functioning website with Divi.
And that too without developer support.
I have a bunch of clients who are making 5000$ per month in sales by using a Divi theme. So much helpful.
Not everybody can afford a custom theme developer and a designer when they are just getting started, right?
But there is one problem and it comes in the long run.
As time passes by, your ideas around your website will get more ambitious and this will force you to move away from Divi because of its limitations.
And when you decide to move away from Divi for some reason, it breaks the content of your website big time.

Did you see that?
That is how your website will look like when you switch from a Divi theme to a default WordPress theme.
This means that Divi is dealing with the content as a theme and it shouldn’t be doing that.
The clients I mentioned before have faced the same problem and that is when they contacted me for help.
Eventually, some of them even moved to Shopify.
Not just Divi, most themes with the highest sales on Themeforest come with their own page builder and you should them too.
These so-called page builder themes are not good for content-heavy websites in the long run. Be cautious about this.
Imagine having to recreate 100s of blog posts after migrating away from Divi.
So, instead, you have to go with:
- A premium theme that supports native WordPress Block Editor. For example, GeneratePress and Astra.
- Or a Custom Theme if the budget permits (best possible option)
Choose a custom theme for better control, performance, and less maintenance
Even if they are highly performant, third-party themes like GeneratePress and Astra come with maintenance headaches.
- They are still a third-party theme.
- They still ship with customization options that you don’t need.
- If you have a custom design, achieving 100% design control is questionable too.
- They ship with integration support for various plugins you might not install at all. For example, they by default support plugins like Woocommerce, Elementor page builder, Beaver Builder, Learndash LMS, etc.
- This might result in compatibility errors and you spending more money than investing on a custom theme.
And a custom theme will solve all these problems.
A custom theme:
- Gives you ultimate control over the design because it will be tailor-made for your needs and your needs only. This is why you also don’t need any customization options.
- Gives you ultimate control over the performance of the website because you can decide to eliminate a lot of code and plugin integration support that you don’t need.
- Reduces maintenance headaches if it is very well coded because following WordPress standards is easy while coding the theme.
- All will make your site error free and saves you a lot of money in the long run.
A custom theme is more like having your own house while a third-party theme is more like a rented house.
With a custom theme, the upfront investment is big but the benefits often overweight them.
Choose a highly performant theme

If coded as per the recommended standards, every theme is highly performant.
But this is not the case with most third-party themes out there.
Most third-party themes come with a lot of customization options and code bloat because they try to satisfy the design needs of 100s of business owners.
And this results in a slow website.
So, if you care about the performance, choose your theme carefully.
If you have the budget, go for a custom theme because it gives you ultimate control over the design and performance of the website.
If you don’t have the budget, here are the most performant third-party themes according to my experience with client websites:
Yep, there are not many.
A few good things about these themes are:
- They are built with website speed in mind
- They support WordPress block editor
- They ship with customization options that are only absolutely necessary.
Make sure your theme is compatible with the latest version of PHP
WordPress is a CMS software written using the PHP programming language.
And just like any programming language, new versions of PHP will get released every year.
With every new version release of PHP, these things happen:
- New features will get shipped
- Some of the old features will get deprecated (can no longer be used)
- WordPress core software is always two steps ahead and supports the new version of PHP.
- Your web host (if any good) will automatically upgrade their servers to use the latest version of PHP.
Because of these things, if your theme and plugins are not compatible with the latest version of PHP, WordPress will throw fatal errors that look ugly to our front-end visitors and destroys the website’s reputation.
This happened to many of my clients who were using age-old themes without updating them to newer standards and it proved costly to them.
So, it is important for you to make sure your theme and plugins are compatible with the latest version of PHP.
It’s okay if we don’t take advantage of the new features in our theme. Only performance will take a hit.
But make sure your theme is not using any old PHP stuff.
Use a child theme if you are using a third-party theme
It is a common practice to make changes to a WordPress theme to tweak the look and feel of the website.
Sometimes we need to change the CSS code to make design tweaks.
Sometimes we need to change the PHP code to output some custom data.
The problem is not with performing these changes.
The problem is on what kind of theme we are performing these changes.
There are two kinds of WordPress themes:
- The custom theme that is tailor-made for you
- A third-party theme that you have downloaded from the internet. Be it a free theme downloaded from wordpress.org or be it a premium theme downloaded from a marketplace like Themefortest.net. It comes under a third-party theme.
If we are performing these changes on a custom theme that is specifically built for your website, then there is no problem.
You can do whatever you want with it in terms of customization.
But if it is a third-party theme, you shouldn’t make any changes to its code files.
Usually, third-party theme developers release a good chunk of updates every year.
And whenever you perform an update on a third-party theme, all the file changes you have made inside the theme are lost because a theme update usually replaces the entire theme folder with the new version.
“Got it! But where do I add my changes?”
Don’t worry. This is where a child theme comes in.
What is a child theme?
A child theme is nothing but an extension of the parent theme.
It helps you override certain parts of the parent theme without affecting the parent theme.
And the best part is, you can preserve all the changes you make inside the child theme.
Simply put, even if you perform updates on the Parent theme, those updates will not impact the child theme in terms of file changes.
Also, be it a custom theme or a third-party theme, you can always create a child theme for it.
For example, I currently have a client who runs a multisite of 5 websites.
I created one parent theme for the overall layout and design structure.
And I created 5 child themes to address the customization needs of each subsite.
Troubleshooting
Always keep FTP credentials handy
Whenever WordPress throws an error, it is mostly due to a poorly coded plugin or a PHP coding error inside the active theme.
To fix the issue, you need to start deactivating all the plugins one by one to check which plugin is the culprit.
If the error is gone after a particular plugin is deactivated, you need to keep the plugin deactivated.
If you think that the problem is with the active theme, you need to switch to a default theme to see if the error goes away.
But to do any of these troubleshooting activities:
- You need access to WordPress Admin Dashboard
- Or, as a Plan B, you need “file system” access to your WordPress website.
When you are stuck with a fatal error, most often, it is not possible to log into WordPress Admin Dashboard.
If that is the case, you’ll need to access the file system of your website to perform the troubleshooting activities.
But how do you access the file system?
It is essential to fix the issue, right?
This is where FTP Access comes in handy.
FTP is short for File Transfer Protocol and it helps you access your website files via tools like File Zilla.
And, to access your website files via FTP, you need to create an FTP account with your web hosting company.
It is totally free to create an FTP account and once you are done with it, you’ll get credentials like these:
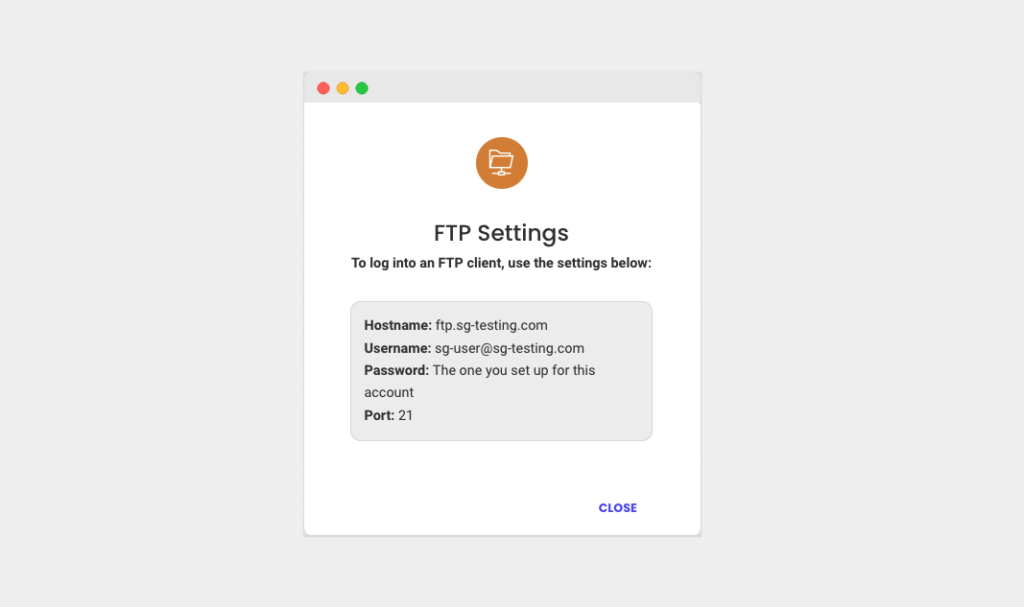
If you have these credentials handy and if something goes wrong with your website, you can start the troubleshooting process right away.
“Got it, But how do I use these credentials?”
Good question!
You provide these credentials to an FTP tool like Filezilla to access your website files.
If you are not sure how to access your website using FTP, I have created a detailed tutorial here about how to use it.
Always perform troubleshooting on a staging site
Troubleshooting is nothing but tearing the website piece by piece to find the root of the problem.
So, if we perform troubleshooting on the live website, it could cause further damage to the functionality of the website.
And, worst, it could expose some important functionality details of our website to the public on the internet.
This is where a staging site comes in handy.
A staging site is an isolated version of your website where you can perform all kinds of experiments and troubleshooting activities.
It is not visible to the public unless you share a link with them.
So, it is the most effective way to troubleshoot why something went wrong by not breaking your website further.

My bullet-proof process for troubleshooting any WordPress issue
I follow the exact same process whenever I troubleshoot my client websites.

Step 1: Create a staging site if it doesn’t exist or update an existing one
When we create a new staging site, it will be an exact replica of our live website. We don’t have to worry in this case.
But if the staging site already exists, we have to make sure that it is up to date with the live site.
If the staging site is not up to date, we can’t troubleshoot accurately because the problem might not exist in the staging environment.
If your site doesn’t have a staging feature at all, then trust me, it is a good idea to move to a web host that has a staging feature inbuilt.
It will save you a lot of time and money in the long run.
According to my experience, WPEngine has the best staging site functionality.
Step 2: Enable debugging mode in WordPress
The next step is to enable debugging for your staging site.
To do this, find the wp-config.php file of your staging website.
Then turn on debugging by setting the wp_debug setting to true:
define("wp_debug", true);By default, it will be set up as false.

Perform this step only if you know what you are doing.
If you mess up the code syntax, you’ll get a fatal error.
But it’s okay because it is a staging site :P
Step 3: Finding the traces of the problem
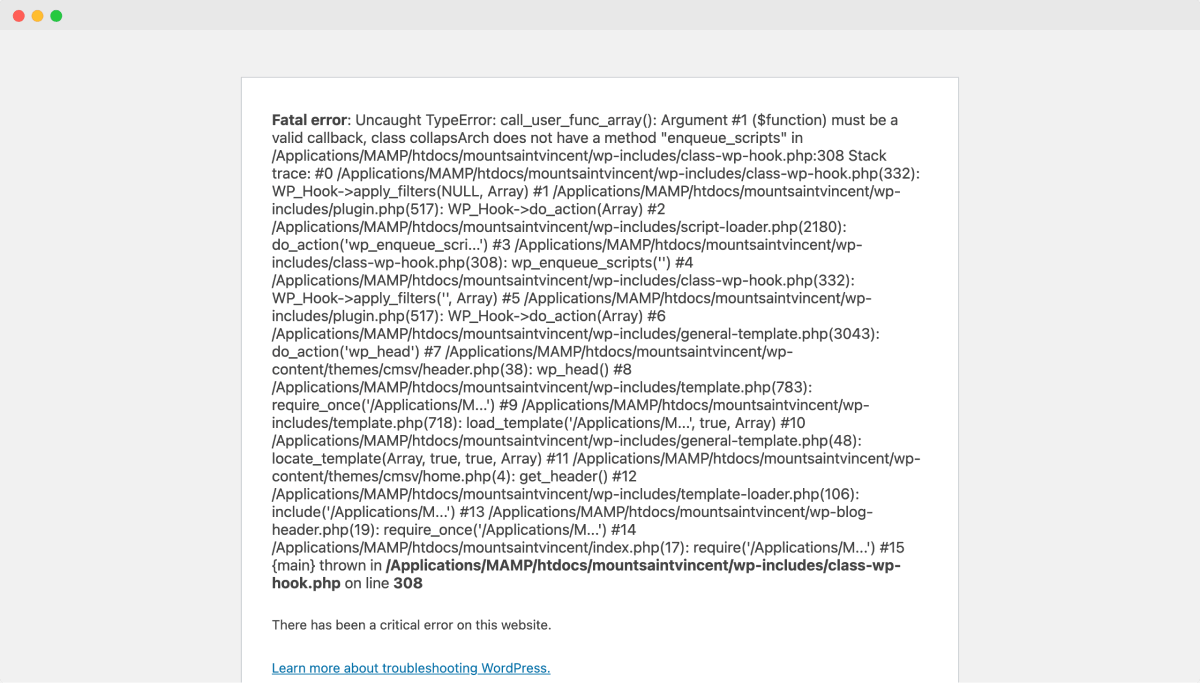
After turning on the debug mode, go ahead and refresh the browser again.
This time you’ll see a detailed error message stating what went wrong.

Now look for the words “plugins” or “themes” inside the error message.
If they are found, you can easily see which plugin or theme caused the problem and then take the necessary action.
If it is a theme, you will definitely find its name inside the error message along with the file name and the line number where the error occurred.
If the problem is with the plugin, the action could be turning off a particular setting inside the plugin or deactivating it altogether.
Anyway, if the problem is with a particular plugin, sometimes you can not see its name.
In that case…
Step 4: Start deactivating the plugins one by one
If the root of the problem is unclear, start deactivating the plugins one by one and see if the error is gone.
In most cases, deactivating a certain plugin will fix the issue.
If you don’t have access to the admin dashboard, then use FTP to deactivate the plugins one by one.
For deactivating a particular plugin via FTP, you just need to rename the plugin folder to something different from the original.
I usually add an underscore (_) in front of the plugin folder name.

For example, if the plugin folder name is far-future-expiry then I would rename it to _far-future-expiry
If you are not familiar with what FTP means, read my article here.
Step 5: Switch to a default theme
Sometimes, the problem could be with a compatibility issue between a theme and a plugin.
For this kind of problem is impossible to find whether the problem is with the theme or the plugin.
For cases like this, switching to a default theme will fix the issue. It happened to me a lot of times.
If the issue got resolved after switching to a default theme, then the problem is a compatibility issue between the active theme and a plugin.
We can’t tell who is at fault because it is impossible for a plugin developer to support every theme out there in the market.
This applies to theme developers as well. They can’t support all the plugins in the market.
The blame game is quite often in this scenario.
Step 6: Remove the error on the live site
Now, let’s just say you figured out the problem and it got resolved after deactivating a plugin or switching to a default theme.
Apply the same thing on the live site so that your visitors don’t see the ugly error message.
After removing the error on the live, start can dig deeper into the problem and fix the issue permanently.
Step 7: Applying a permanent fix
Now that you know what kind of problem it is, depending on your skill set, you can try to fix the problem permanently.
The permanent fix could take many directions.
If the problem is with a custom theme, you’ll get it fixed by being a developer or by hiring a developer.
If the problem is with a third-party theme, then you will need to reach out to the developer asking him/her to fix the issue. This could take a lot of time.
If the problem is with a third-party plugin, then you have two options here:
- Finding and moving to an alternative plugin
- Reaching out to the developer asking to fix the issue.
If the problem is with the third-party theme or plugin, then don’t try to fix it by modifying them because you’ll lose those changes when you update them.
That’s all!
Never automatically push the changes from the staging site to the live site
Being able to automatically push changes made on the staging site to the live site is a great feature.
But it is only a great feature if your website is a static business website or a new website.
If you have a dynamic website, even though you made sure that the staging site is an exact replica of the live site, don’t push the fixes you made on the staging to the live site automatically.
The reason behind this is pretty simple.
Now let’s just say you cloned the live site at 10:30 am.
At 10:30 am, you started troubleshooting on the staging site and fixed the issue by 12:30 pm.
In between these two hours:
- Someone might have published an article on the live site.
- If it is an e-commerce website, someone could have purchased something.
In both cases, that data is totally lost when you push the staging site content that is old by two hours.
So, I always recommend manually repeating all the changes on the live site.
 © 2026 UsableWP. A project by Naresh Devineni.