Introducing the body_class() template tag
In the last lesson, we are temporarily done with the <head> tag.
Now, let’s move on and deal with the <body> tag.
To give us some dynamic control over the styling of any webpage, WordPress provides us with a body_class() template tag and this template tag echoes out the classattribute with some really handy classes to the opening <body> tag.
Note: Utilizing this function is not mandatory while developing a theme.
This function accepts a single parameter in the form of a PHP string or a PHP array so that you to attach your own custom classes to the list of dynamic WordPress generated classes.
Usage of this function with a PHP string as its first parameter.
<body <?php body_class('no-js some-custom-class-name'); ?>>
Usage of this function with a PHP array:
<body<?php body_class( array( 'no-js', 'some-custom-class-name' ) ); ?>>
You can use both the above techniques to attach multiple custom classes to the <body> tag.
Anyway, let’s try it out.
Open up the header.php file and replace the plain <body> tag with the following code:
<body <?php body_class('no-js'); ?> id="site-container">
Here is the final header.php file for this lesson:
<!DOCTYPE html>
<html <?php language_attributes(); ?>>
    <head>
        <meta charset="<?php bloginfo( 'charset' ); ?>">
        <meta name="viewport" content="width=device-width, initial-scale=1">
        <link rel="profile" href="http://gmpg.org/xfn/11">
        <link rel="pingback" href="<?php bloginfo( 'pingback_url' ); ?>">

        <?php wp_head(); ?>
    </head>
    <body <?php body_class('no-js'); ?> id="site-container">
If you notice, I also added an ID to the body element.
I also want to attach a single custom no-js class name to the <body> tag, so I went with a PHP string. We will remove this no-js class with Javascript. It’s a handy little trick to determine whether the Javascript is enable in the browser. If you are an experienced frontend developer, you are already familiar with this technique.
Now, let’s go back to the browser and view the page source of our Homepage
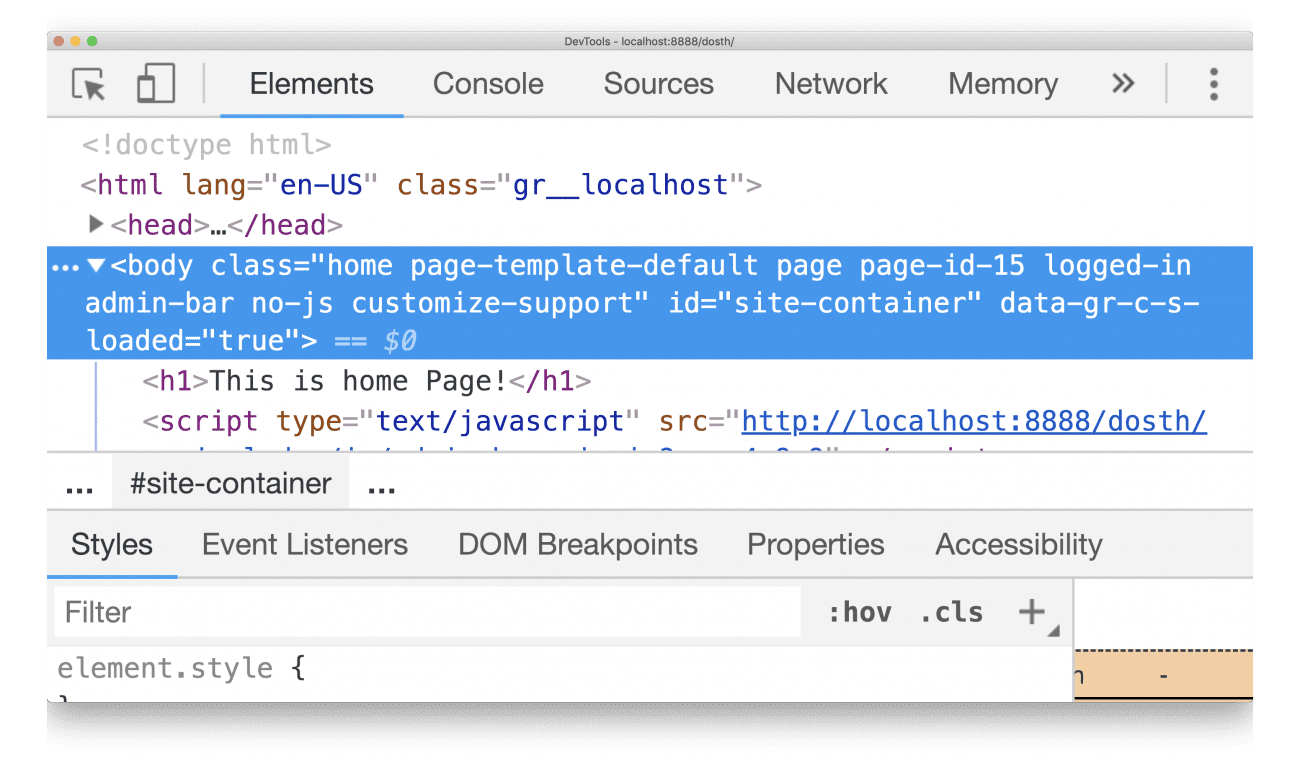
Woah! WordPress is logically echoing a lot of HTML classes and it generates these classes based on a lot of factors. If we watch them closely, these classes will convey more information about a particular webpage. So, let’s quickly run through these classes.
- The
homeclass tells us that the webpage is the Homepage of the website. This applies to a static front-page and a front-page with blog posts. - The
page-default-templateclass tells us that the WordPress is using the default template to render this webpage. This class is specific to the WordPress pages. If you are looking at a webpage with a single blog post, you will be seeing apost-default-templateclass instead. - The
pageclass tells us that this is a WordPress page. If you looking at a webpage with a blog post, you’ll be seeing a class name of post instead. - The
page-id-15class tells us that this is a WordPress Page with ID of 15. - The
logged-inclass tells us that we are logged in as a user. This applies to every user of our website, even the front-end user of our website. For example, Woocommerce as an e-commerce plugin allows the visitors of your e-commerce website to login and purchase the products. Woocommerce uses the WordPress user management system internally to manage the user accounts. - WordPress echoes out the
admin-barclass only if the user is logged in and “Show Toolbar When viewing site” option is turned on inside the user profile.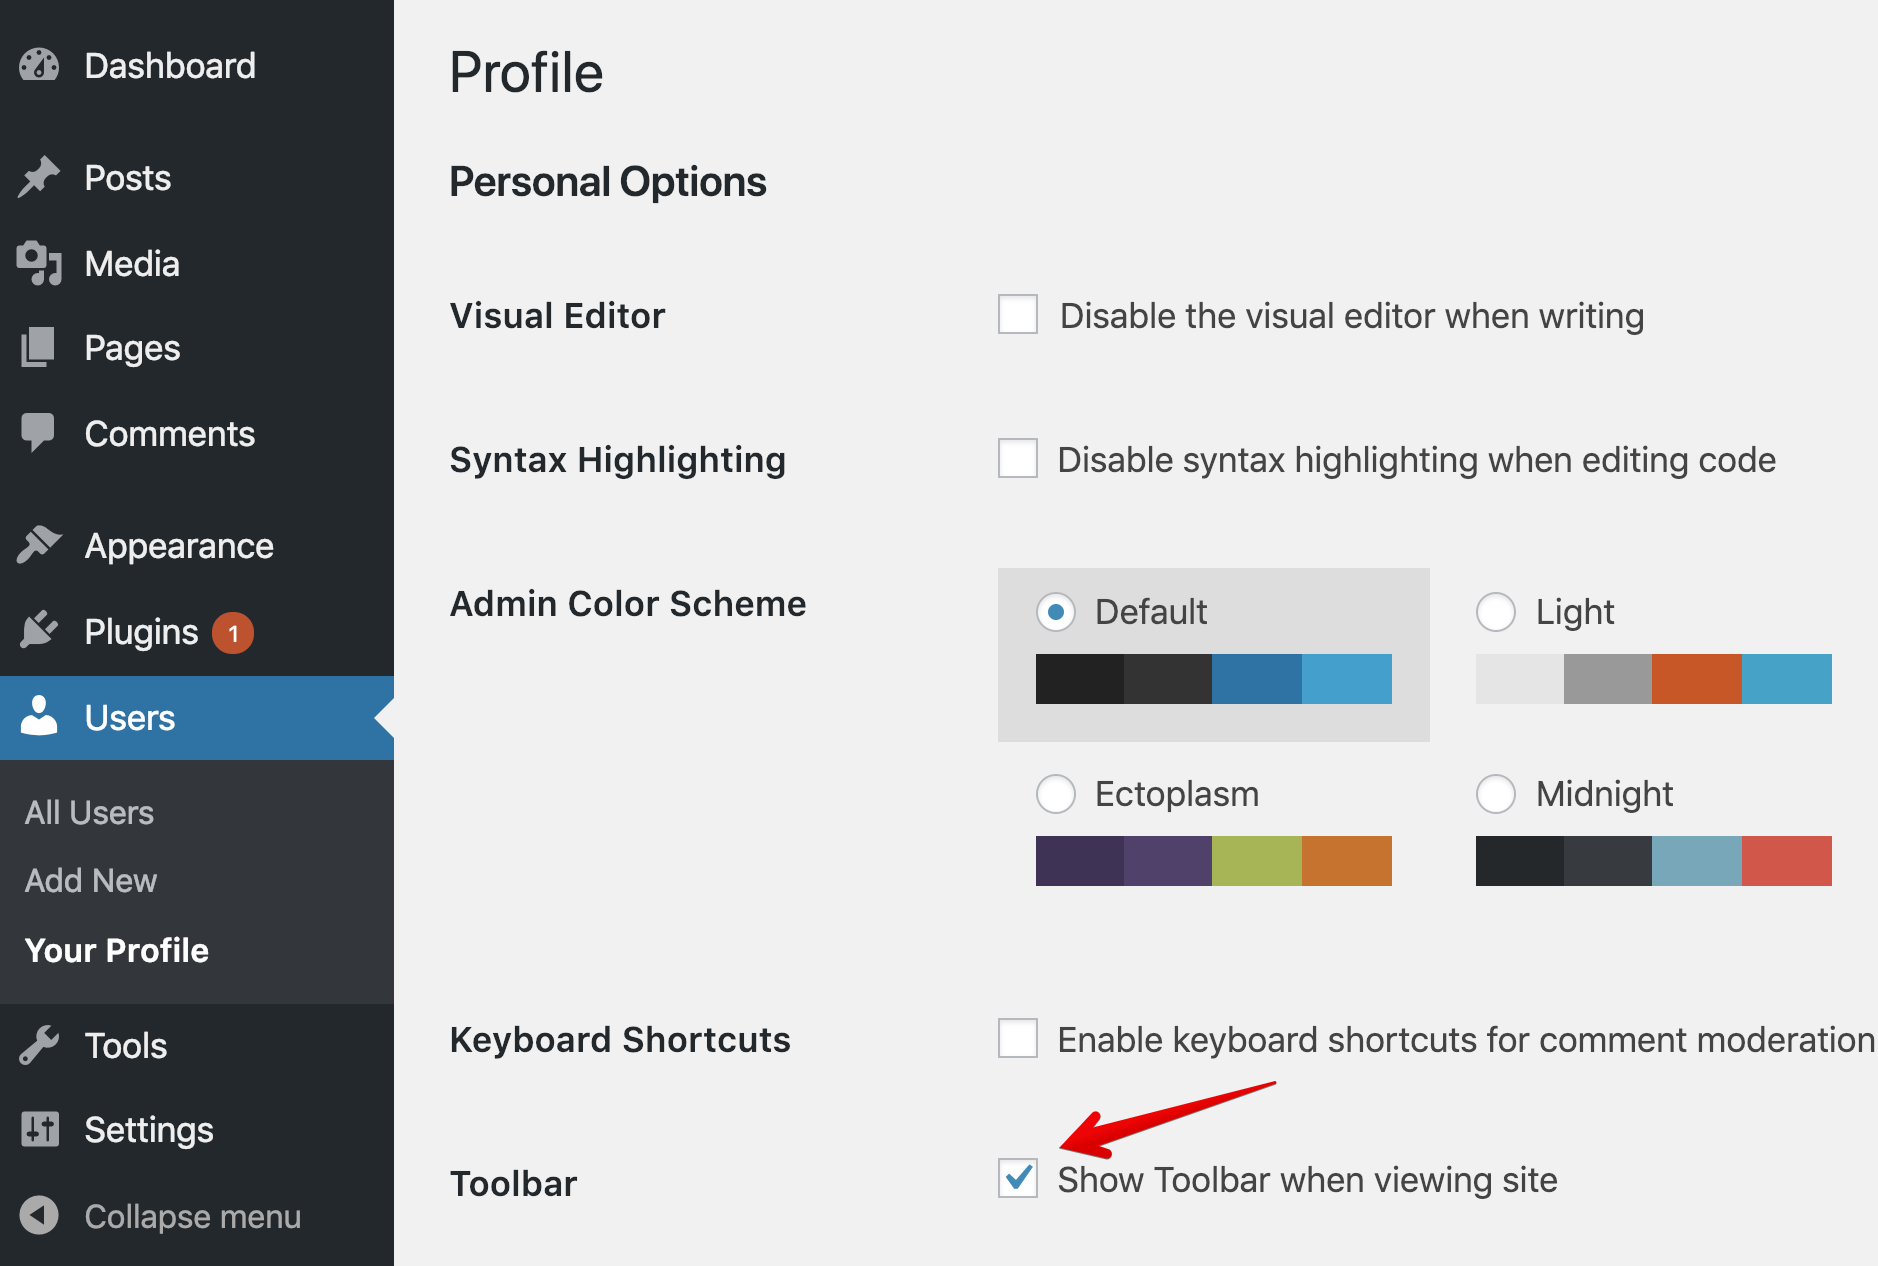
- The
no-jsis our custom class - The
customize-supportclass tells us that WordPress relied on the Admin Dashboard -> Appearance -> Customize panel to generate some of the HTML mark up of this webpage. And in our case, WordPress is using the Customize panel to generate the favicons.
Important Realization: The final list of classes that WordPress generates using the body_class() template tag changes from webpage to webpage and it is totally up to you utilize these classes to style the webpage. If you don’t want to use these automatically generated classes, you can remove the remove the body_class() function from the <body> tag.
Anyway, I use these classes to style a webpage differently from others and I use these quite extensively on every WordPress project. Trust me, these classes will become a lifesaver in a ton of real-world situations.
However, there is one problem.
What if you want to remove some of the classes that body_class() function is generating?
What if you want to add more classes based on a condition? Because we are dealing with PHP now, we can determine the user-agents like chrome browser and machines like iPhone to add appropriate classes to the body tag.
If we add classes like that in the development phase, we can easily fix cross-browser issues, right?
So, in the next lesson, we will take control of the body_class() function.
 © 2026 UsableWP. A project by Naresh Devineni.