How to create a database using PhpMyAdmin
You can create a Database in two ways. Using an easy to use interfaces like phpMyAdmin and using Command Line Interface( CLI ) like command prompt or macOS terminal.
If you are good with CLI and MySQL, there are tons of tutorials out there on the internet to guide you through the process. For the purposes of this course, I will stick with phpMyAdmin.
phpMyAdmin gives us an to easy to use interface to create, read, update and delete our databases. In short, it is a database management tool. It also lets you export databases with a single click. And the best thing is, phpMyAdmin is totally free. It is written in PHP, So, It can run anywhere a PHP code can run, and this is the reason why most of the Web Hosting Providers will provide you phpMyAdmin as part of their service.
I have been using phpMyAdmin for over a decade now. I use phpMyAdmin to back up a database, I use it to export my WordPress database when I am moving the website to a new server, and there are tons of other problems that phpMyAdmin solves for us.
phpMyAdmin is also an excellent tool for people who are just getting started with databases. When I started developing WordPress websites, I am a novice PHP developer with a very little database knowledge. phpMyAdmin turned me into a pro-MySQL developer with its exceptional features.
Alright, now let’s create a database using phpMyAdmin.
If you are on macOS, start your MAMP server, open up your browser and type http://localhost:8888/phpmyadmin/
If you are on Windows, start your WAMP server and type http://localhost/phpmyadmin
As soon as you hit the enter in your browser, you’ll be greeted with the phpMyAdmin login screen.
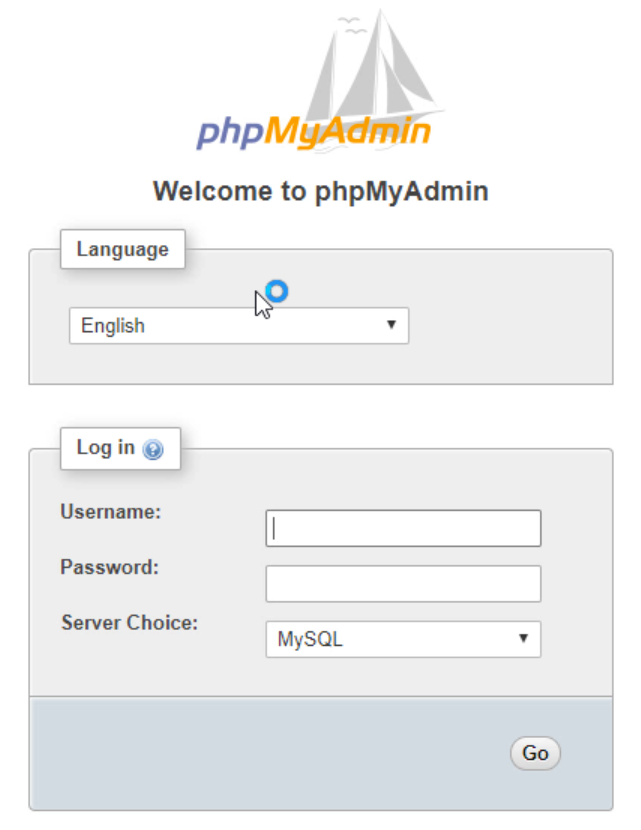
“Hey! I do not have any username or password. What do I do now ?”
By default, MySQL Server uses “grant privileges to the user to access a database” approach to protect access to its databases. This way, it can restrict access to a specific database only to the user with specific privileges.
Be it remote or local; every MySQL server comes with a pre-registered user called “root.” The root user has all the privileges to manage every database and user on the MySQL server.
MySQL server lets you create new users once you log in as the root user. A newly created user cannot access the already existing databases. For an individual user to access a particular database, the database administrator aka the root user must grant the permission on a database by database basis. We will see this in action once we move our finished WordPress site to the remote server like Godaddy. Don’t worry about it now.
Coming back to WAMP and MAMP, they come with a root user too, and We will use the credentials of root user to go inside phpMyAdmin and create and manage databases.
phpMyAdmin Credentials for MAMP user, be it Windows or macOS
Username: root
Password: root
phpMyAdmin Credentials for WAMP user
Username: root
Password: no password, so, leave the password field empty and hit Go.
You read it correctly, WAMP’s root user has no password. Local server environments are liberal as heaven, aren’t they?? :P
Enter the Dragon (phpMyAdmin)
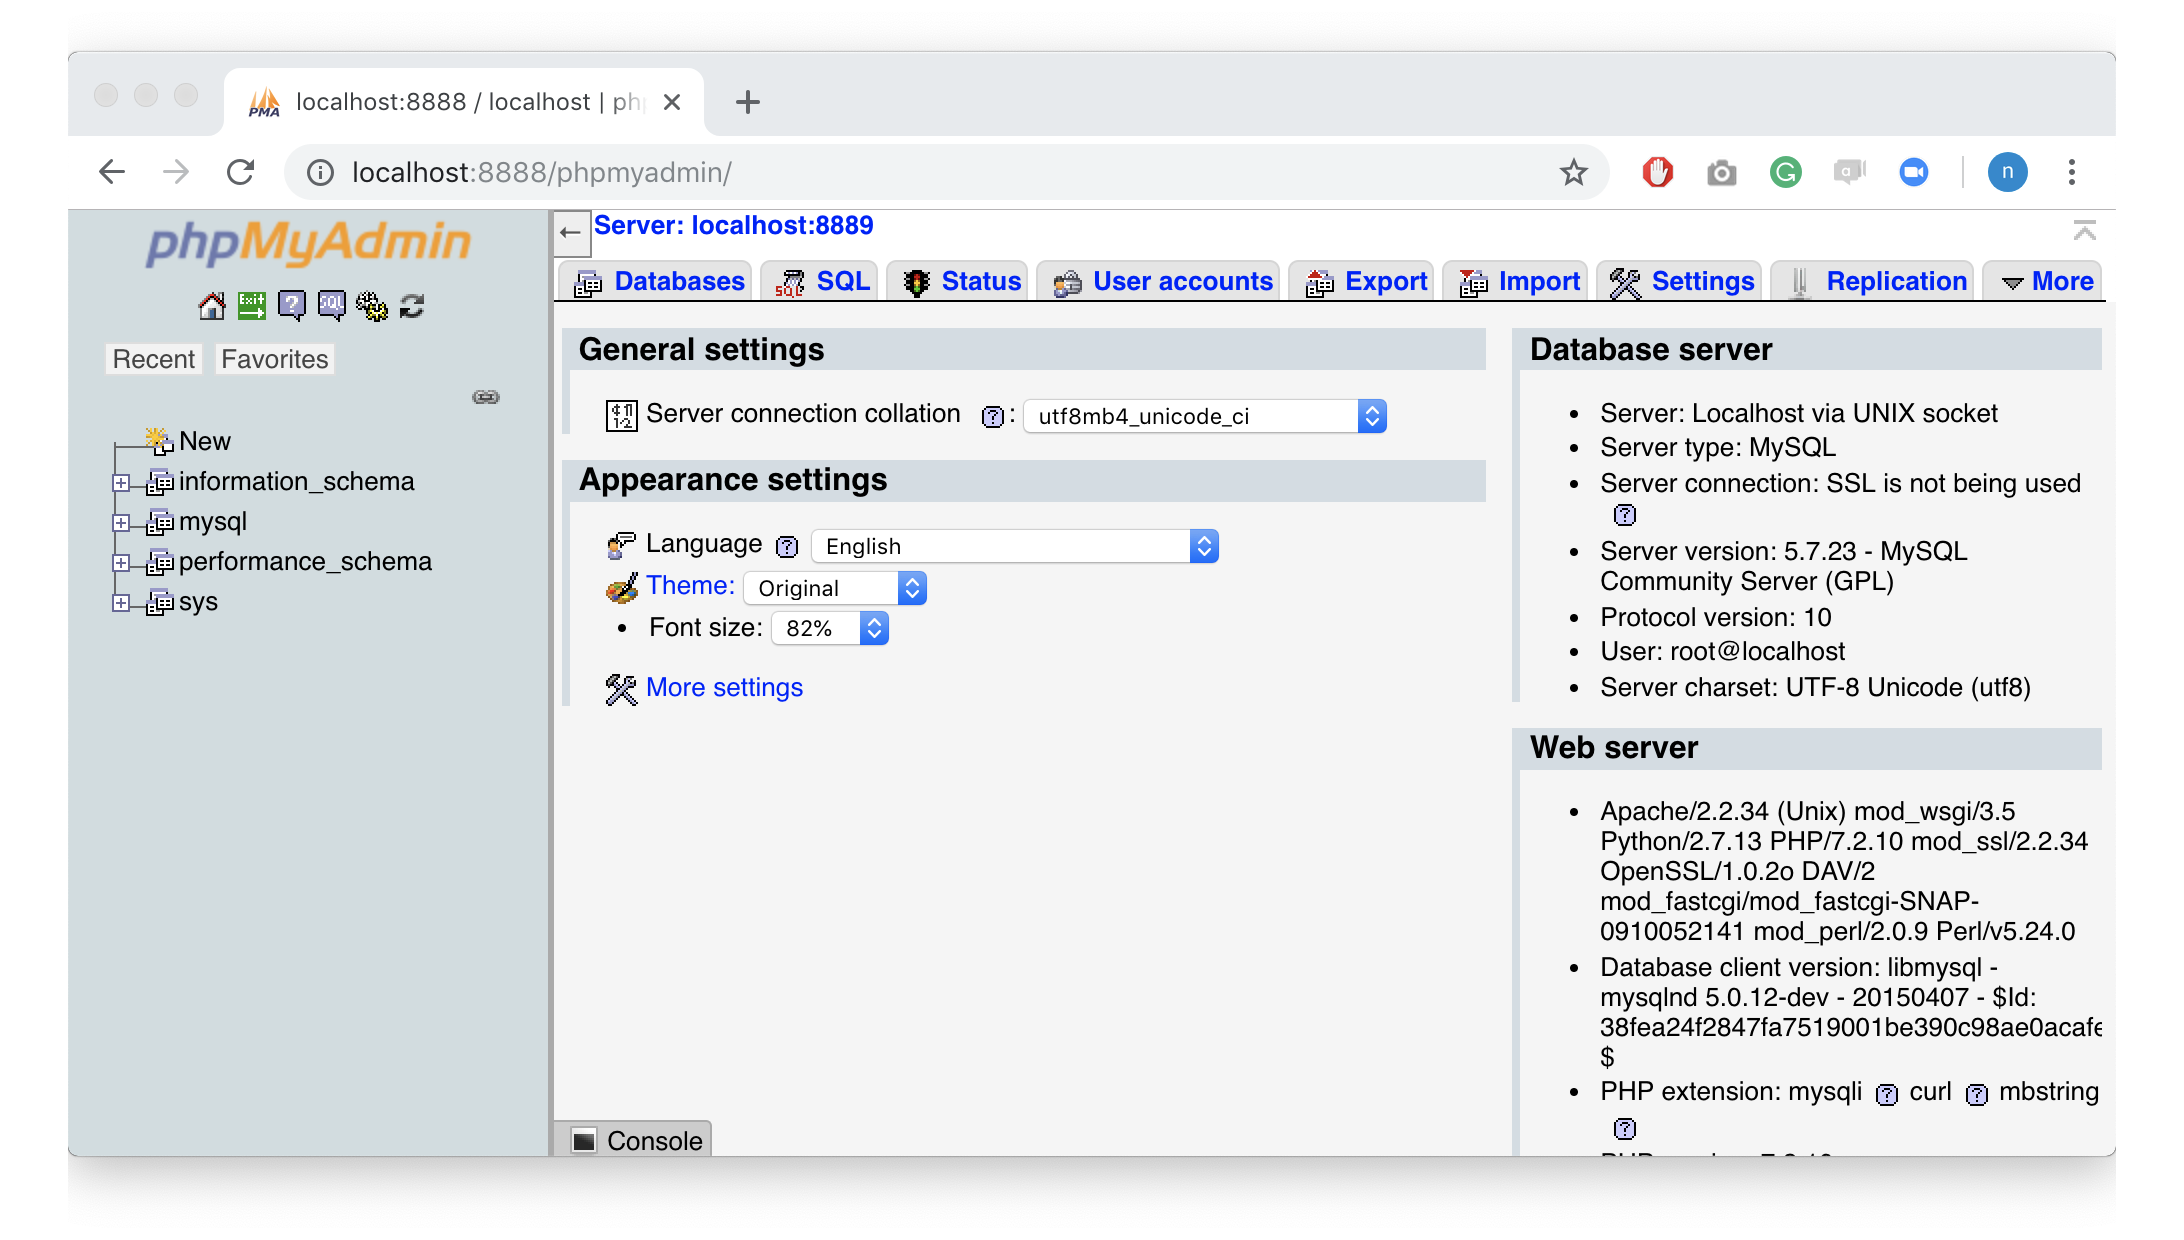
Now, on the left-hand side of the screen, we have the list of all the databases available to the root user. At the top portion of the screen, we have an important menu with buttons like SQL, User Accounts, Export, Import etc.. I will walk you through them when the need comes, for now, we are only interested in Databases button in the menu. Go ahead and click on that to create your first database.
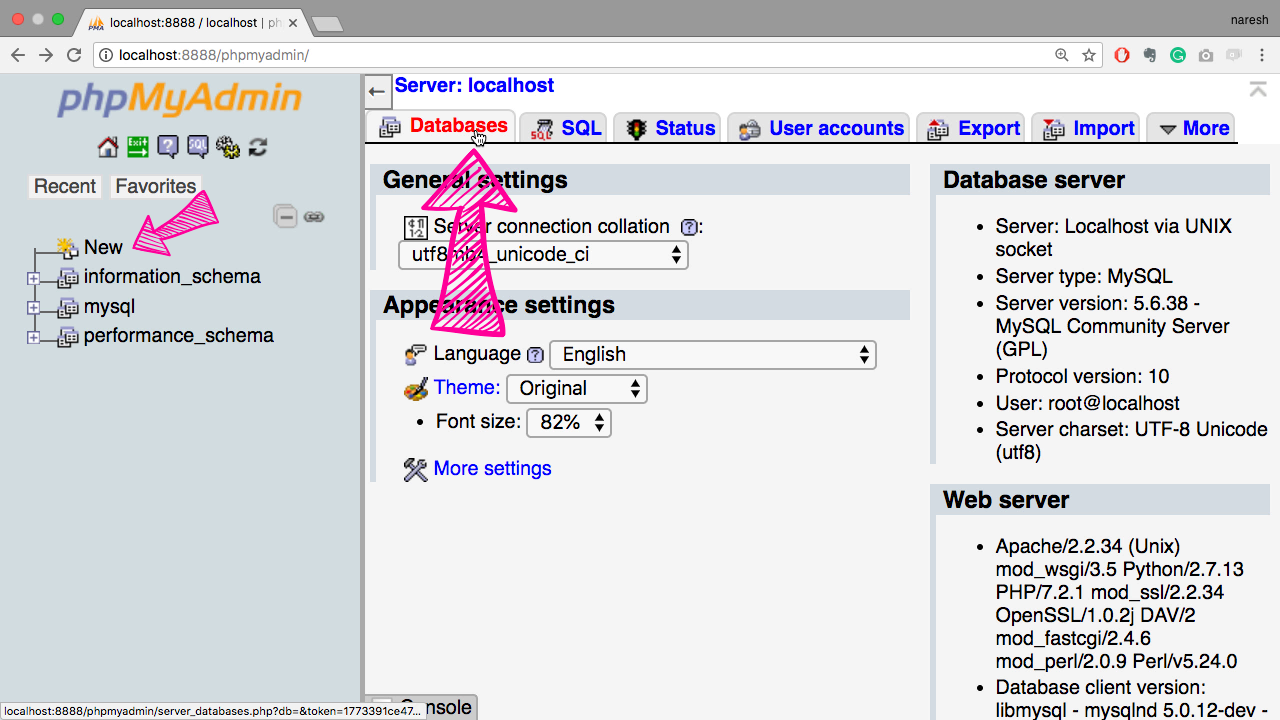
You can also create the database using the “New” link on the left-hand side of the screen. Both “Databases and New” links will take us to the same page.
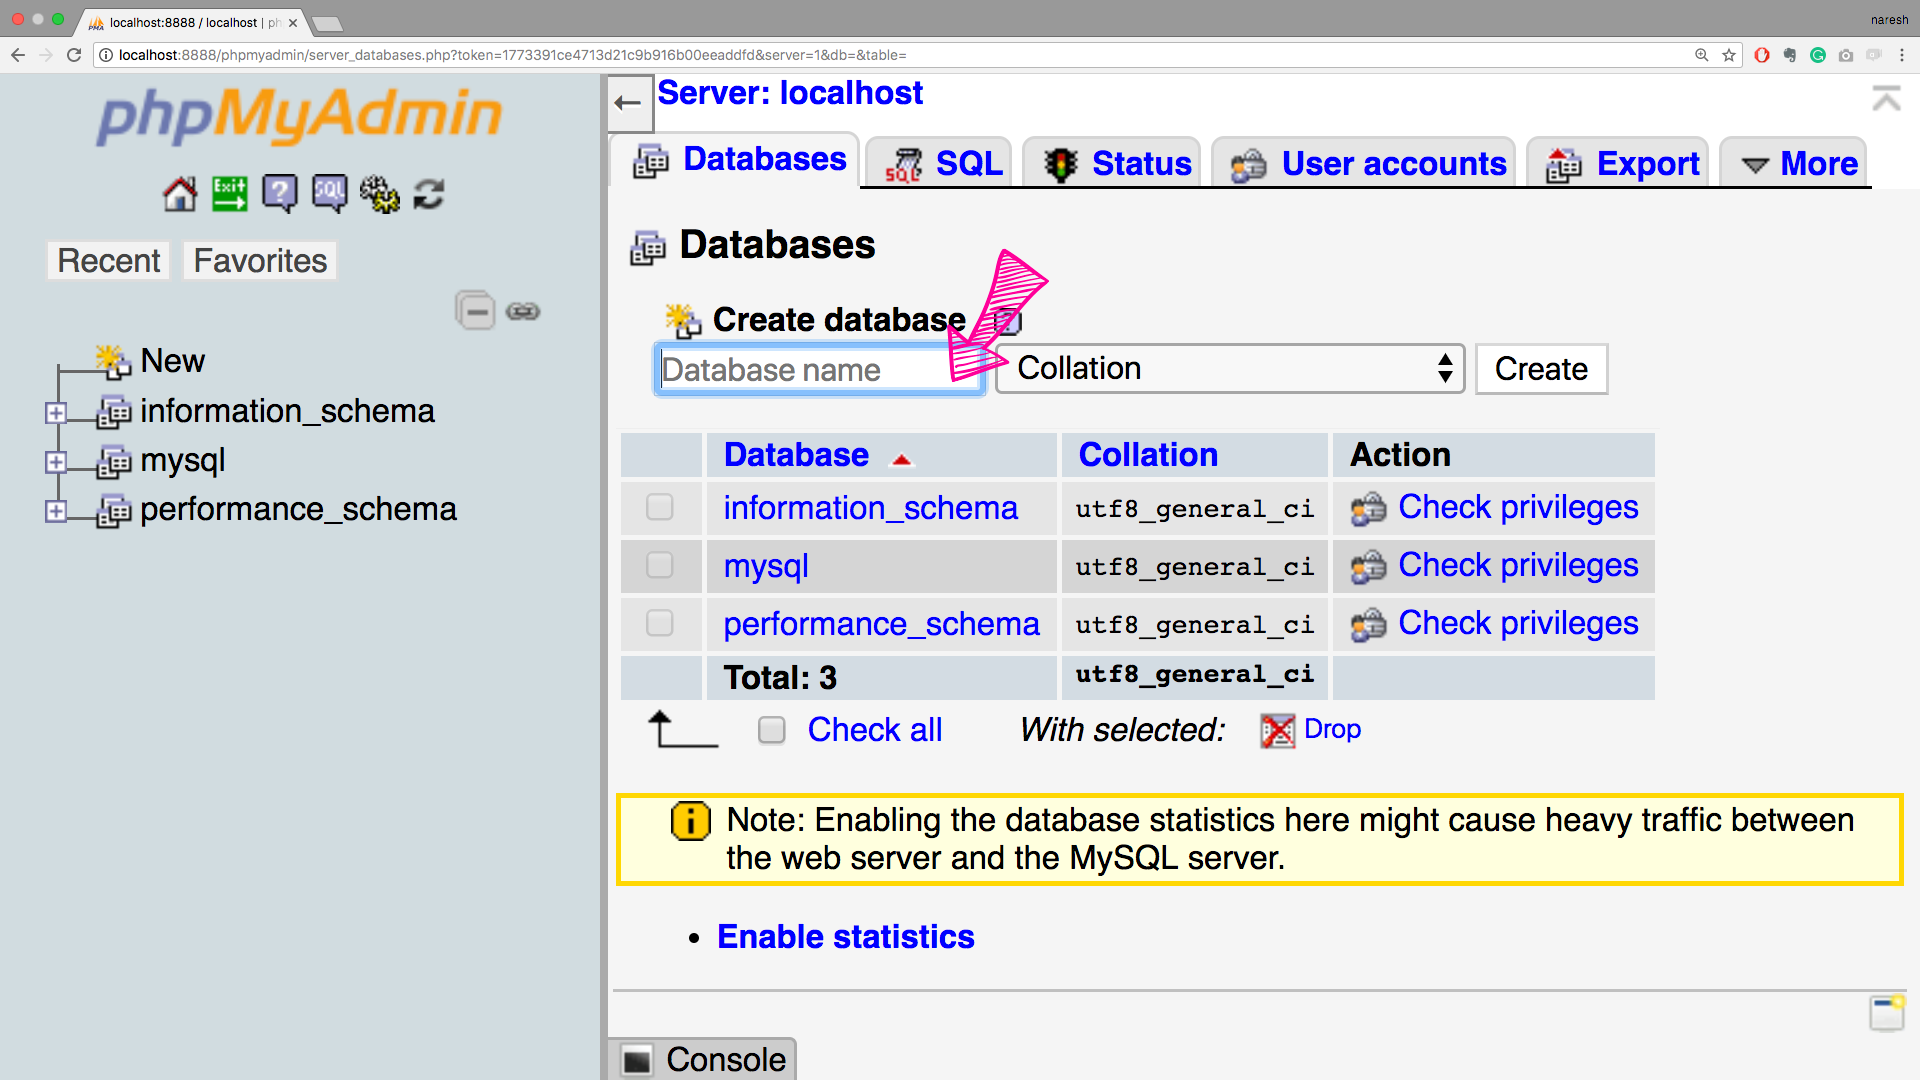
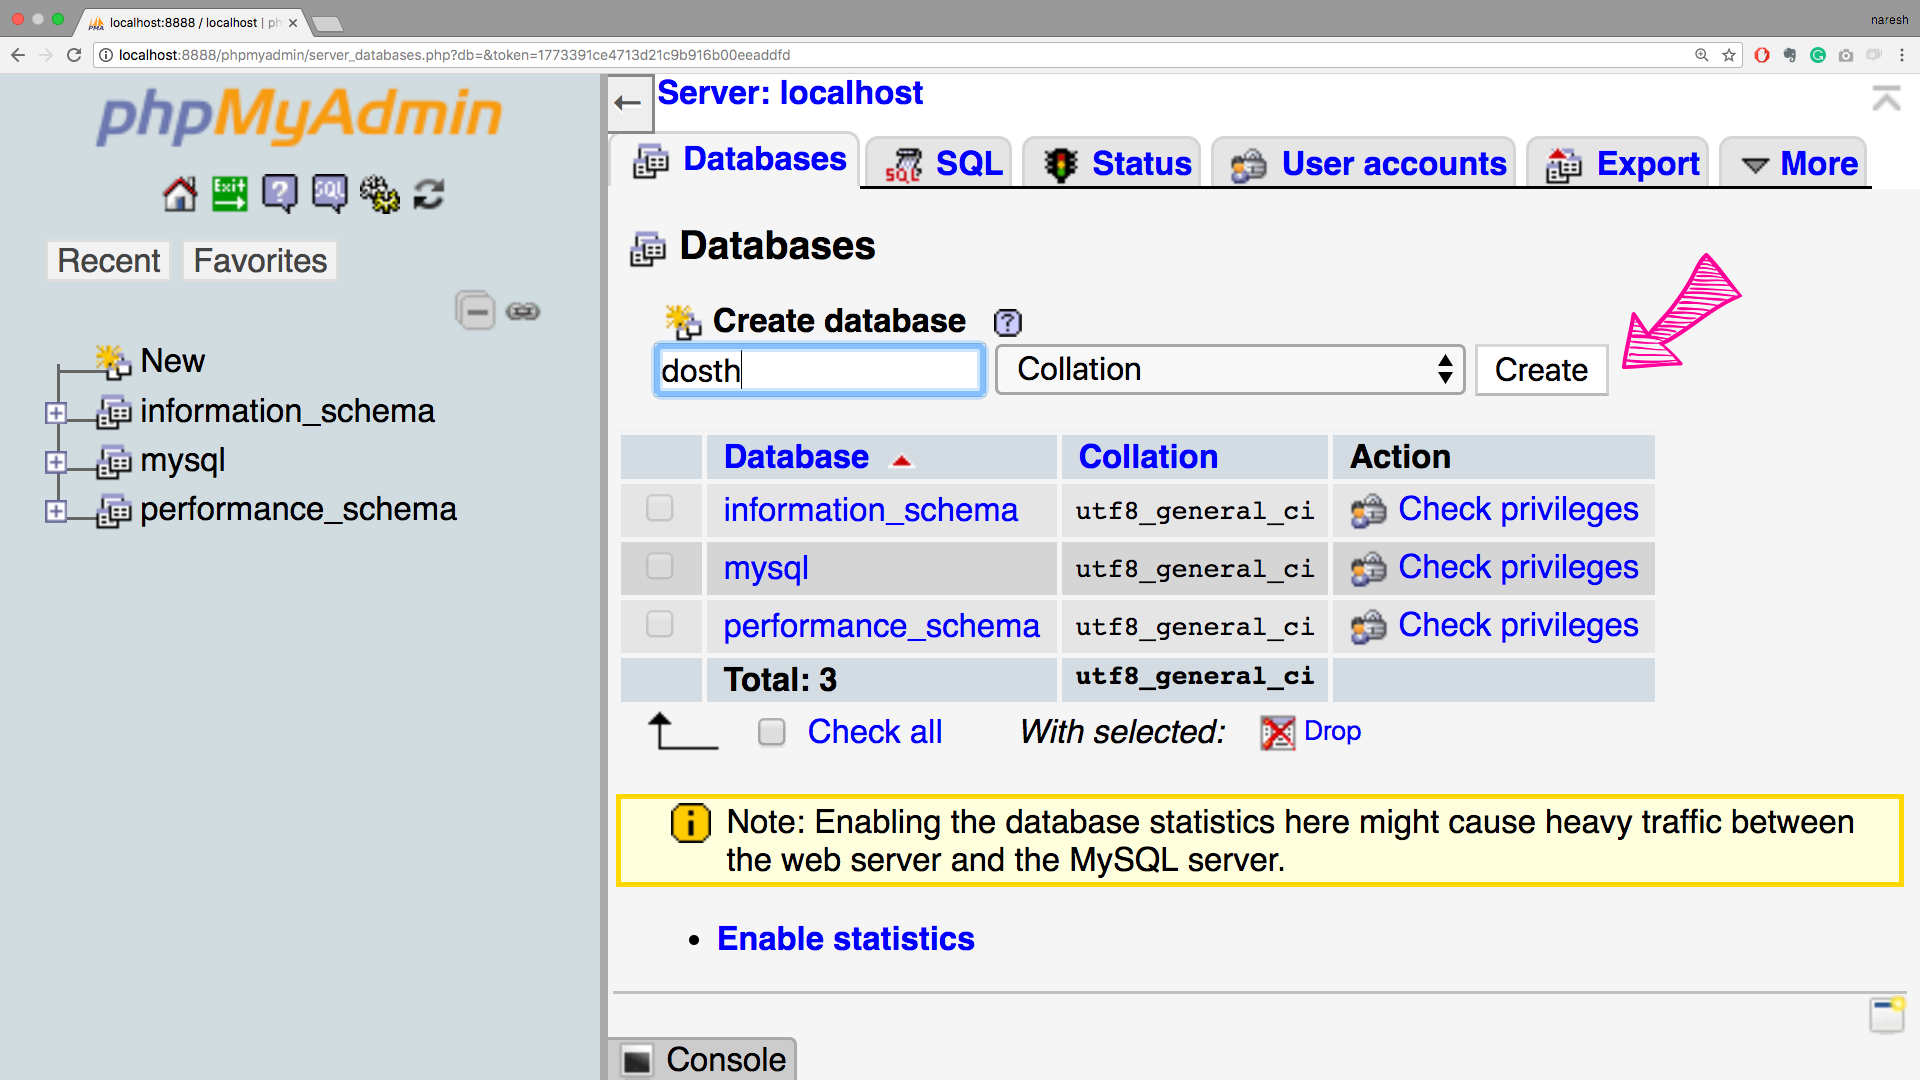
Once the page is loaded, you’ll see a “Create Database” form. You can enter the database name of your liking but for the purposes of this course, please name it dosth. This avoids all sorts of confusions in the future.
I am habituated to name my database after the domain name of the project. This way, I don’t have to remember the database name. Some say it is not a good practice because of security reasons. I agree with them. But since this is local to you and nobody else except you can access this database, you can name it whatever you want.
When I create databases on remote servers, I postfix some creepy letters to the database name so that no hacker can guess it :P
As soon as you hit the create button, phpMyAdmin does two things for us. First, it creates the database. Second, it selects the newly created database by redirecting you to the newly created database page.
If you notice, the breadcrumb and the menu in the top-middle part of the screen has changed. All the options residing under these menu items act on the selected database only. For example, if you click on the Search button in the menu, you can only search the contents of the selected database. If you click on the Export button, you can only export the selected database.
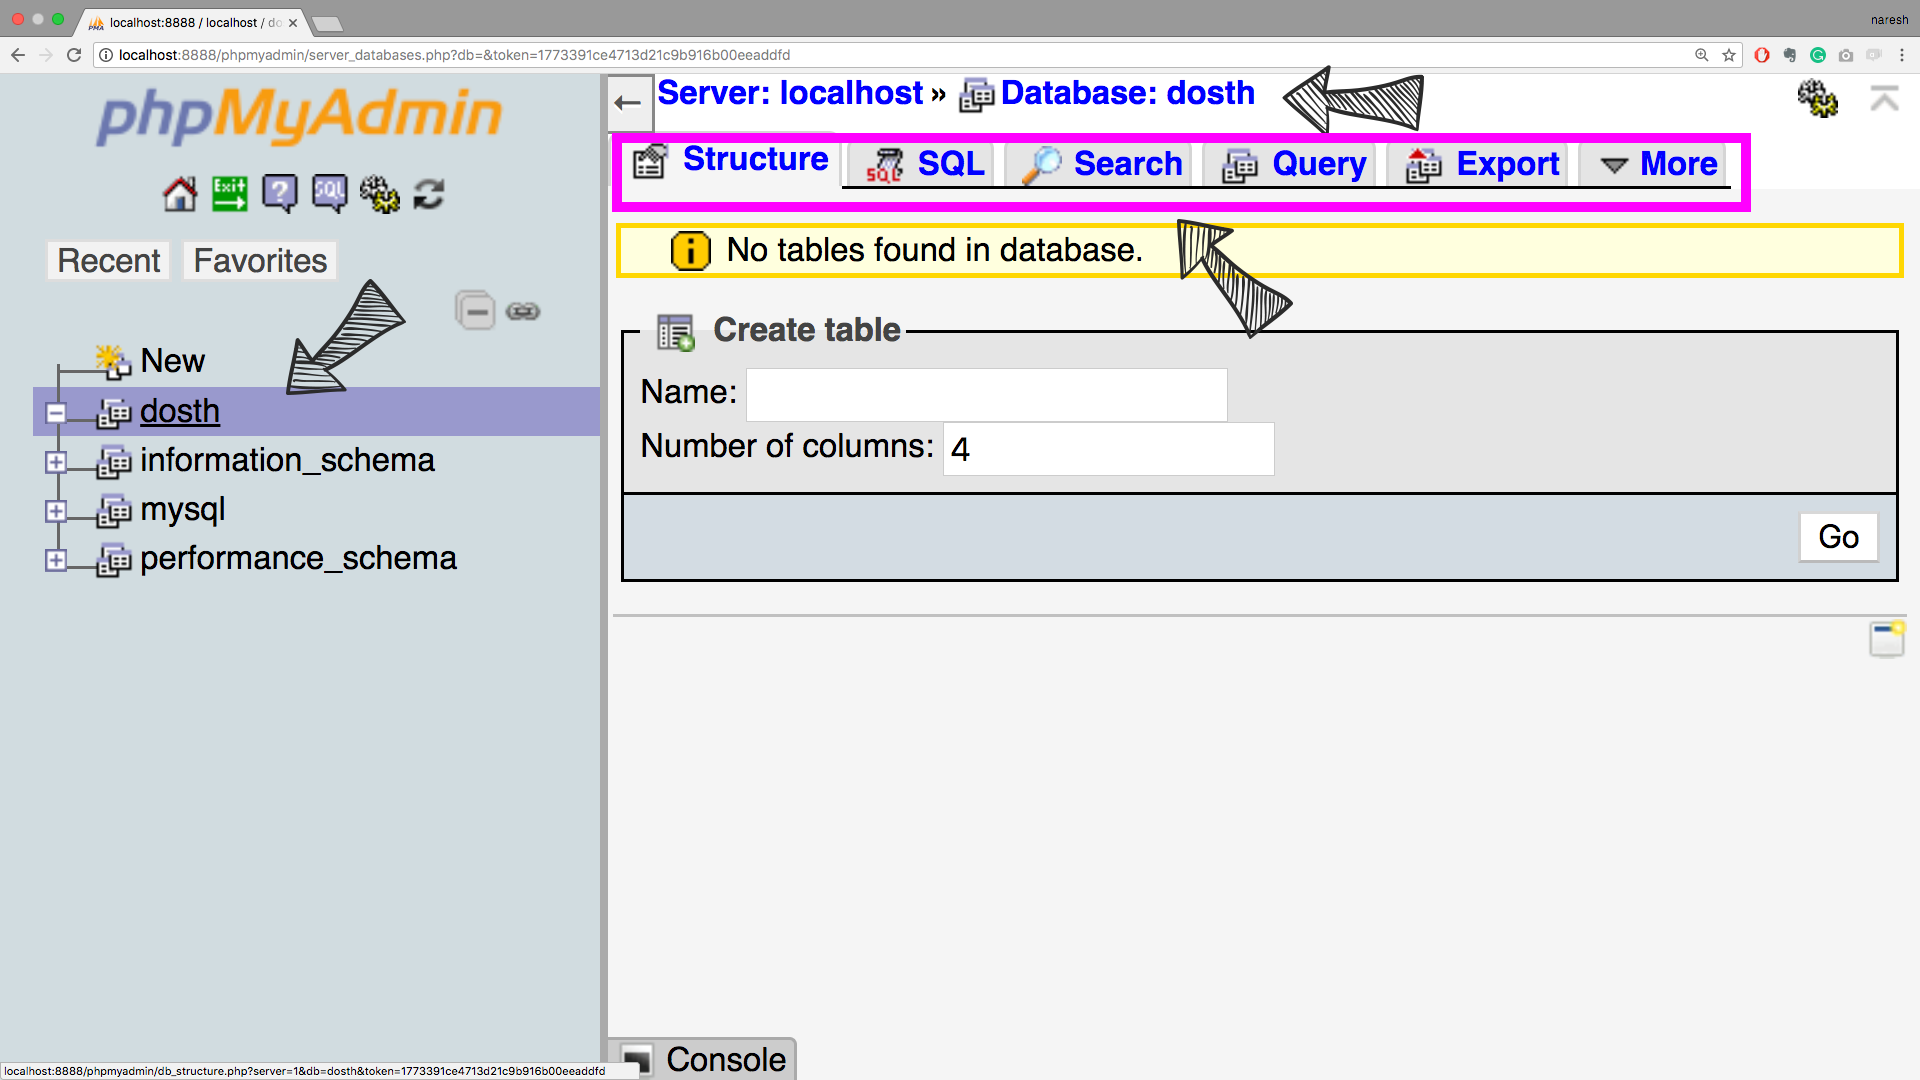
This tells us one important thing. When you are inside phpMyAdmin, you have to select a particular database to manage it. It is true for both phpMyAdmin and CLI tools like terminal or the command prompt. So, Be careful. I accidentally picked another project’s database once and paid a big price ( this also tells about my sloppiness though :( ).
Anyway, now that the database is created, we now have everything to install WordPress. So, in the next lesson, we’ll do just that.
 © 2026 UsableWP. A project by Naresh Devineni.