Managing individual menu items
Adding menu items to the menu structure is not enough.
Sometimes, we need to tweak them to fit our needs.
Here are the most common tasks that we perform on our menu links:
- Renaming the menu link without affecting the original page/category title
- Making the menu link open in a new tab
- Removing the link from the menu totally
If you notice, all the tasks mentioned above must be performed on an individual menu item.
And to perform any of those tasks, we need to access the settings of individual menu items.
How to access the settings of a particular menu item
If you observe, each menu item inside the “Menu Structure” area is a box of its own.
If you want to configure a particular menu item, you should open its box.
By default, every menu item’s box is in its closed state.
And you can easily open it up by clicking on the little down-arrow icon located at the right-hand corner of the menu item:
Clicking doesn’t work on the rest of the menu item area because we will use the remaining area to adjust the Menu structure by dragging and dropping menu items.
Anyway, let’s open up the “About” menu item box and see what we have in store for us:
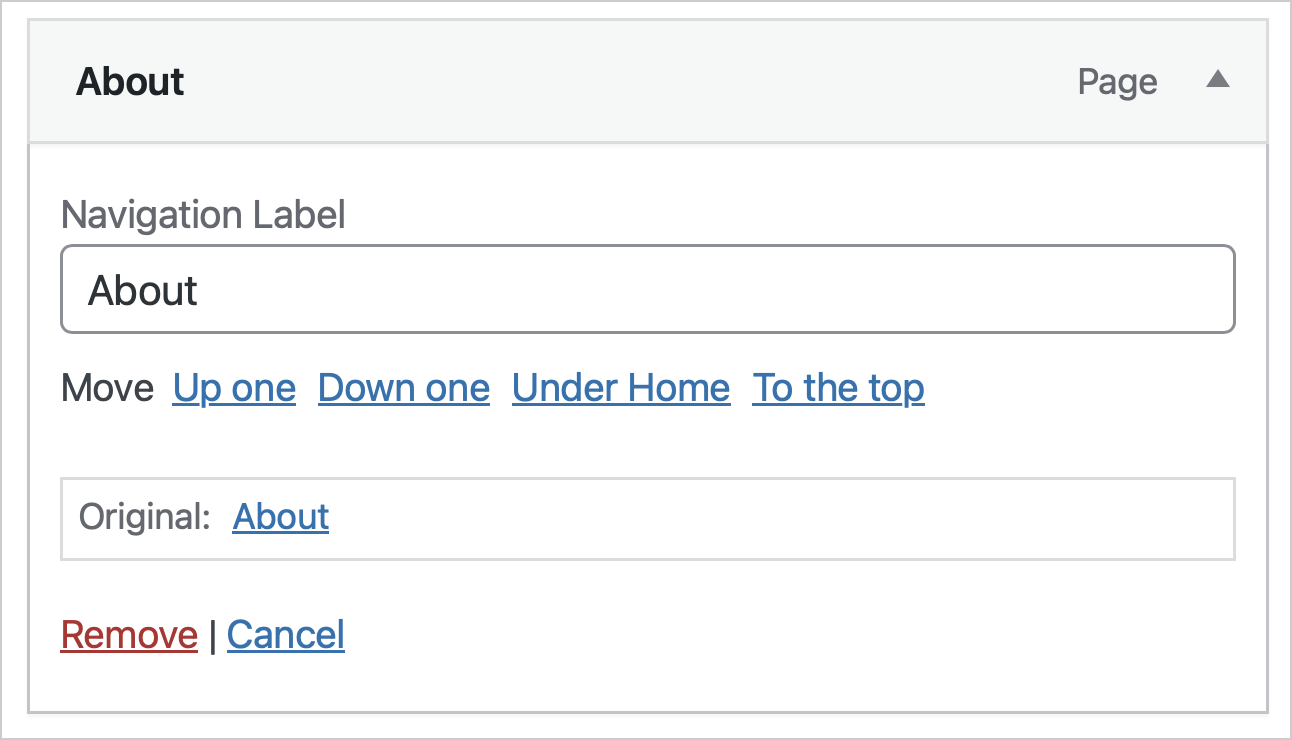
As you can see, it looks like we can perform three operations on it:
- Rename the menu item using the “Navigation Label” setting.
- Remove the item from the menu structure
- Or Cancel the changes you made and close the menu item box
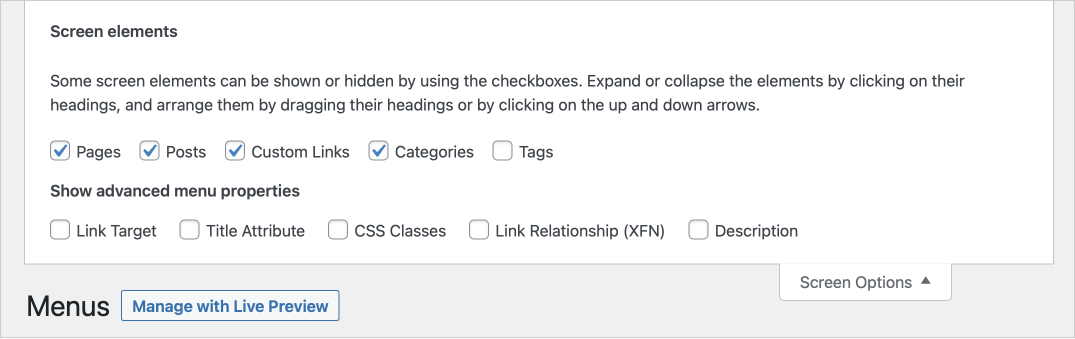
But wait, other advanced options are currently hidden, and we can enable them by clicking on the “Screen Options” button.
The “Screen Options” button is on the top-right-hand corner of the “Menus” screen.
If you click on it, it will let you turn on or off certain advanced settings for individual menu items:
Some of these settings are better learned through practical use cases.
So, let’s perform some practical tasks starting from the next lesson.
Previous Article

 © 2026 UsableWP. A project by Naresh Devineni.