Creating a multi-column layout using the “Columns” block
We have only built single-column layouts with the Block Editor throughout the course.
That is about to change now.
Here is our next target:


Oh wow!
Yeah, we are finally building a multi-column layout using the Block Editor.
To be more specific, it is a four-column testimonial section.
It might look like a complicated layout, but we can achieve it quickly and easily.
But before everything, remember that we are creating a new Homepage section.
Now tell me. What’s the first step you need to do when creating a new section inside the Block Editor?
We need to add the parent block for creating a new section!
Atta boy!
The testimonial section doesn’t have any background color or background image.
What parent block do you want to pick?
Ummm…Group Block?
Yep, we need to use the “Group” block when building a plain section like this.
So, let’s do that.
Adding the “Group” block for creating a section
Sometimes, we could accidentally place the new parent block inside the previous one.
Because of this, we could create a new section inside the previous section, eventually leading to a lot of re-arrangement and time waste.
To avoid this, always add a parent block using the “List View” sidebar.
So, first, let’s access the “List View” by clicking on its icon:
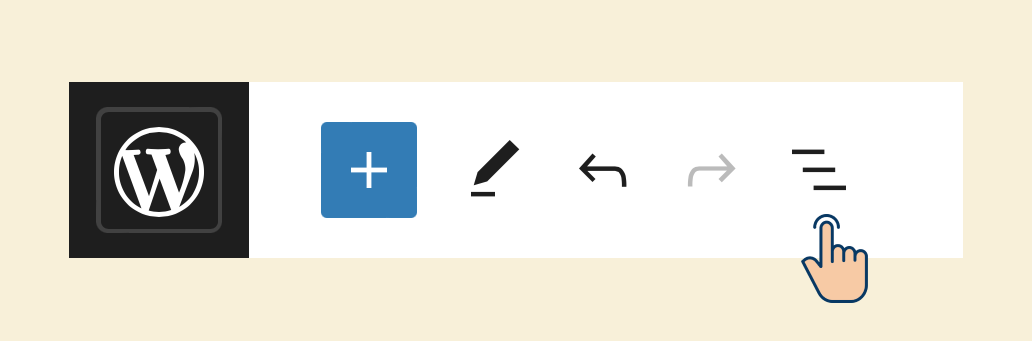
This will bring up the “List View” sidebar.
And if you notice, the sidebar only contains one “Cover” block that we added during the last lesson:
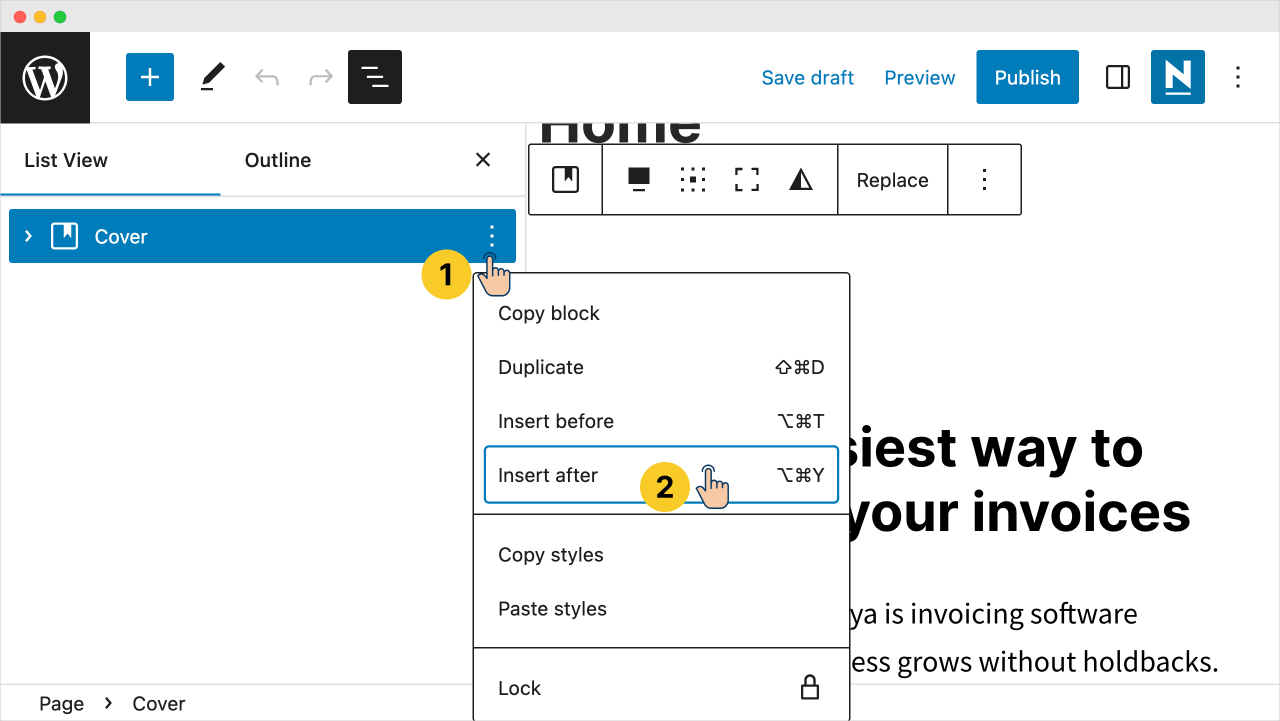
Click on the “Cover” block options icon, and finally, click on the “Insert After” option.
This will end up adding a “Paragraph” block to the editor.
Next, replace the “Paragraph” block with the “Group” block by typing “/Group” and then hitting enter.
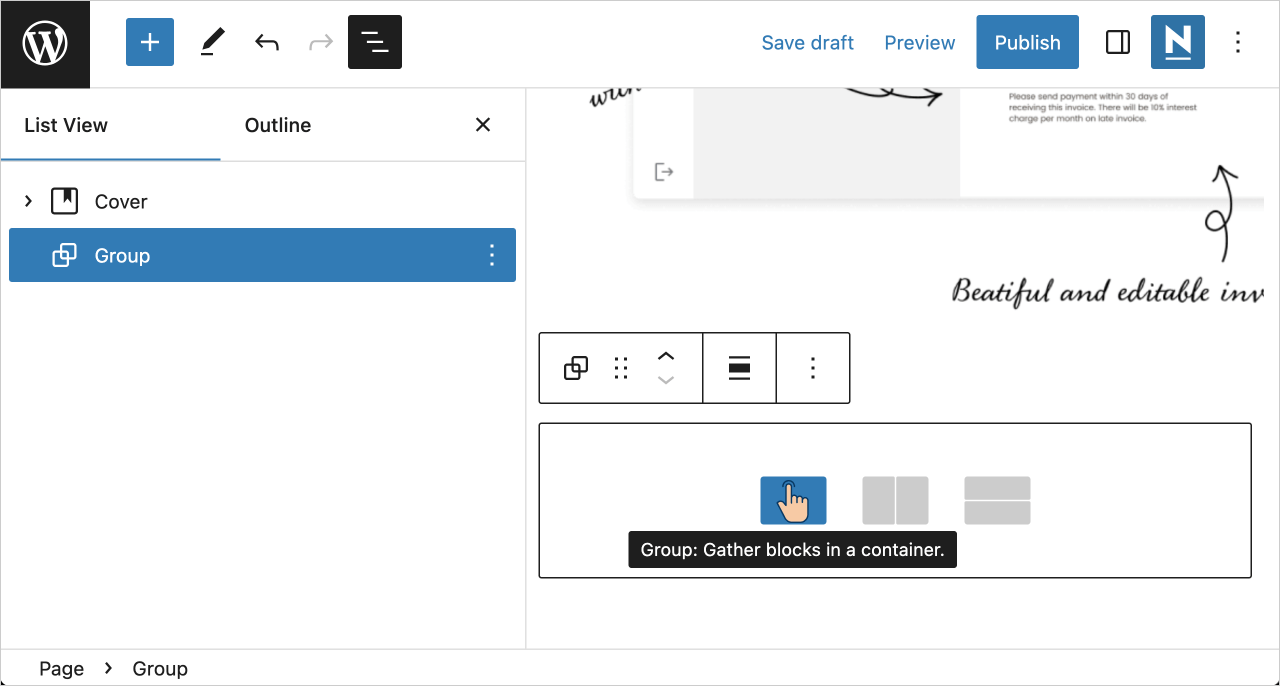
Now, the “Group” block is asking us:
“Hey! How would you like to arrange the blocks inside me?”
Click on the first option that says “Gather blocks in a container”.
This is because we use the “Group” block as a container for the section’s content.
Anyway, picking the first option would result in the following:
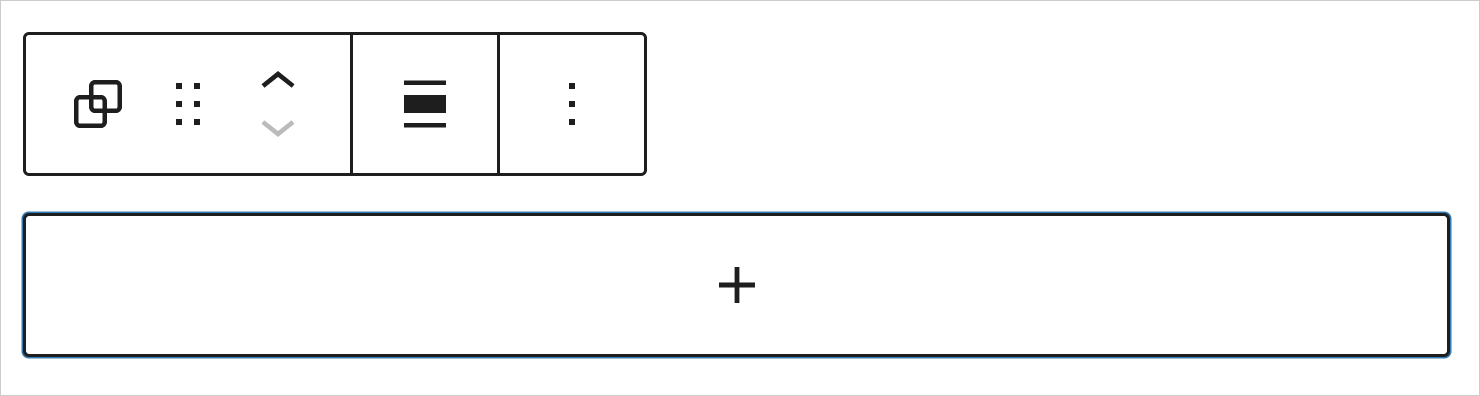
Alright! Great!
We are finally ready to add the “Columns” block and build the testimonials section.
From here onwards, we can easily b
uild the testimonials section in three easy steps:
Step 1: Add the “Columns” block inside the “Group” block and set its column count to four
To achieve this, Click on the big “Add Block” button inside the “Group” block and then add the “Columns” block.
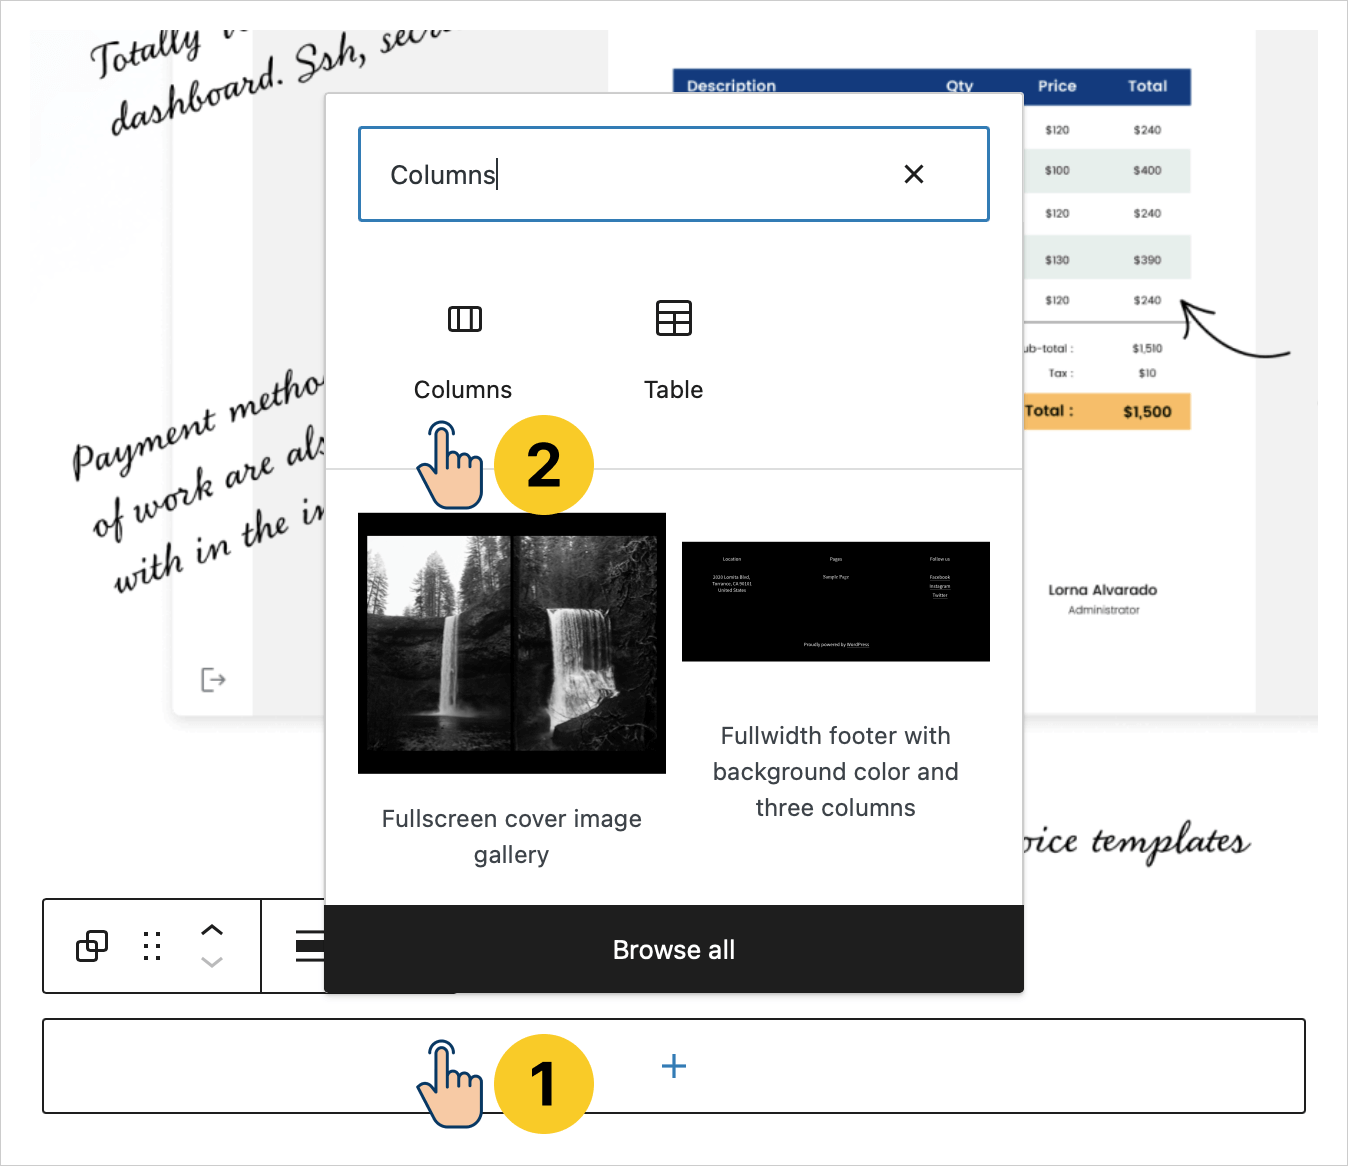
Next, the “Columns” block will give us the option to pick the number of columns and the layout for our content:
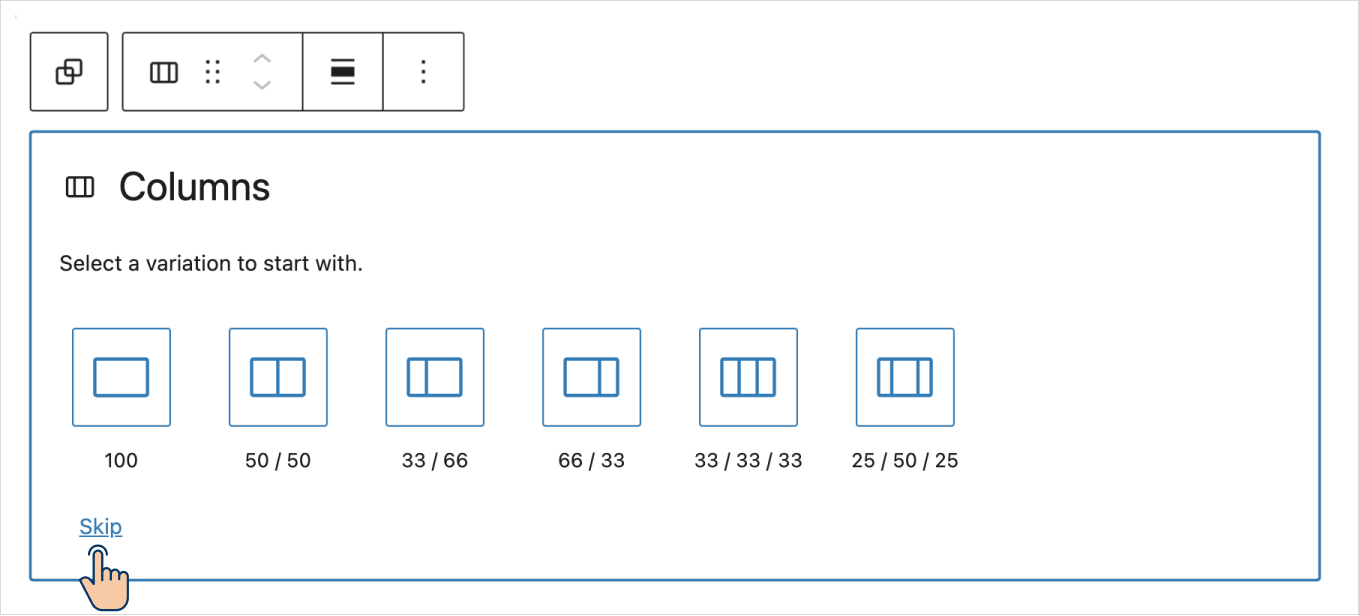
We are trying to build a four-column layout, right?
But if you notice, there is no option for picking a four-column layout.
So, click on the “Skip” link, which will automatically create a two-column layout for us.

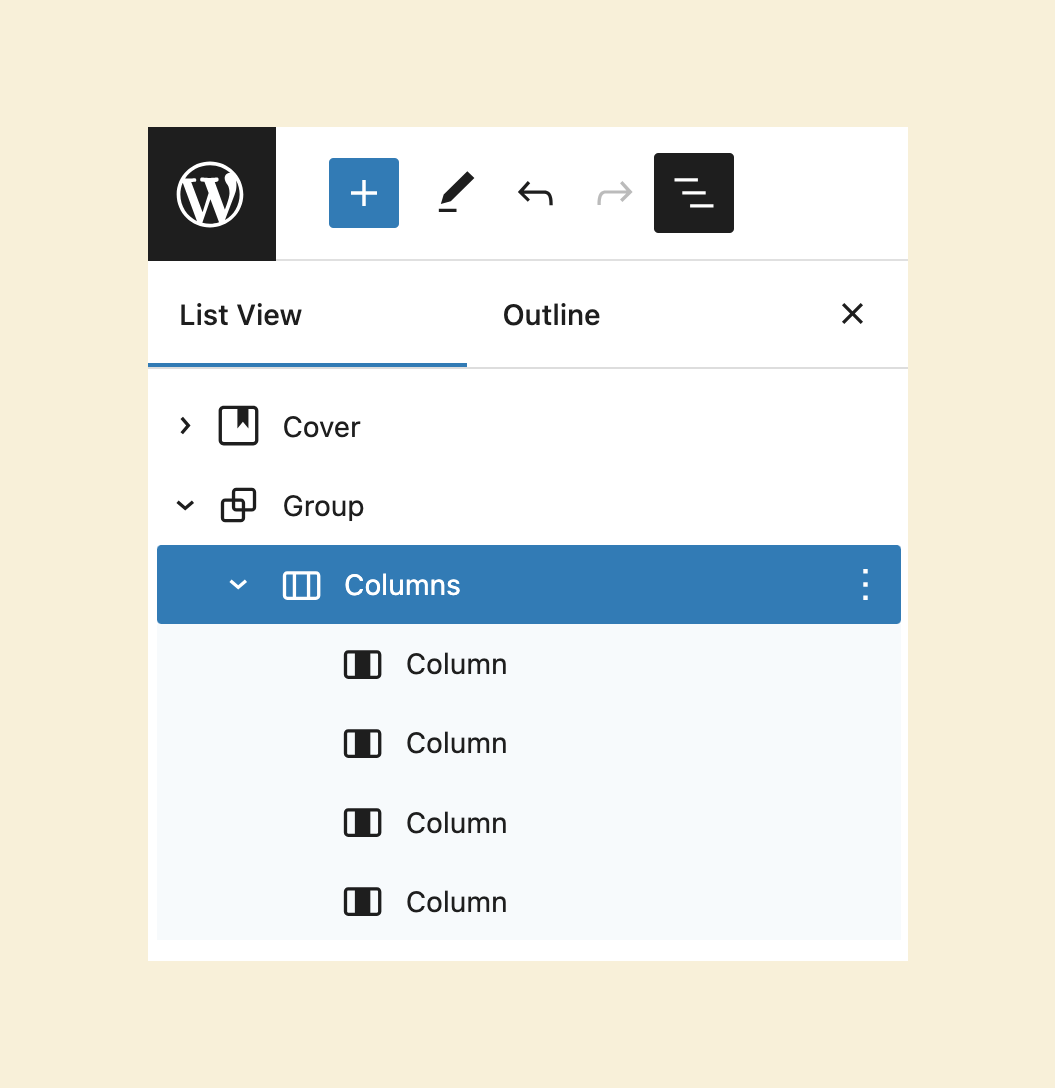
But don’t worry. We can quickly transform this two-column layout into a four-column layout.
To achieve this, open the “List View” sidebar and select the “Columns” block.
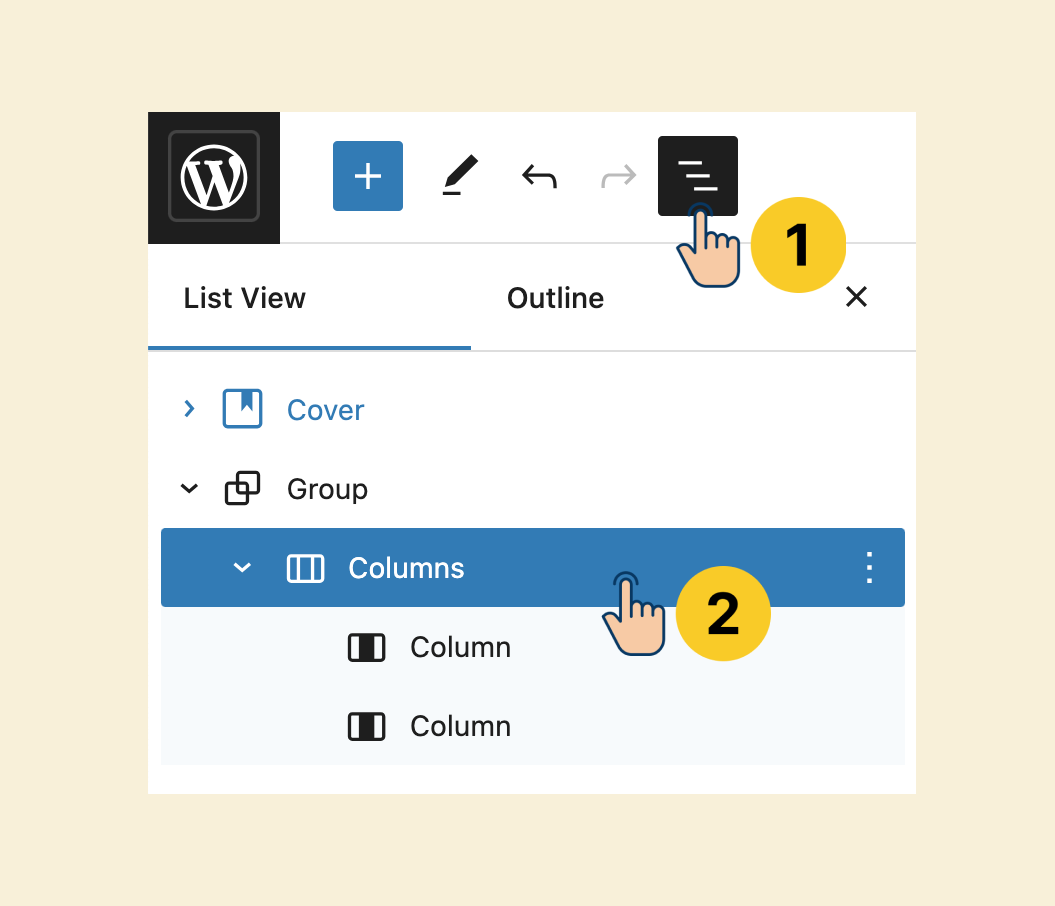
This will open up the settings for the “Columns” block on the right.

Now if you notice, there is an option called “Columns”.
Set it to four, and this will result in:
Next, all that is left for us to do is add testimonial content inside the “Columns” block.
But where does this content go inside the “Columns” block?
If you observe the “Columns” block inside the list view, it has individual “Column” blocks placed inside it.
And each “Column” block is a container block where you add other blocks to build the content of the individual column.
This is better shown that explained.
Step 2: Add the first testimonial content inside the first “Column” block
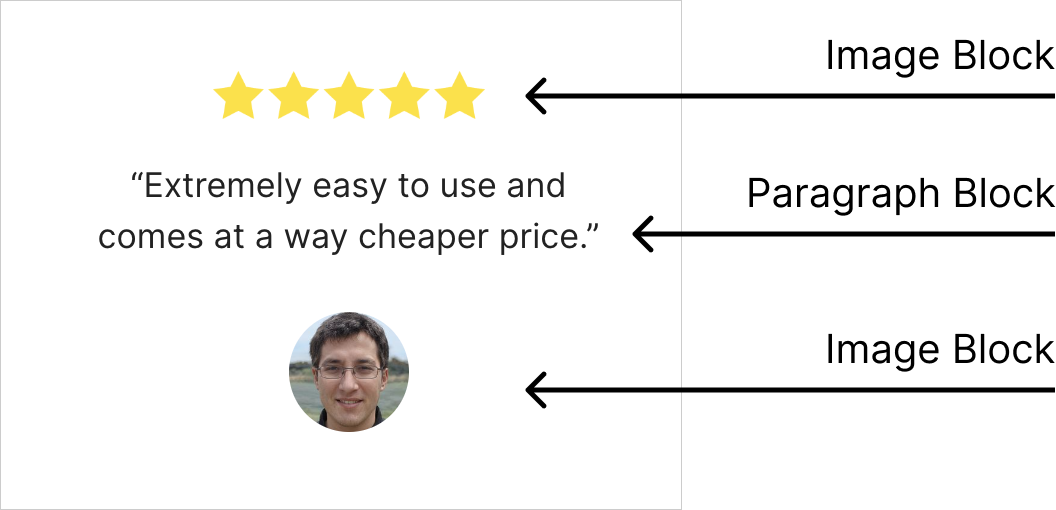
Here is the content I want you to add to the first column:
And if you are following along with me, you can download the content from here:

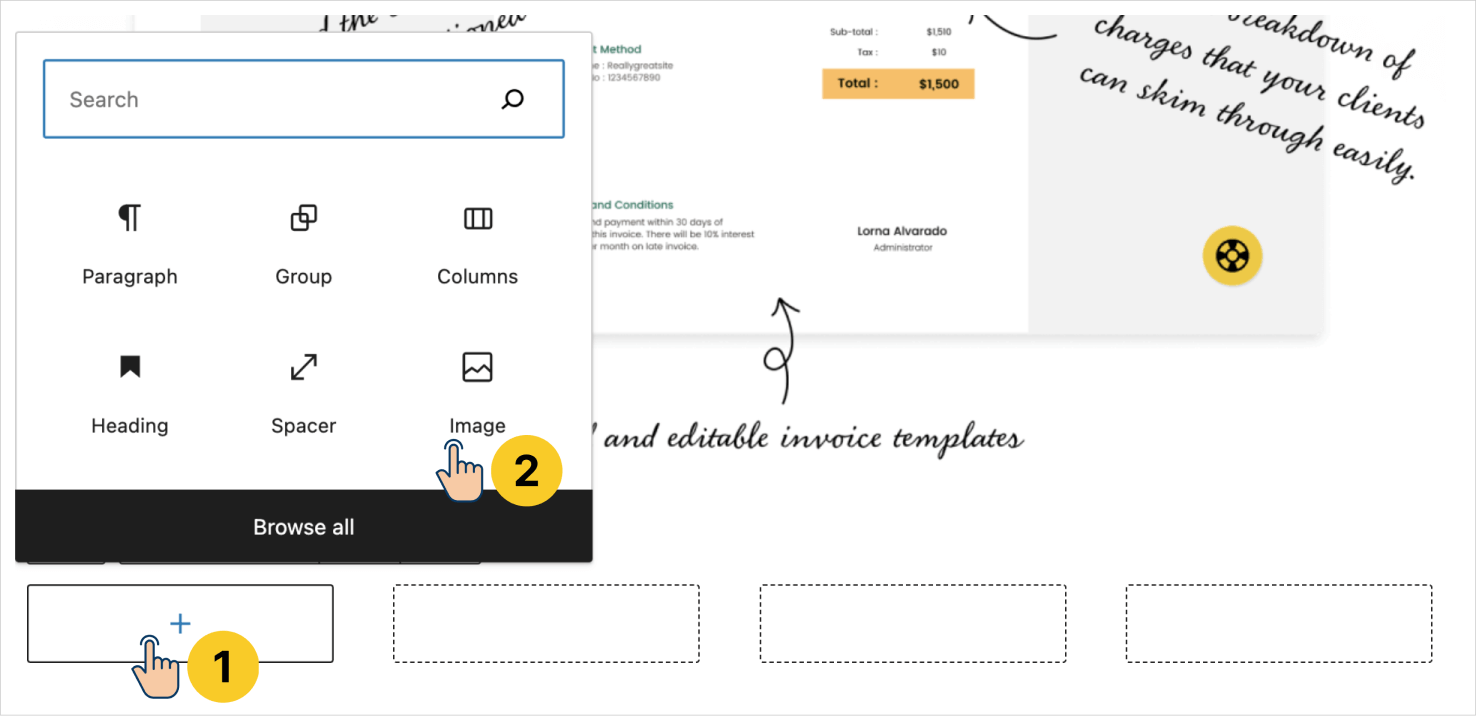
For starters, click on the big “Add Block” button inside the first “Column” and then add the “Image” block.
Next:
- Upload the five-star image using the image block
- Set its width to 140px
- And finally, center-align the image
This is the easy part. You already know how to do this stuff.

Next comes the trick part.
We now need to add the testimonial quote.
The thing is, it is not easy to add another block inside the “Column” block without accidentally placing the block outside the “Column” block.
So, when dealing with a “Column” block, always try to use the “Insert After” or “Insert Before” option.
I have already taught you how to do this, but let’s quickly repeat it.
We want to insert the quote after the five-star image, right?
So, make sure the five-star image is selected to access its “Toolbar” settings, and then from there, click on its “More Options” icon:
Then, click on the “Insert After” option.
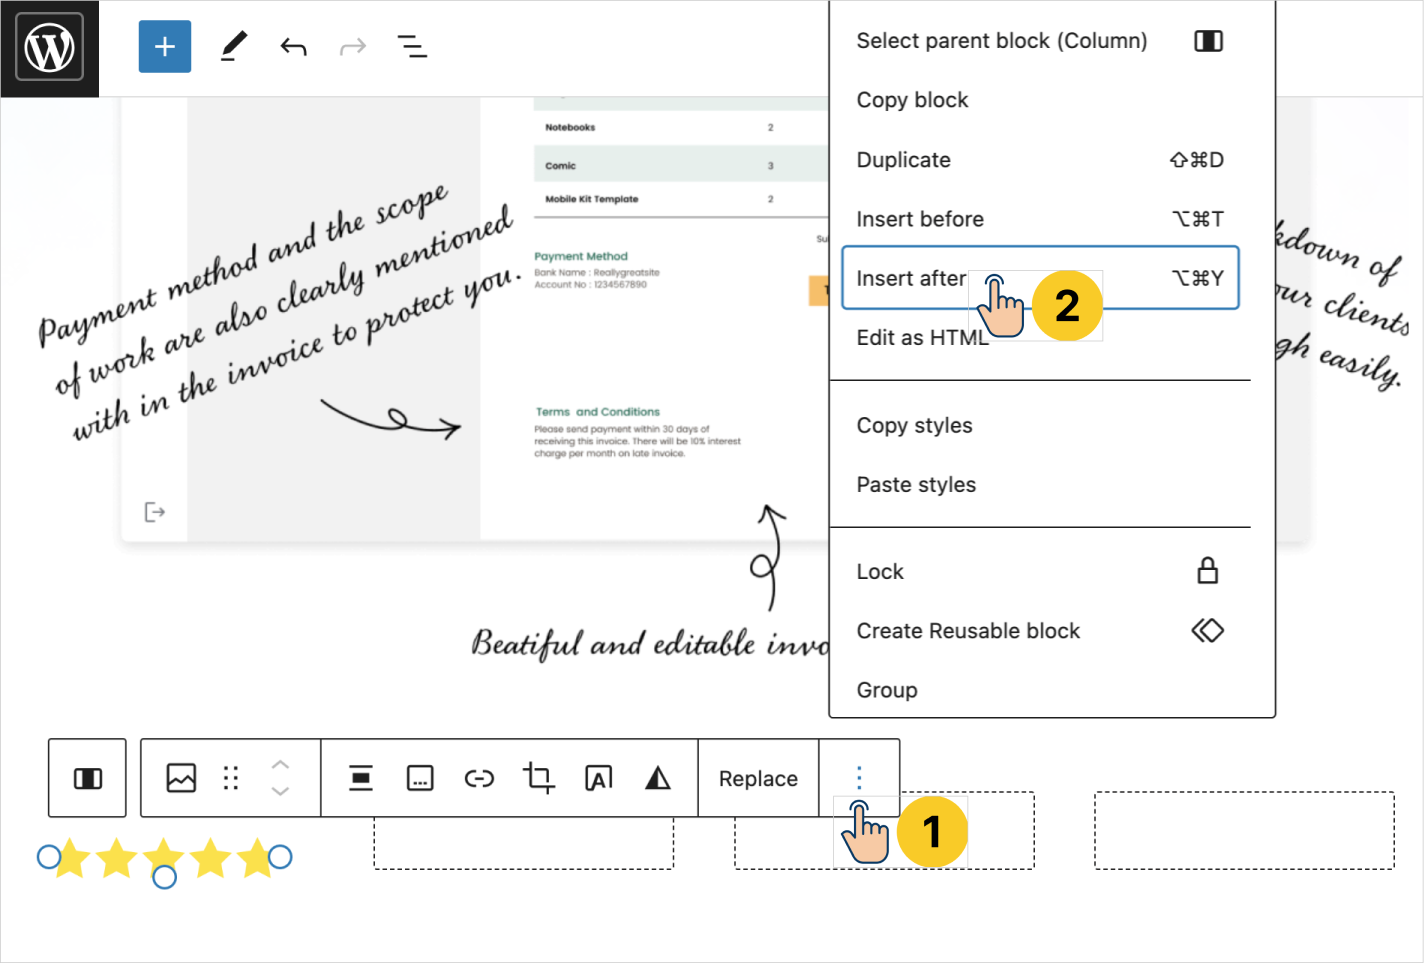
Now you can easily add the “Paragraph” block to write and center align the quote.
Finally, add the testimonial author’s image using the same tactic.
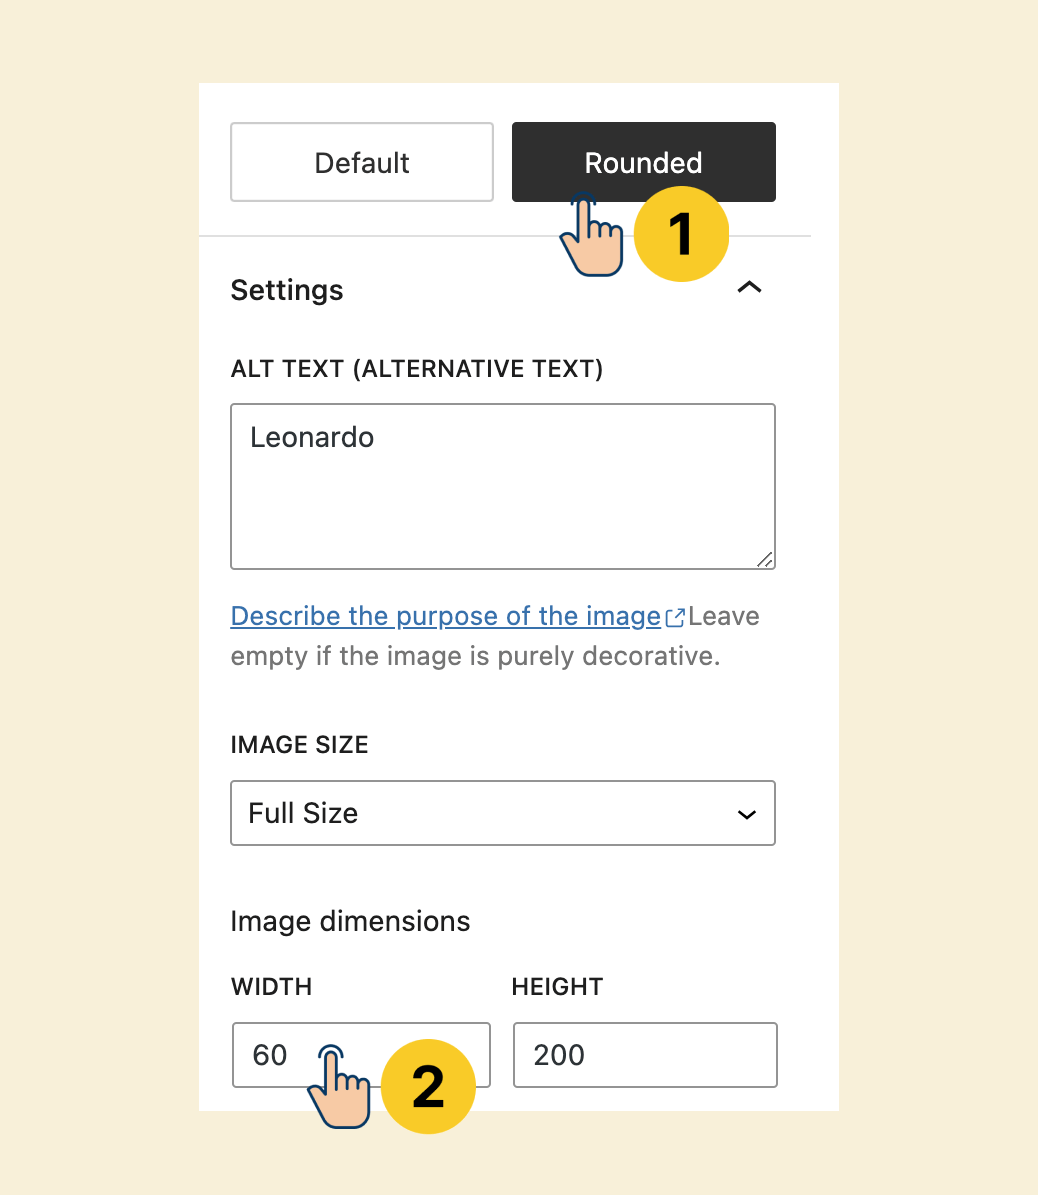
Use the following settings for the image:
- Set its width to 60px
- Center align it
- Add the author’s name as an alternative text
- Round the image borders by using the “Rounded” option. You can find this option on the “Settings” sidebar when you select an image.
The image, like five-stars.png, is purely decoration, so you don’t have to add alternative text.
But for the images like the testimonial author, you must add alternative text.
Step 3: Repeat the same process for adding testimonials to the rest of the columns
But wait!
When building similar content across multiple columns, we can speed up things using the “Copy, Paste, and Replace” technique.
And we will talk about that in the next lesson.
 © 2026 UsableWP. A project by Naresh Devineni.