Understanding the “All Posts” screen and its filters
You’ll manage your blog posts in the “All Posts” screen.
It is a listing page for the blog posts of your site.
Once you have many blog posts and start managing them regularly, you’ll realize you’ll spend a lot of time inside the “All Posts” screen.
So, it is a good idea to understand how to use it properly and then jump into actual exercises.
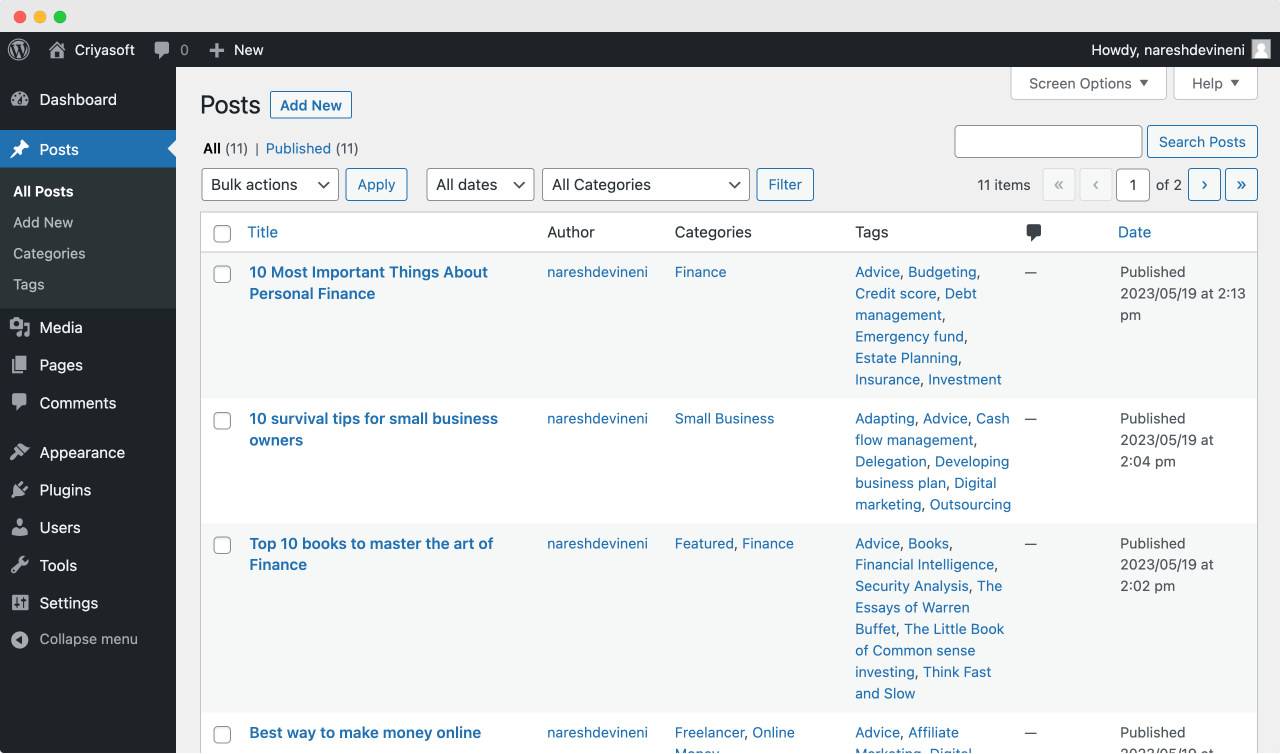
Anyway, if you notice, the “All Posts” screen is divided into three major parts:
- Post filters – Helps you view filter posts based on particular criteria
- Post list – A table of blog posts that you have created
- Post pagination – If you have a lot of posts, they are spread into multiple pages by displaying only ten posts per page. If that is the case, the “Post pagination” feature helps you navigate those pages.

And for the rest of this lesson, let’s talk about filtering posts.
Post Filters
Now imagine that you have a lot of blog posts.
But you only want to view posts assigned to a particular category.
For example, let’s say you only want to view blog posts assigned to a ” How-to ” category.
Or maybe you want to view the blog posts published in a particular month.
How do you achieve these scenarios?
This is where the Post Filters come in.
These filters are located at the top-left-hand corner of the “All Posts” screen.
If you notice, these filters are divided into two sections:
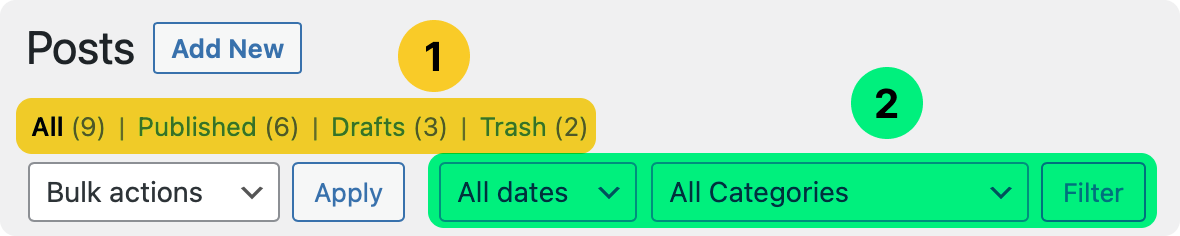
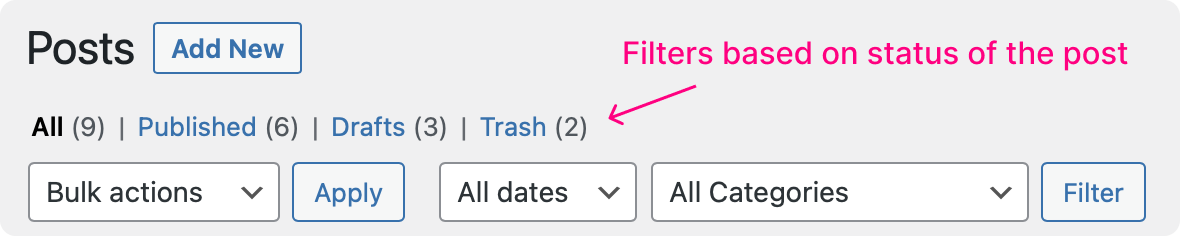
- Filters based on the status of the post
- Filters based on the date and taxonomy classification
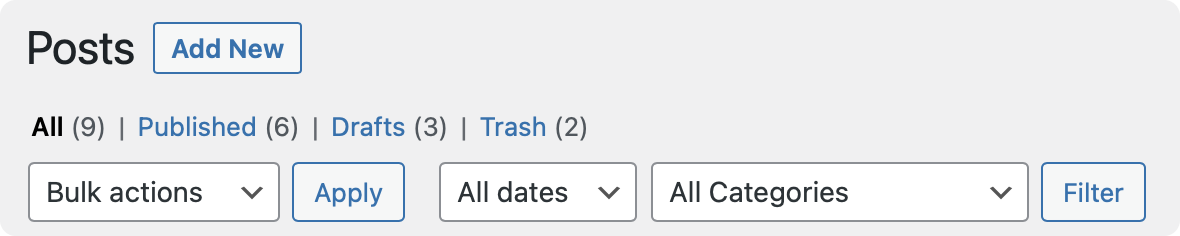
1) Filters based on the status of the post
By default, the “All” filter is active.
But you can switch to the other filters by clicking on them.
The “All” filter
This filter will help us view all the blog posts we have created irrespective of their status, such as “Published” and “Draft”.
The “Published” filter
This filter will help us view the posts with ” Published ” status.
In other words, When you select this filter, WordPress will hide the posts in the “Draft” mode.
The “Drafts” filter
This filter will help us view the posts that are not published yet.
In other words, When you select this filter, WordPress will hide the posts in the “Published” mode.
The “Trash” filter
This filter will help us view the posts that are trashed.
Not all filters are available to us all the time.
For example, The filters “Drafts” and “Trash” are only
available if any posts match the criteria.
Currently, in my case, I have three posts in draft mode and two trashed posts.
So, the “Draft” and “Trash” filters are currently visible.
But if you don’t have any posts in draft or trash modes, these filters will be hidden by WordPress like this:

Similarly, if you don’t have any posts with “Published” status, the “Published” filter will not be visible either.
2) Filters based on the date and taxonomy classification
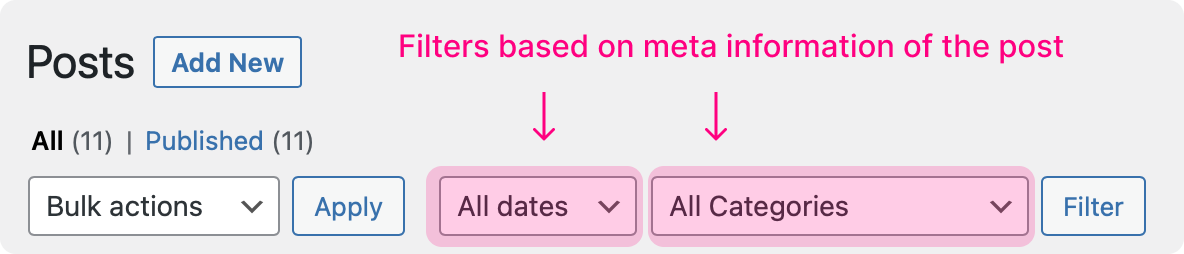
The “All dates” filter
This filter is helpful if you want to view posts created in a specific year and month.
By default, the “All dates” filter is selected. So, we are currently viewing posts published over all the months and years.
Come on, Let’s change that.
Did you see that?
When I switched from the “All dates” filter to “February 2022”, I could only see the posts published in February 2022.
Next…
The “All Categories” filter
As the name suggests, this filter will help us view posts that are assigned to a particular category.
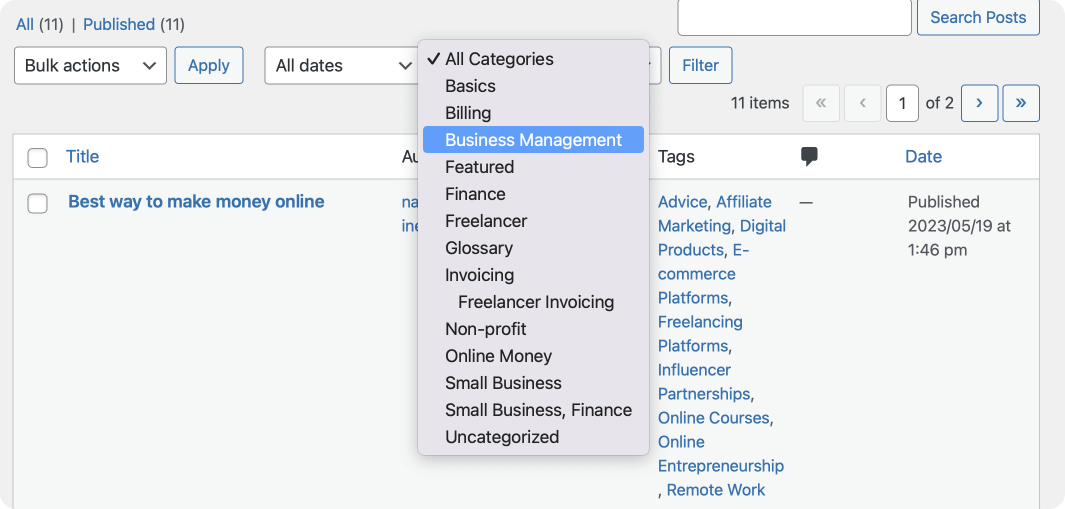
Select a category from the list and click the “Filter” button to see the filtered posts.
The “Tags” filter
If you notice, there is no “All Tags” filter.
But don’t worry. You can still filter posts based on tags.
If you notice, inside the “Post list” table, there is a “Tags” column, which displays the list of tags assigned to a particular post.
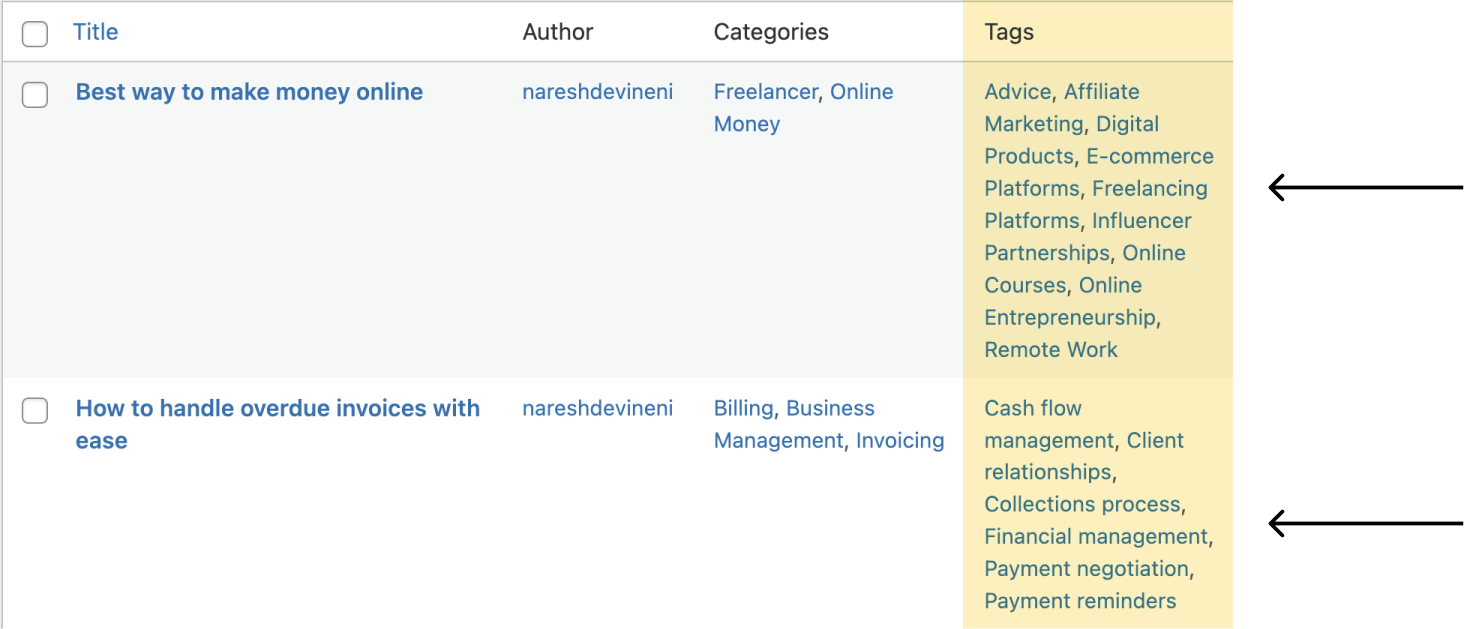
All these tags are colored in blue because they are clickable links, and when you click on a particular tag, only the posts assigned to that specific tag will be visible on the “All Posts” screen.
All other posts will be hidden.
For example, in the above video, I clicked on the “Advice” tag and the “All Posts” screen reloaded by displaying only those posts that were assigned to the “Advice” tag.
Easy.
The “Category” and “Author” columns work similarly, too!
They are the filters hiding in plain sight :D
In the next lesson, we will learn about the “Post pagination” feature.
 © 2026 UsableWP. A project by Naresh Devineni.