Exercise: Deleting a blog post
As you start blogging more often, you’ll find many reasons to delete blog posts on your website.
For example:
- The blog post could get totally out of date, and it is no longer useful for your website audience.
- The blog post is hurting the SEO of the site.
- The blog post has received a lot of negativity, and you want to get rid of it.
- There are many other reasons.
The reason could be anything, but this exercise’s goal is to delete a blog post correctly.
Deleting a blog post is a two-step process.
Step 1 – First, we must put the blog post in the trash. Otherwise, we can not delete the post permanently.
Step 2 – Once the post is in the trash, we get access to the “Delete permanently” link. Clicking on it will delete the blog post.
The reason behind this two-step process is simple.
There are chances that you could accidentally trash a post by clicking on the “Trash” link.
If that is the case, you’ll get a chance to go inside the “Trash” area for blog posts and restore the post without losing it.
Long theory short, WordPress doesn’t want you to delete the posts accidentally.
Anyway, now let’s try out this two-step process.
Step 1: Trashing the blog post
For this exercise, we will delete the dummy “Hello World!” blog post created by WordPress when it got installed.
And WordPress provides the trash button in two places on the admin dashboard:
1) Inside the “Summary” settings portion of the post editor screen
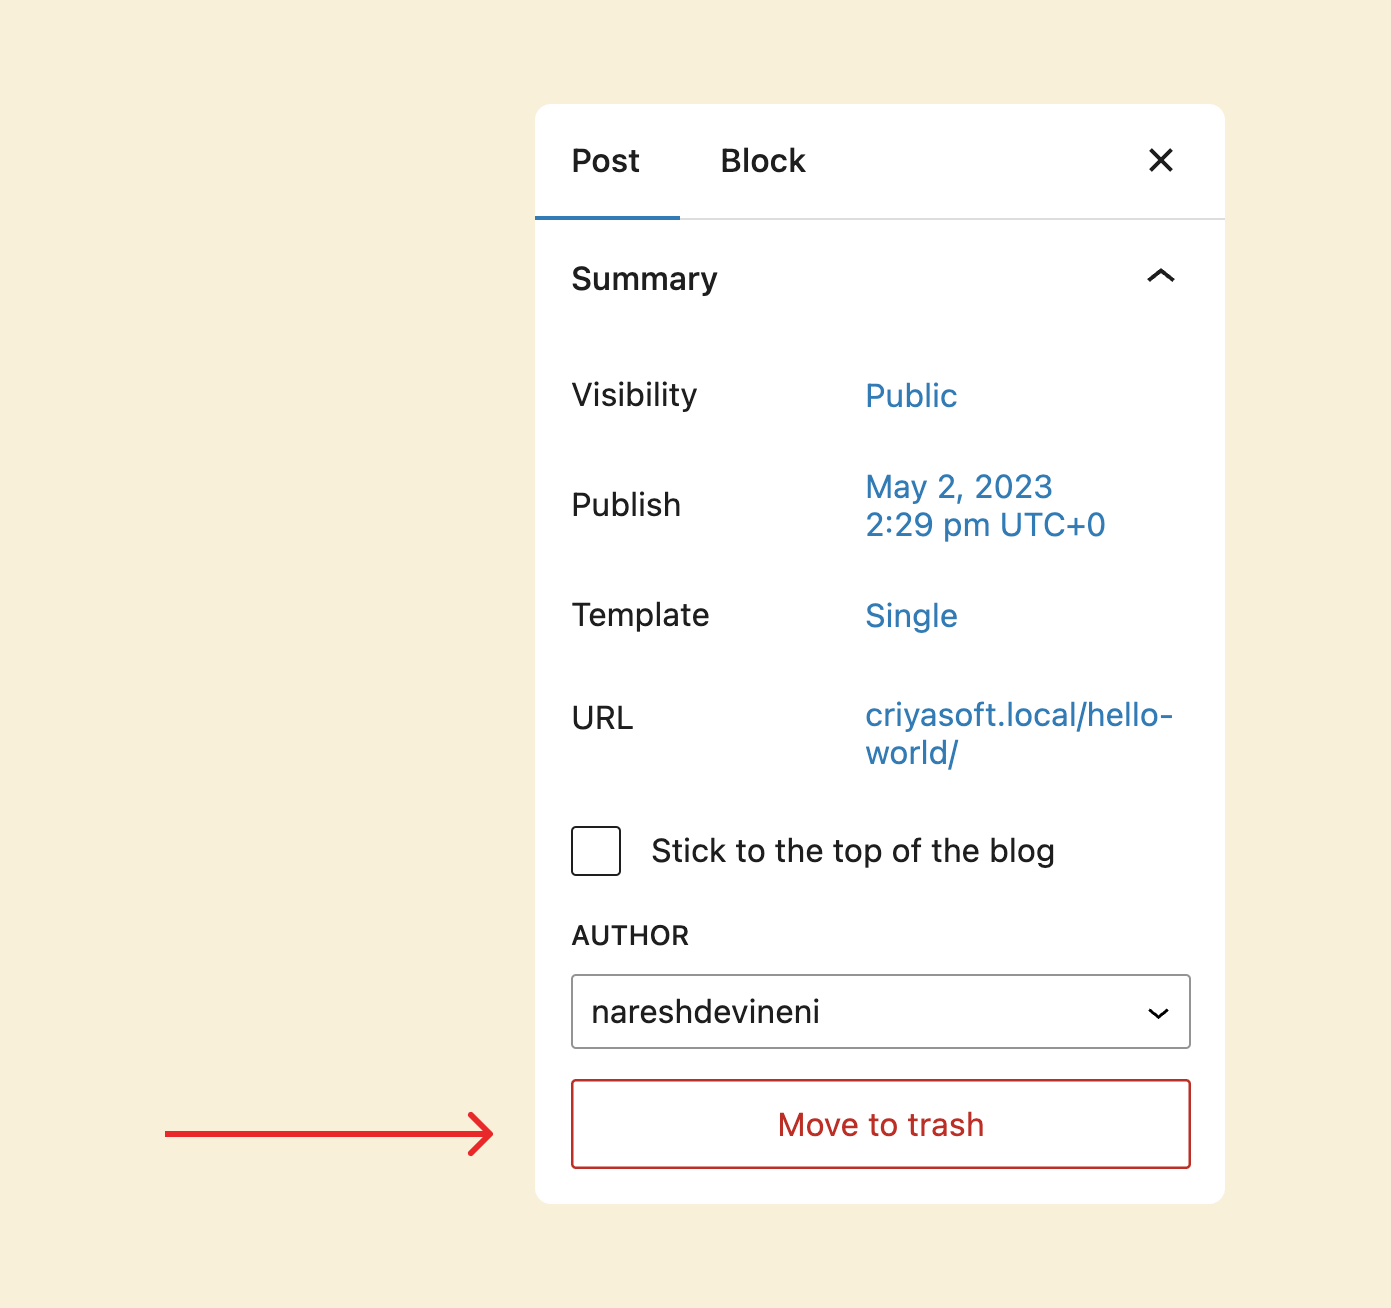
Clicking the “Move to trash” button will complete our job.
2)Inside the “All Posts” screen
The “Trash” link will appear if you hover your mouse cursor on any post.

Click on the “Trash” link to put the blog post in the trash.
At the end of the day, the “Move to trash” and “Trash” buttons do the same job.
So, you can use either of them based on which screen you’re currently viewing inside the WordPress dashboard.
Anyway, our job is only 50% done!
Step 2: Deleting the blog post permanently
The post is now inside the trash.
Next, we need to access the “Trash” screen to delete the blog post.
But how do you access the “Trash” screen?
WordPress hides it in plain sight.
I want you to take some time and look for it :D
Anyway, the “All Posts” screen is the place where you’ll find it.
Come on, let’s go to the “All Posts” screen.
Next, if you remember, the “All Posts” screen has some filter options located at the top-left-hand corner of the screen:
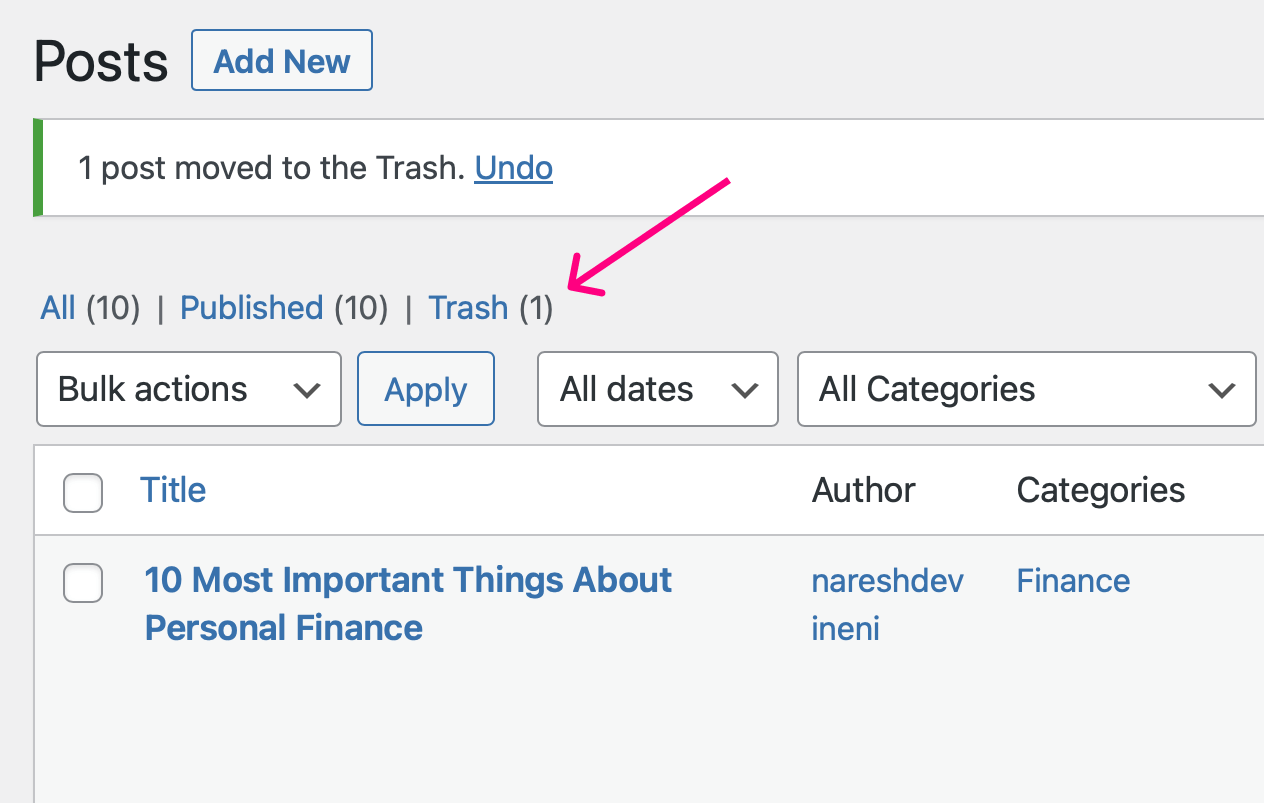
The “Trash” filter is one of them.
And if we click on it, we will be taken to the “Trash” screen and find the post we have previously trashed.
Next, if you hover your cursor over the trashed blog post, the “Delete permanently” link will appear.

Just click on it to get rid of the post permanently.
Finally, exit the “Trash” screen by clicking on the “All” filter or the “Published” filter (if it is applicable).
This will take you to the “All Posts” screen again.
That’s all you need to do to delete a blog post.

Nice! But why should I delete a blog post permanently? Can’t I just keep the trash without cleaning it?
Good question!
Yes, you can :)
It will help you restore the blog post in the future.
Having said that, if the trash piles up, it is important to clean it by deleting the posts permanently.
Remember that the trashes blog post still occupies the space inside the database.
So, deleting the trash will help you reduce the size of the database, and small database size, in turn, keeps the website performant.
In the next lesson, we will learn how to restore a trashed blog post.
 © 2026 UsableWP. A project by Naresh Devineni.