Exercise: Accessing the edit screen of a blog post
Once you have published a blog post, the most common activity that you will end up performing is tweaking the post by:
- Changing its title
- Changing its URL
- Adding new content or removing existing content
- Adding or removing categories and tags
- Changing the featured image
- The list goes on and on.
But to perform any of the above activities, you need to access the editing screen of the blog post.
And there are two ways to access it:
- Using the “All Posts” screen
- Using the “Edit Post” button that is only available when viewing the blog post on the frontend.
In this exercise, we will try the first approach.
Using the “All Posts” screen
To access the editing screen of a blog post, all you need to do is:
- Make sure you’re logged inside the Admin dashboard
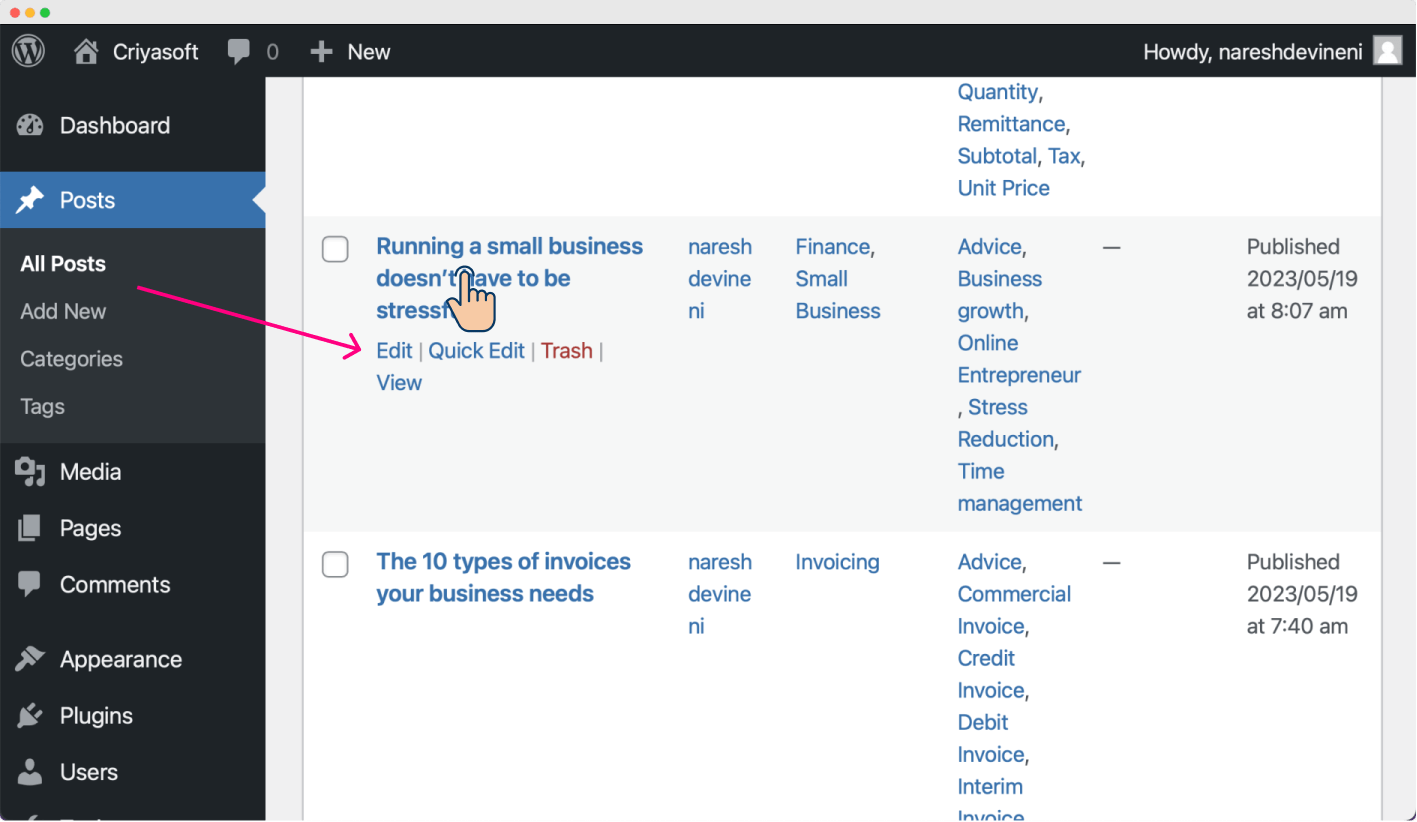
- From the admin menu on the left-hand side, Click on “Posts” -> “All Posts”.
- Next, find the post you are trying to edit
- Finally, to enter the post editor screen, click on the “Name” of the post or click the “Edit” link.
0:00
/
That’s all.
You are now inside the editing screen of a blog post.
This is all nice, but this approach is only good if you’re inside the WordPress Admin Dashboard.
If you are reading the blog post on the frontend and want to quickly edit something, following the above approach is a bit time-consuming.
So, we will learn a quicker approach in the next lesson.
 © 2026 UsableWP. A project by Naresh Devineni.