How to add a favicon to our WordPress website
If you don’t know what favicons are, they are the little icons you see on the individual browser tabs.
And the responsibility of a favicon is simple.
If you open up ten browser tabs simultaneously, a favicon helps you quickly recognize the website you want to visit back.
If properly configured, we can also use the favicon as an App Icon on our mobile device’s home screen.
It acts as a visual bookmark allowing us to quickly access a web page.
If you notice the above mobile screenshot, there are two website icons at the top of the screenshot.
Both these icons are favicons of a website.
Because of this, we must design a high-resolution favicon to look flawless on any mobile or tablet screen.
By high-resolution, I mean an icon at least 512 x 512px in width and height.
I am not making it up. WordPress recommends the favicon to be at least 512 x 512px in resolution.
Anyway…
How do we add a favicon to our WordPress website?
Just like the logo, uploading a favicon is a theme-specific feature.
A theme must decide whether it supports uploading a favicon or not.
Most themes support uploading a favicon, and the “Neve” theme does it too.
Usually, the favicon upload field is available inside the “Site & Identity” panel for any theme:
But the “Neve” theme takes a different approach.
So, here is how we can upload the favicon using the “Neve” theme:
Step 1: Go to the “Customize” screen
Dashboard -> Appearance -> CustomizeStep 2: Go to the “Header” panel
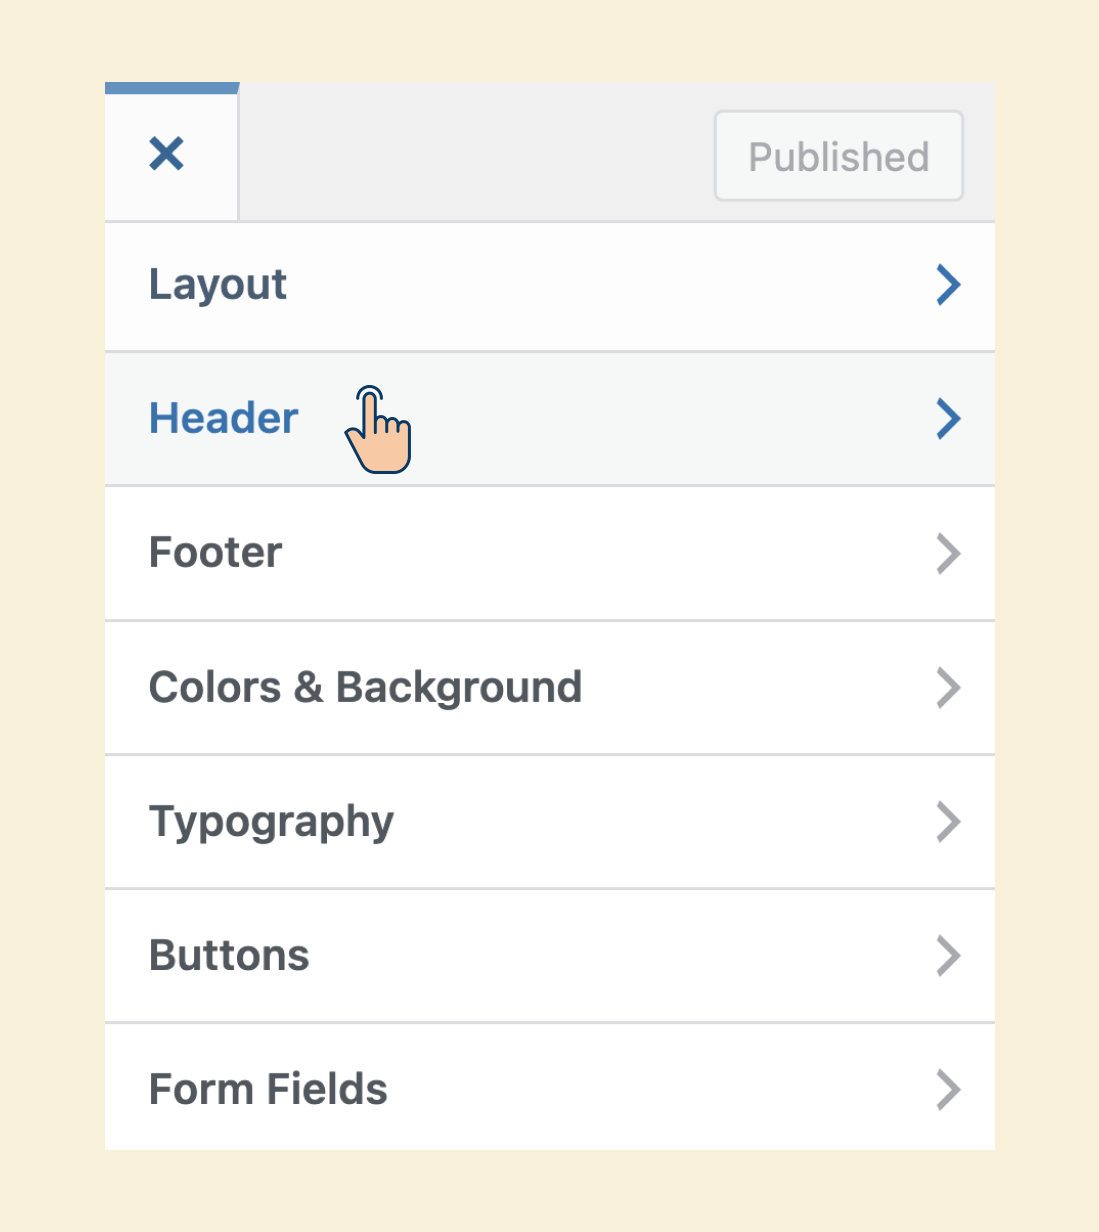
And then click on the “Change Logo” link:
Yep, we are now back to the panel where we uploaded the logo during the last lesson 🙈
Step 3: Upload the favicon using the “Select Site Icon” button
To find this button, scroll down until you see the “Site Icon” section.
It is located directly underneath the “Logo max width” option.
Finally, click on the “Select site icon” button to upload your website’s favicon.
If you are following along with me, feel free to use the following favicon:

Once you are done uploading the favicon, click the “Publish” button to save the changes.

In the screenshot above, you can also see a preview of how my favicon looks on a browser tab.
That’s all.
Starting from the next lesson, we will learn how to create a custom navigation menu for our website.
Previous Article

 © 2026 UsableWP. A project by Naresh Devineni.