Adding items to the custom menu
In the last lesson, we created a custom menu called “Header Menu”.
And as soon as we created the menu, the “Add menu items” form got unlocked.
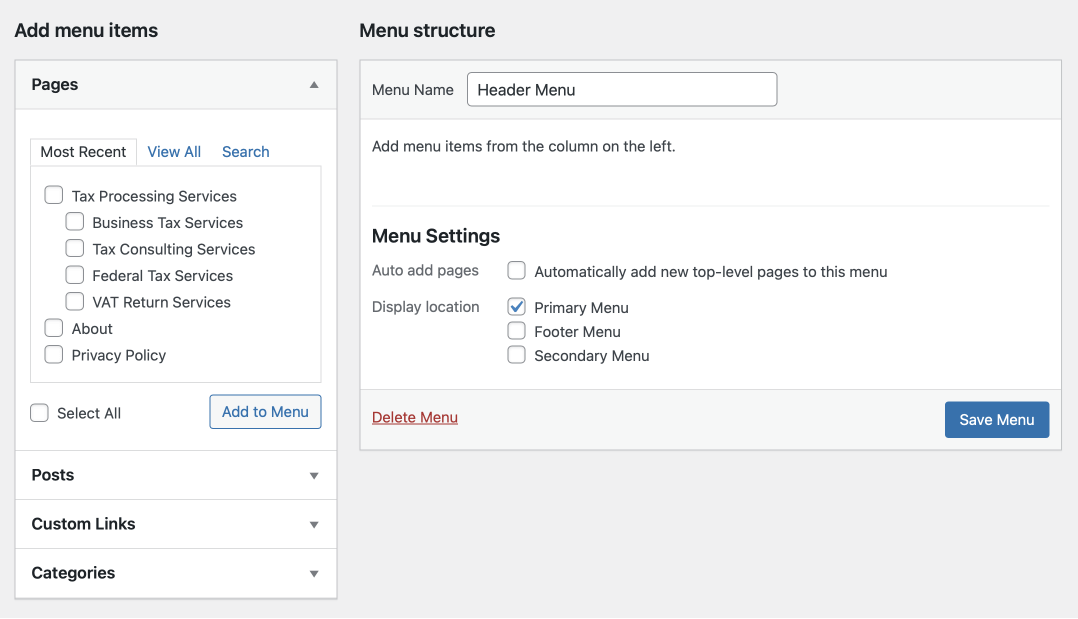
This means that we can now our pages, posts, categories, etc., to the “Header Menu”.
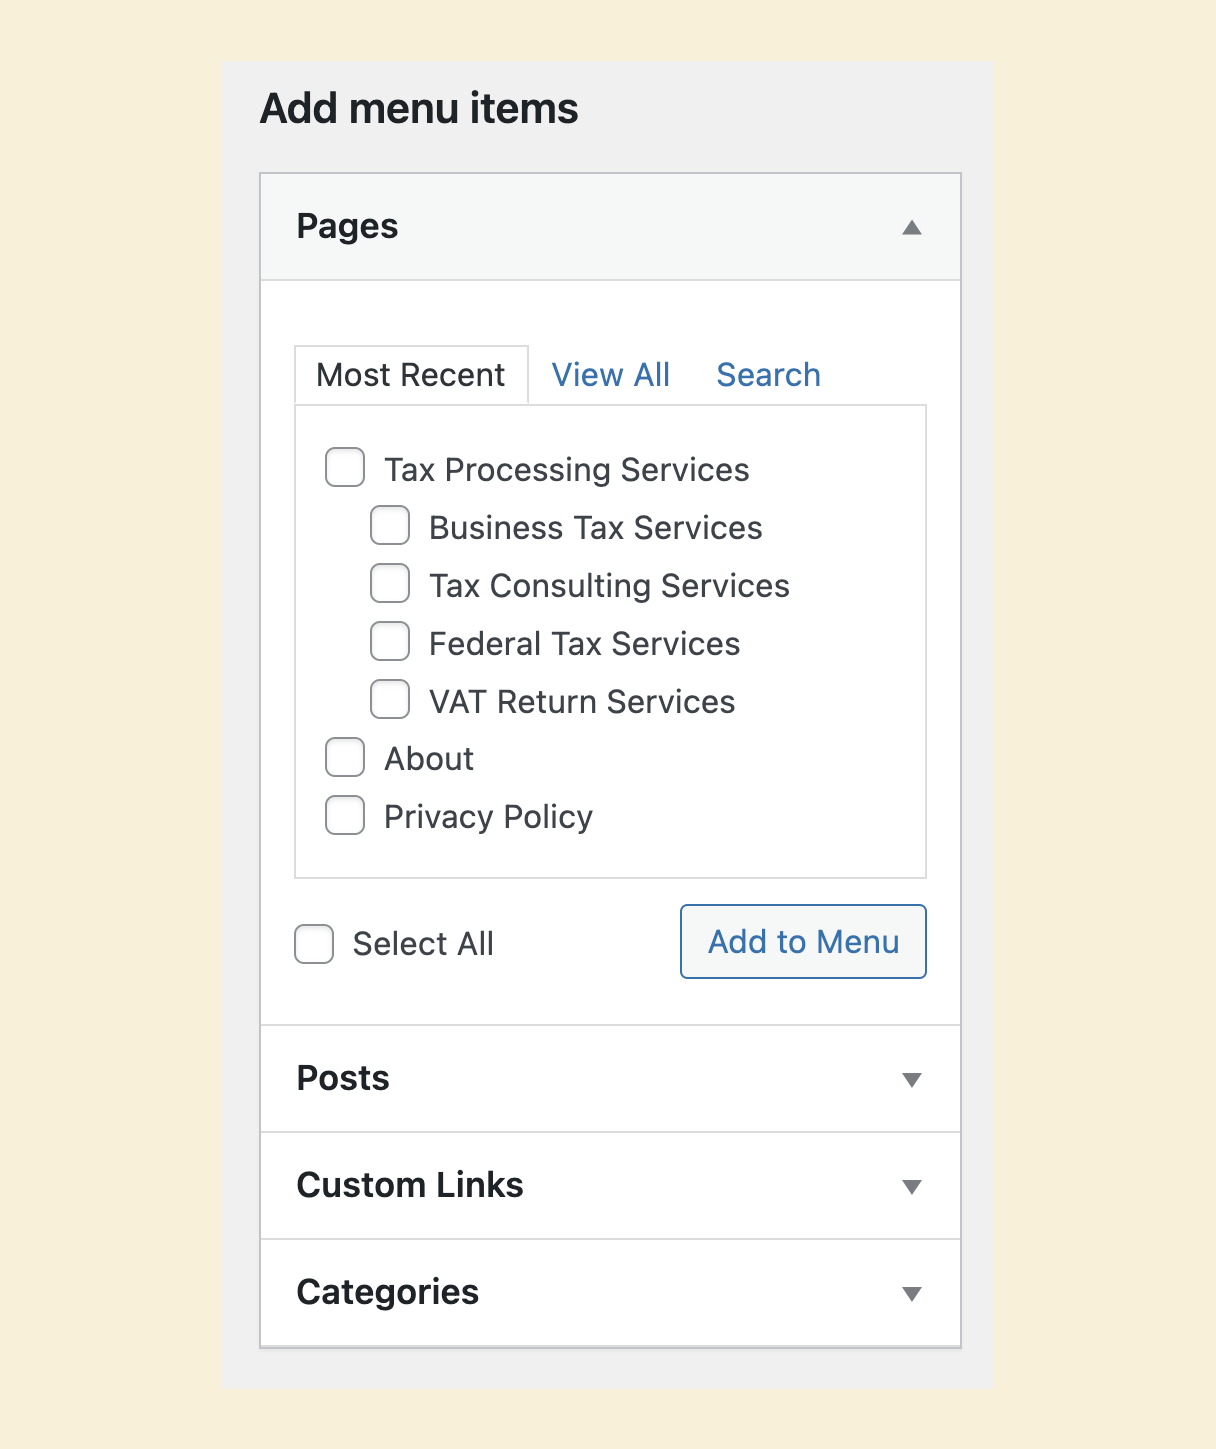
If you observe, the “Add menu items” interface has divided the items into the following accordion-based sections:
- Pages – contains the list of pages as menu items that you can add to the menu
- Posts – contains the list of blog posts as menu items that you can add to the menu
- Custom Links – allows you to enter a custom URL and item name
- Categories – contains the list of blog categories as menu items that you can add to the menu
- Tags – This section is currently hidden, but you can make it visible by going to the “Screen Options” interface and enabling the “Tags” option.
We call them accordion-based sections because you can open and close these sections.
When you open one section, the other section will get closed automatically. This will help keep the “Menus” screen clear and concise.
Come on, let’s see how to use them.
Adding a “Home” link to the menu
Currently, our website’s Homepage displays a list of blog posts.
And it is a good idea to let people easily access it while browsing other pages of our website.
To help us achieve this, WordPress provides a handy menu item called “Home”.
A unique feature of the “Home” menu item is it always points to the current Homepage.
In other words, even if you use a different page as the Homepage in the future, it will auto-update the “Home” link to use the correct Homepage.
For example, let’s say your current Homepage displays a list of blog posts, and the “Home” menu item reflects that.
For some reason, if you change your Homepage to use the “Services” page in the future, the intelligent “Home” menu item will reflect that automatically.
Saves a bit of maintenance headache.
So, let’s add it to the header menu.
The “Home” menu item is inside the “Pages” accordion.
So, make sure that the “Pages” accordion is open.
If it is not, click on it to open it.
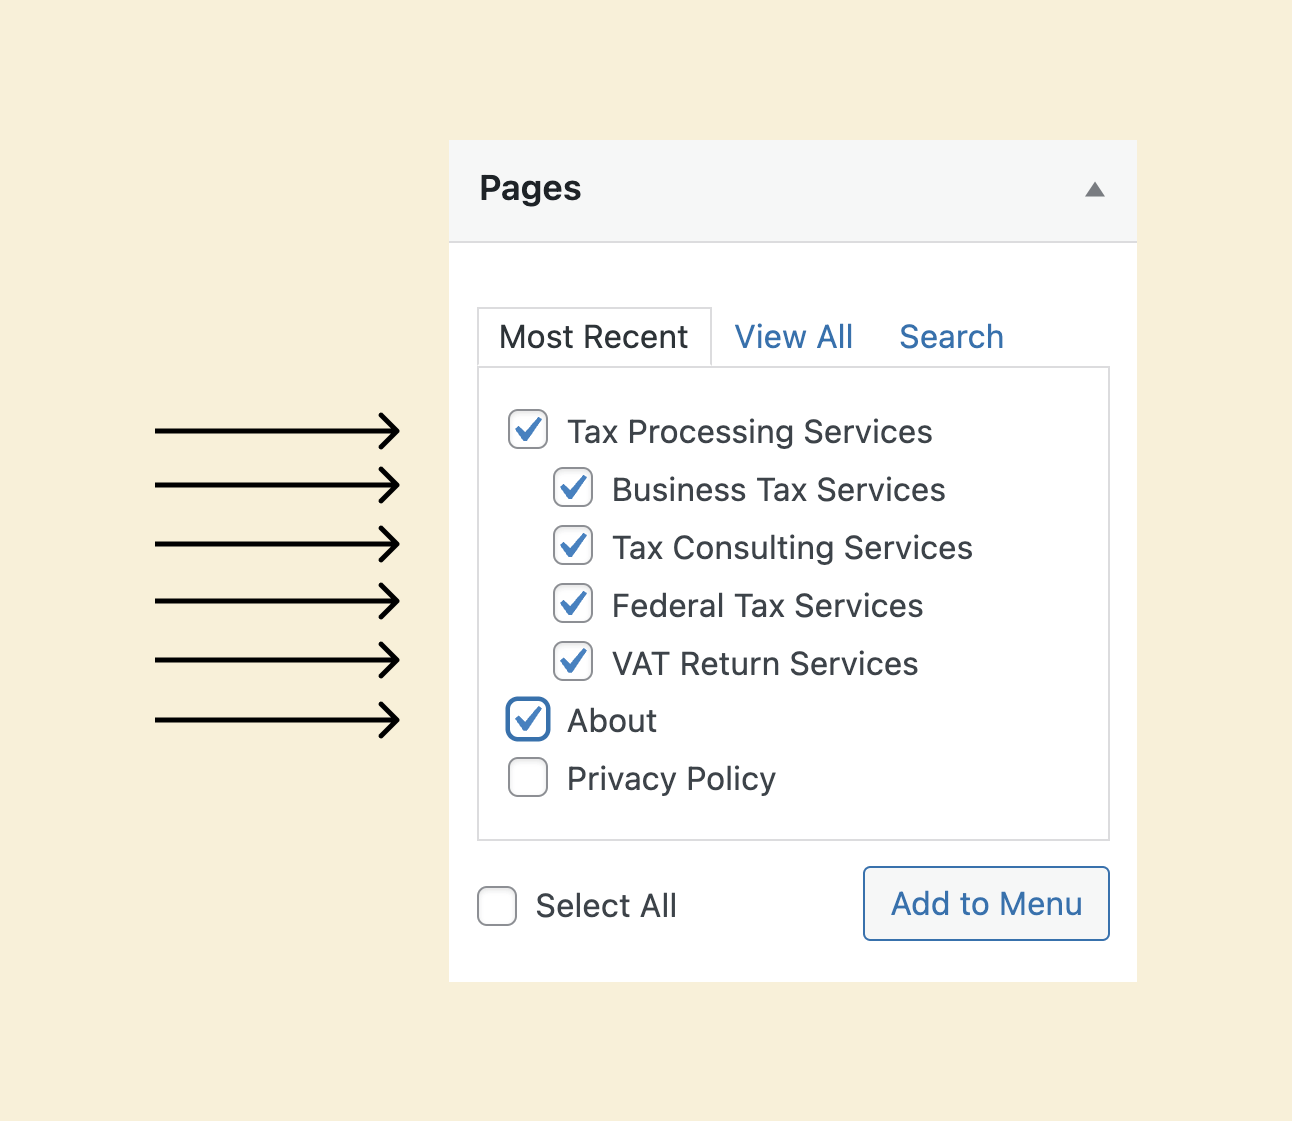
Inside the “Pages” accordion, by default, the “Most Recent” tab will be active.
You can only see the most recently created pages in this tab.
So, if you are not finding the page you are looking for, you either have to switch to the “View All” tab or search for a page using the “Search Tab”.
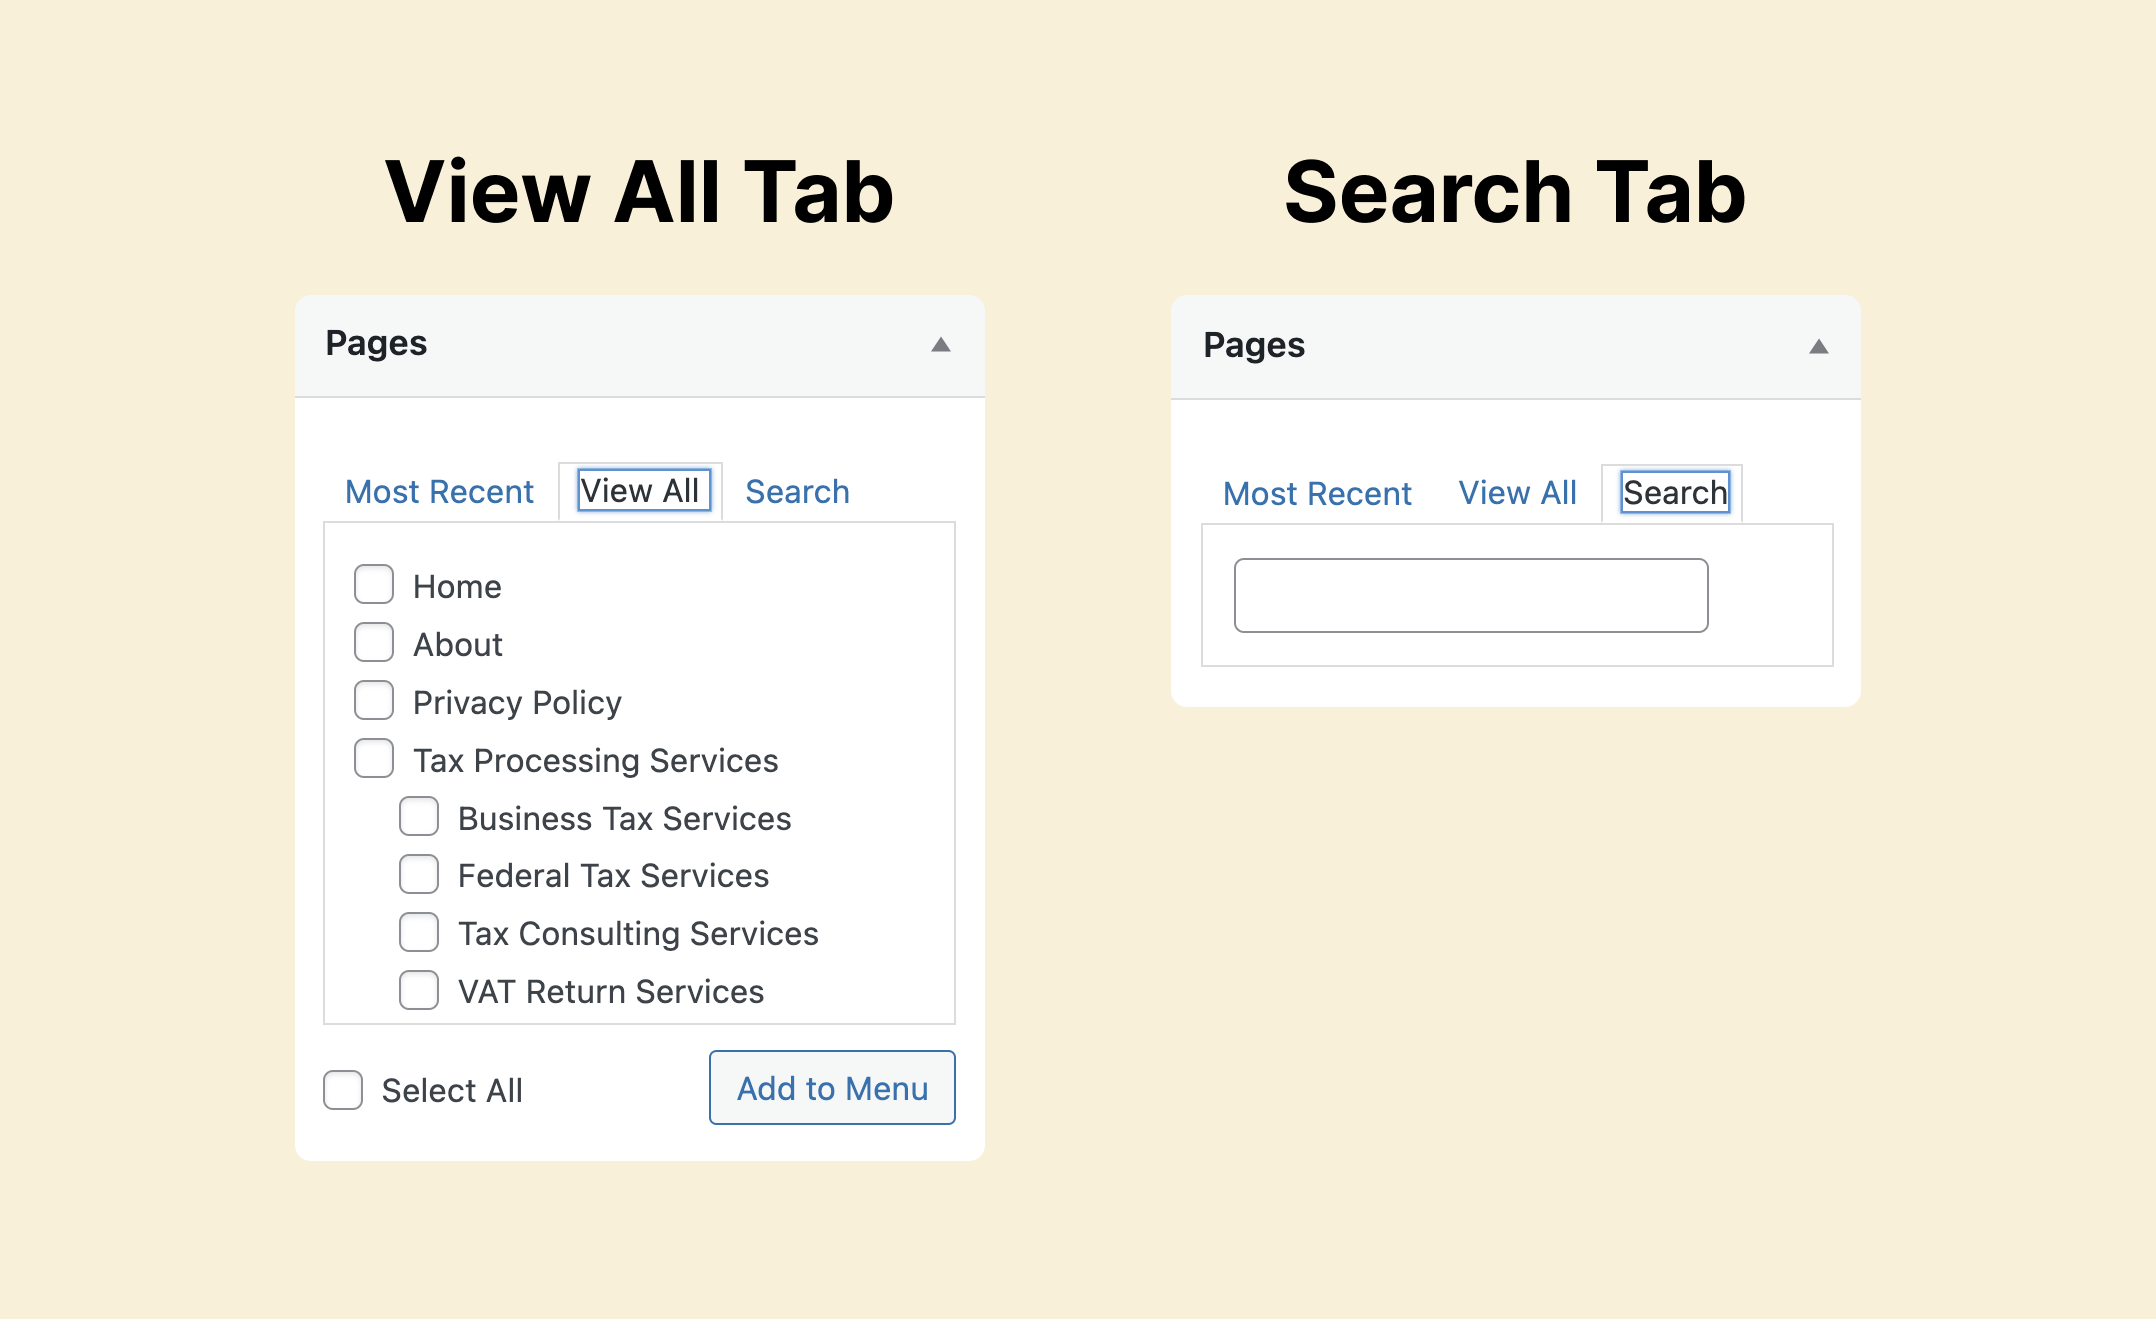
In my case, I am not finding the “Home” inside the “Most Recent” tab.
But when I switched to the “View All” tab, voila. Found it.
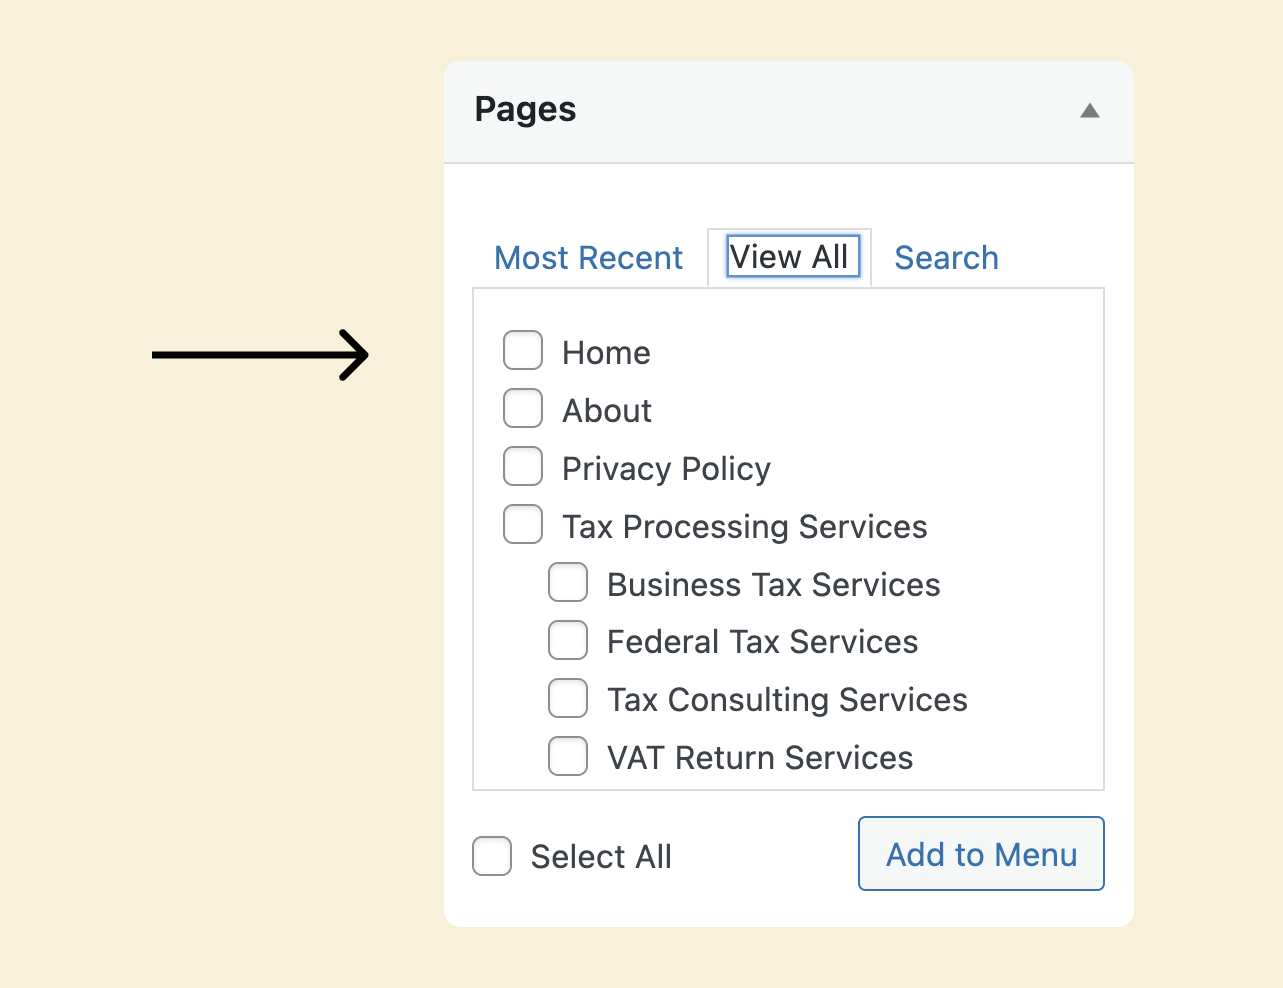
Finally, click on the “Home” item to select it, and then click on the “Add to Menu” button to add it to the header menu.
That’s all it takes to add an item to the menu.
Easy, isn’t it?
Come on, let’s add a few more.
You can add multiple items to the menu at the same time
For this, we need to select various items and then click on the “Add to Menu” button:
That’s how easy it is.
Here is my current menu structure:
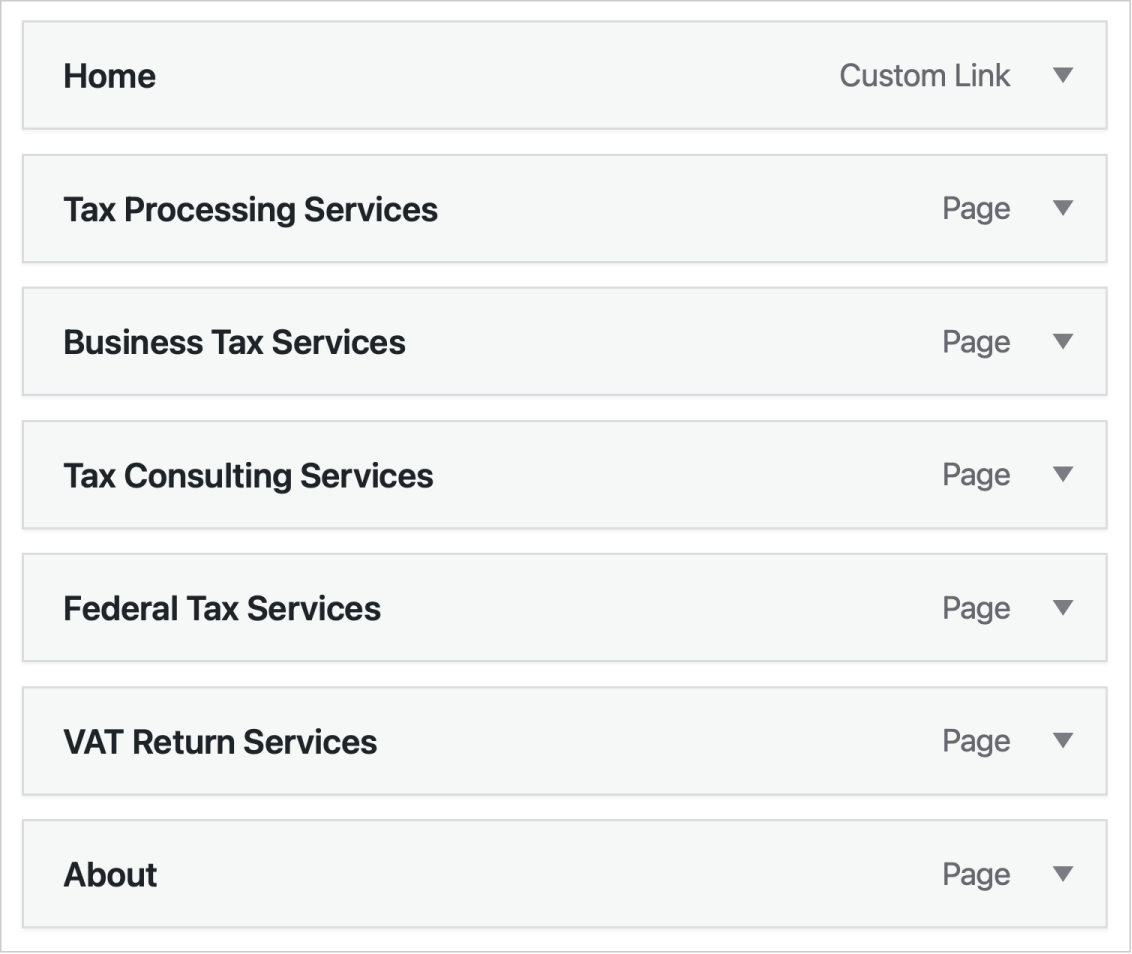
And it looks like I made a mistake.
Currently, the “About” link is placed at the end of the menu.
But I want to place it between the “Home” and the “Tax Processing Services” links.
Achieving this is easy.
How to reorder menu items
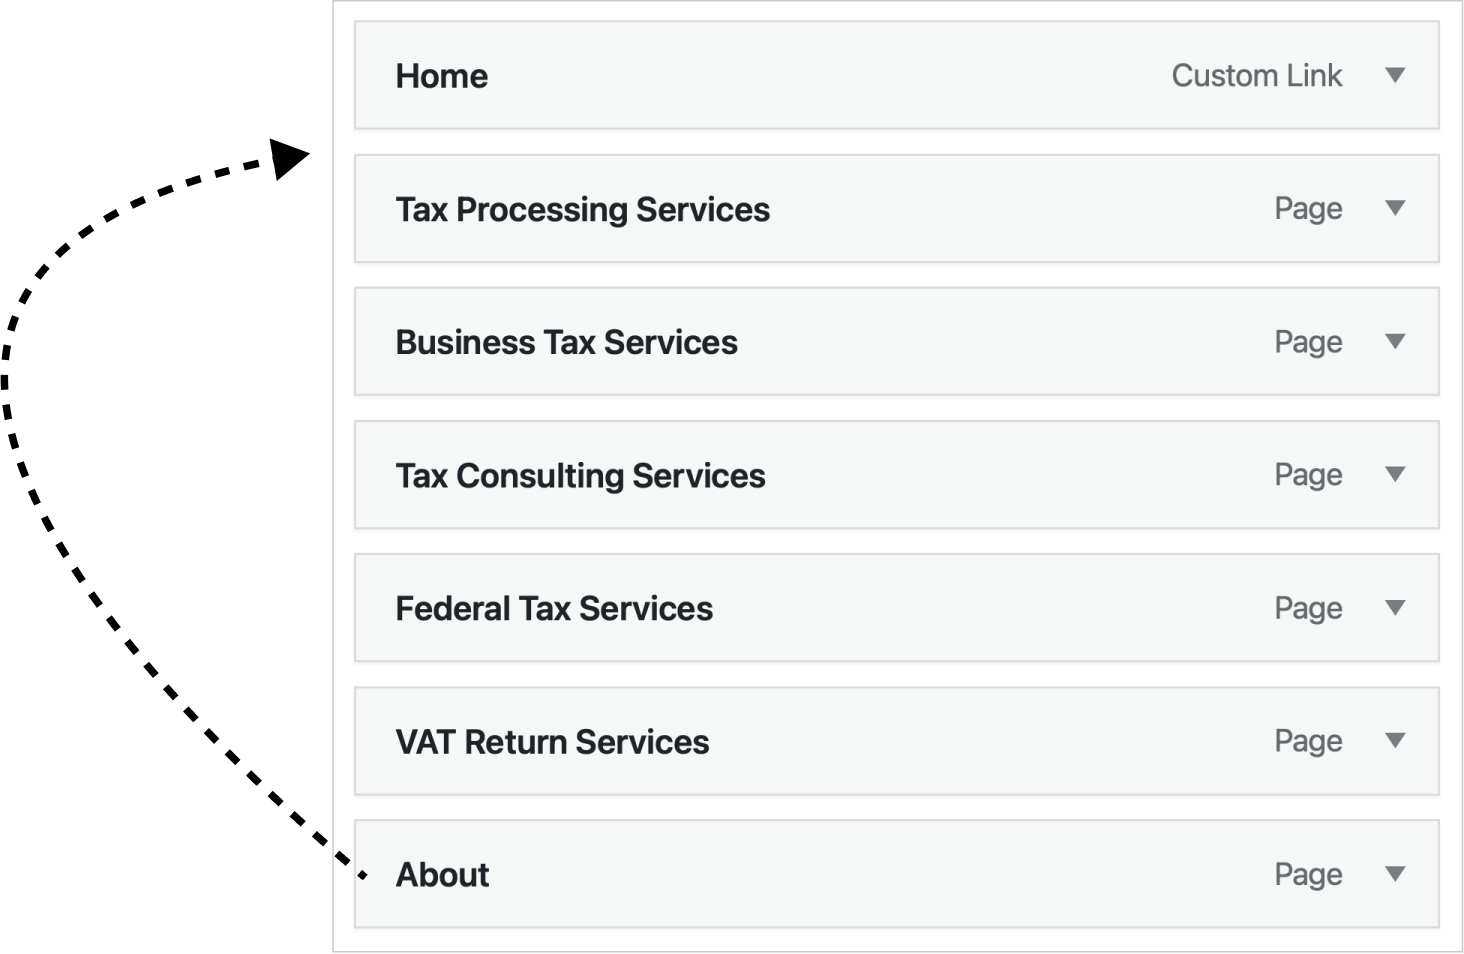
To reorder any menu item, you have to click and drag the menu item to the position where you want to place it and then release it.
For example, in my case, I clicked and dragged the “About” menu item underneath the “Home” menu item.
And as soon as I saw the transparent box with a dotted border, I dropped the “About” menu item by releasing the mouse.
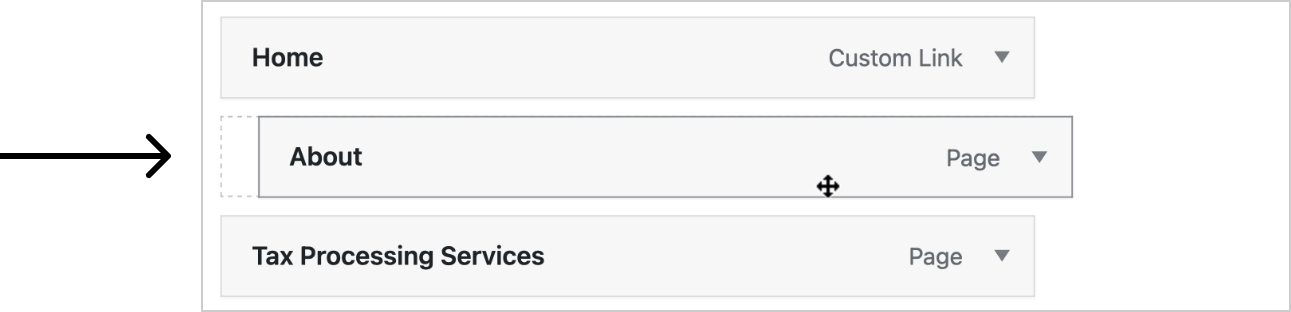
Now be careful here.
We do not want the “About” menu item to be a sub-item of the “Home” menu item.
So, pay attention to the alignment of the dotted border of the “About” menu item.
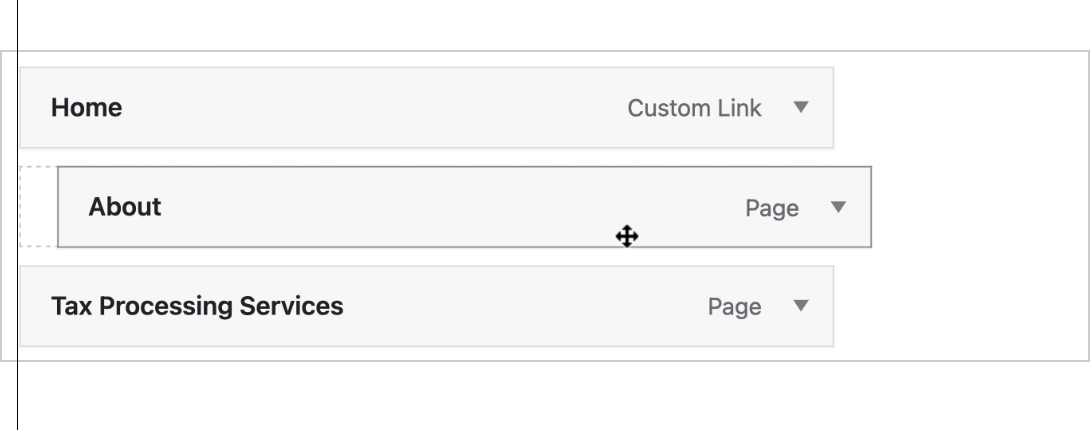
The left-hand edge of this dotted border must perfectly get aligned with the left-side edges of the remaining top-level items like “Home” and “Tax Processing services”.
If that is the case, you’re good to release it.
Finally, hit the “Save Menu” button to save the changes.
If we now go and look at the header menu in the frontend, it looks like this:

This is looking good for me.
But there is one more problem with the menu, and we will fix that by creating a dropdown menu in the next lesson.
Previous Article
 © 2026 UsableWP. A project by Naresh Devineni.