Uploading your first image
WordPress makes it easy to upload images and use them inside posts and pages.
Adding the image block
To add an image to our blog post, first, we need to add the “Image” block.
Next, to upload the image, we have four options:
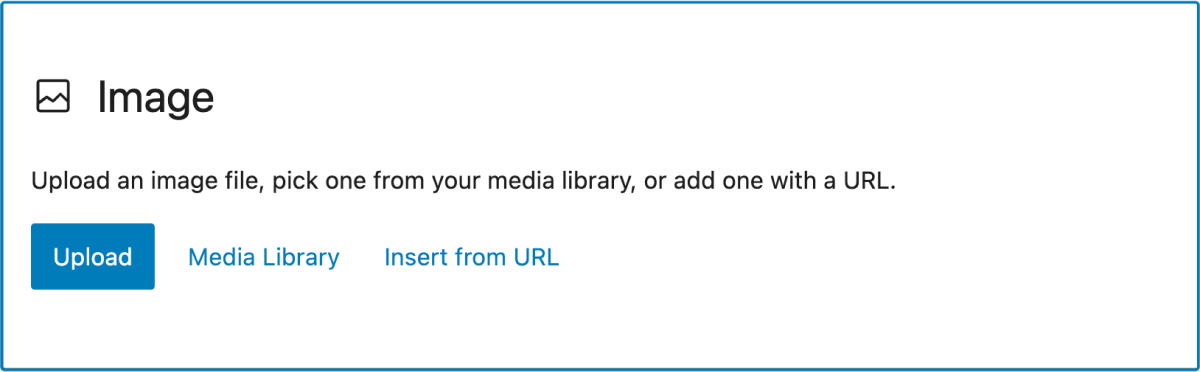
- “Upload” button – helps you upload new images.
- “Media Library” button – helps you choose from images that are already uploaded to the WordPress Media Library.
- “Insert from URL” button – helps you use an image from a website that you don’t own ( stranger’s website )
- Or you can just drop the files inside the image block (inside the blue border) directly.
We will use the “Upload” button.
Come on, download this invoice image:

Upload the image
Ah! Ah! Not so fast! Not so fast!

Resize and compress the image.
One common mistake most website owners make is downloading an image from the internet that is 3000×3000 large with a 2 MB file size.
And then they upload it directly without resizing and compressing it.
This is a bad practice because:
- It makes your blog post load slowly for your visitors. As a result, they will leave and never come back.
- It increases the disk space you need for your website. As a result, web hosting expenses will increase.
So, before uploading the image, please think of the long run of your website and only upload the images after optimizing them for speed and disk space.
Anyway, don’t worry; you can perform the resizing and compressing in two easy steps.
Step 1: Resize the image
There is a free tool called ImageResizer.com.
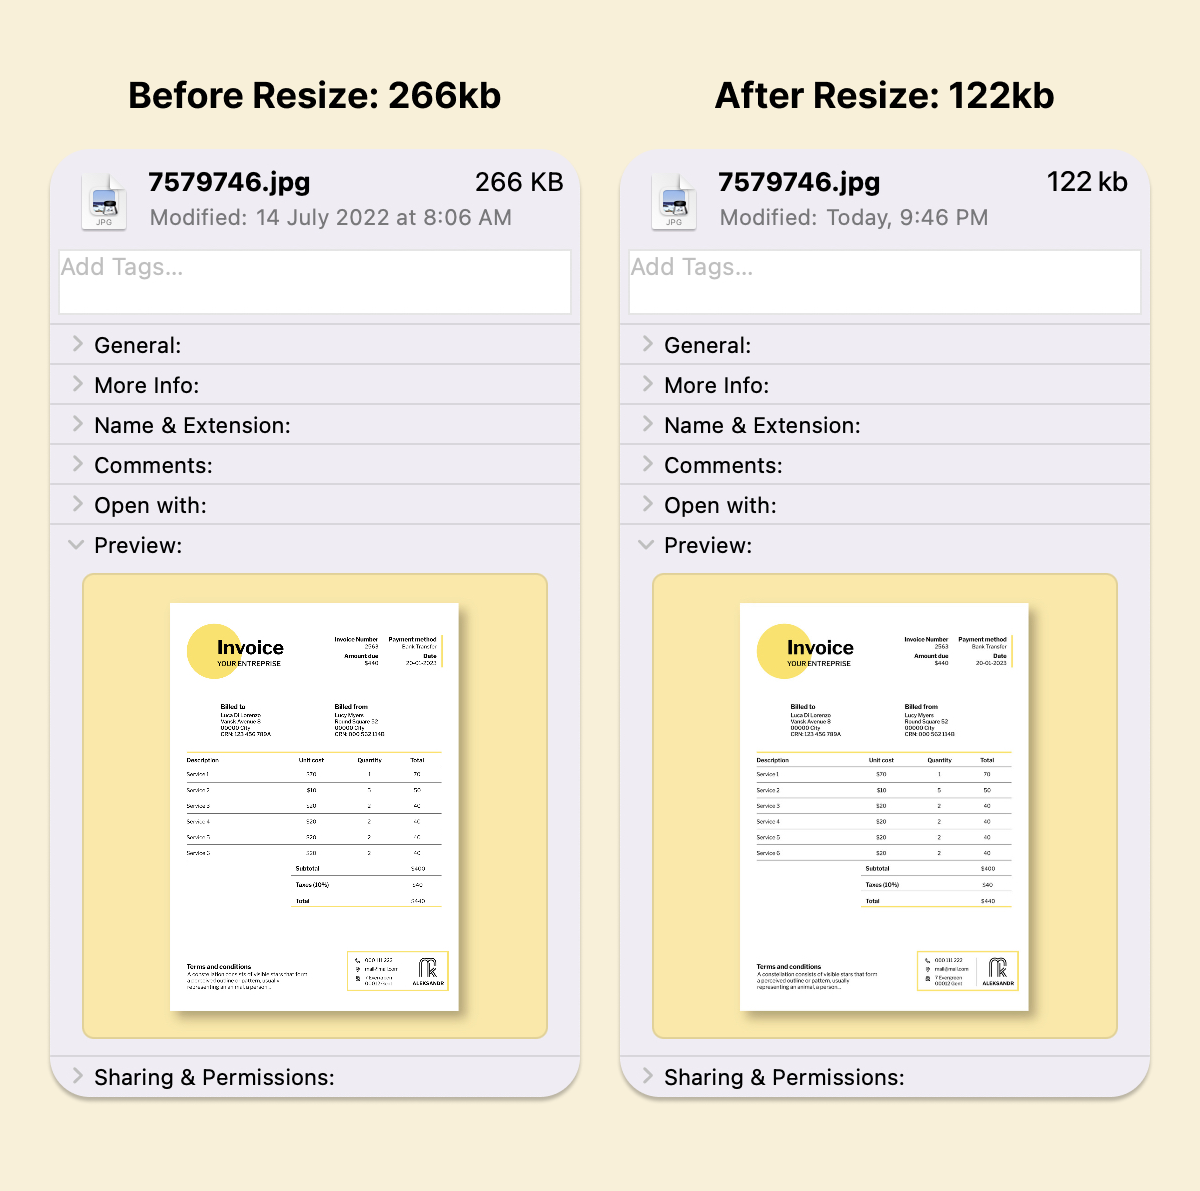
The image I have provided is 2000px wide and 266kb in file size.
But we don’t need an image larger than 1000px for our blog post.
So, go to ImageResizer.com, resize the invoice image to 1200px, and finally download it.
After the resize, the image file size is now around 122kb.
Previously the file size was 266kb. So, that’s a lot of savings.
But we can reduce the file size even further by compressing it.
ImageResizer did an excellent job resizing the image, but the file size can be reduced a bit further without hurting the quality of the image.
Step 2: Compressing the image
To compress the image, we need to upload it to tinypng.com.
Tinypng does its best to reduce the file size further without reducing the quality.
So, upload the resized image to tinypng.com and see what happens.
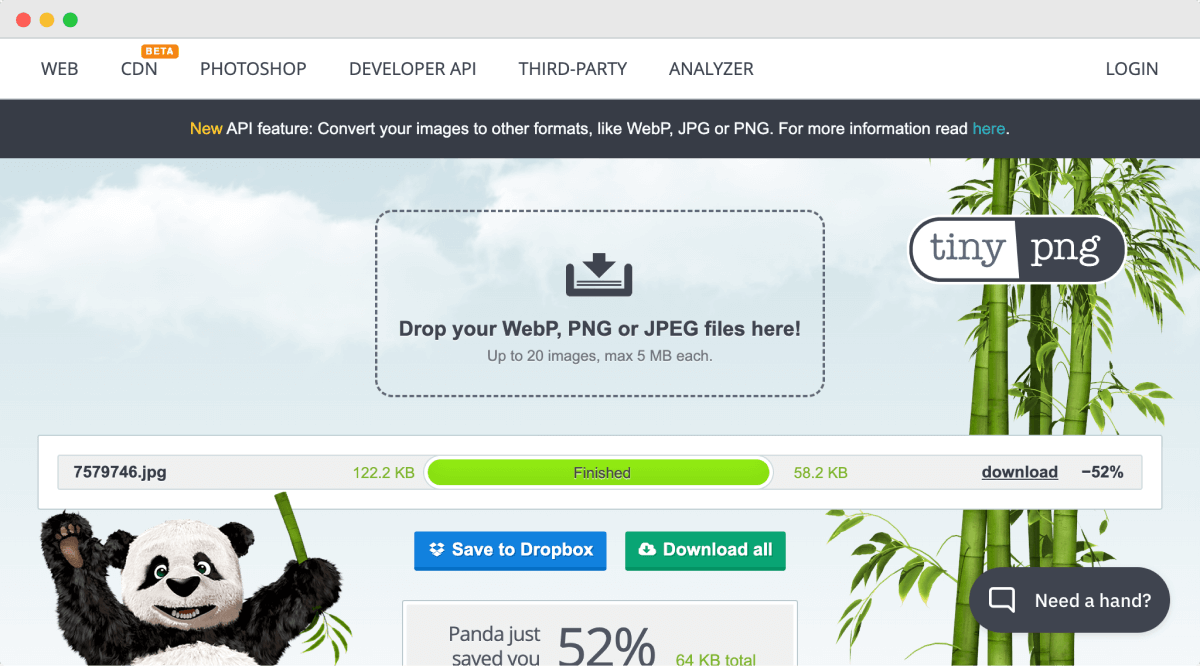
Did you see that?
The image size is now 58kb, and the quality is still tip-top.
Now you have my permission to upload it to your WordPress site :P
I understand that I am being strict here.
But it is necessary to save you costs in the long run :)
Upload the image
Finally, upload the compressed image to your blog post from your computer’s file browser.
And that’s how easy it is to upload the images.
So, if you want to reuse the image somewhere else on the website, you don’t have to re-upload it again.
You can use the image by picking it from the Media Library.
And when using an image from the Media Library, click on the “Media Library” link or tab. This will give you access to all the images inside the media library.
Adding alternative text is important.
When you upload an image and select it inside the post editor, on the sidebar settings area, one of the settings you’ll see is “Alternative Text”.
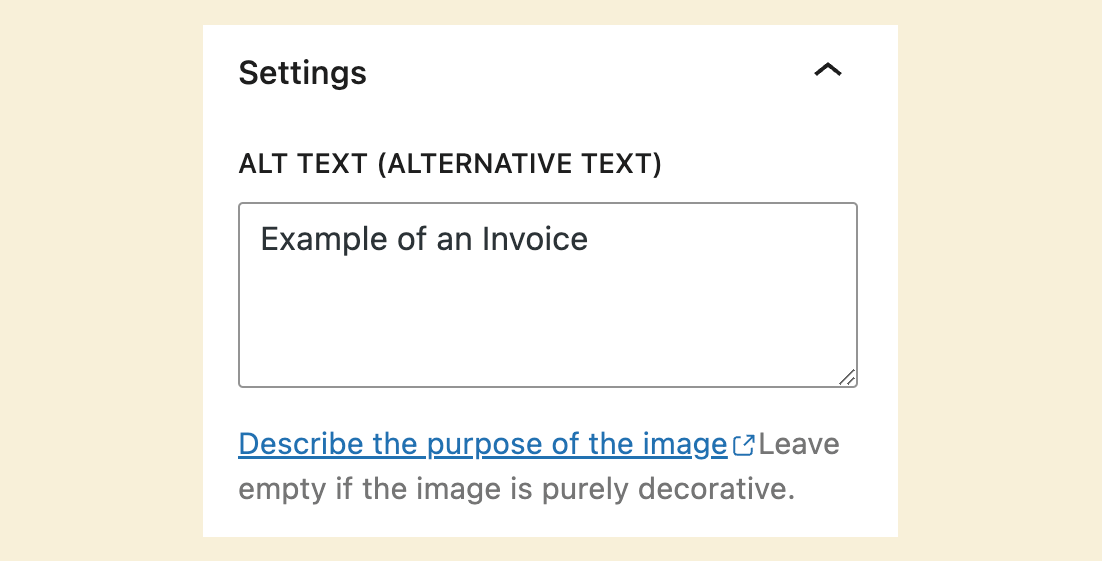
You must add an alternative text to the image uploaded because:
- It helps people who use screen readers to read your articles.
- It could improve the Search engine results of your website as well.
In the next lesson, we learn how to turn the image into a link.

Previous Article

 © 2026 UsableWP. A project by Naresh Devineni.