Introducing the List block and the parent blocks
The “List” block allows us to add bullet points to our content.
To add the “List” block, this time, let’s use the blue-colored “Plus” button located on the top-left corner of the editor screen.
Once you have added the “List” block, you can start typing an individual list item and then hit the enter key on your keyboard to add a new item.
How to exit the “List” block
Once you have added all the list items, you have to hit the enter key twice to exit out of the “List” block.
The “List” block is a parent block
Now, I want you to understand something.
Unlike the Paragraph block or the Headline block, the “List” block is not simple.
The “List” block is a parent block, and it can have multiple “List item” blocks as its children.
Let me show what I mean.
On the top bar of the post editor, there is a button called “Document Overview”.
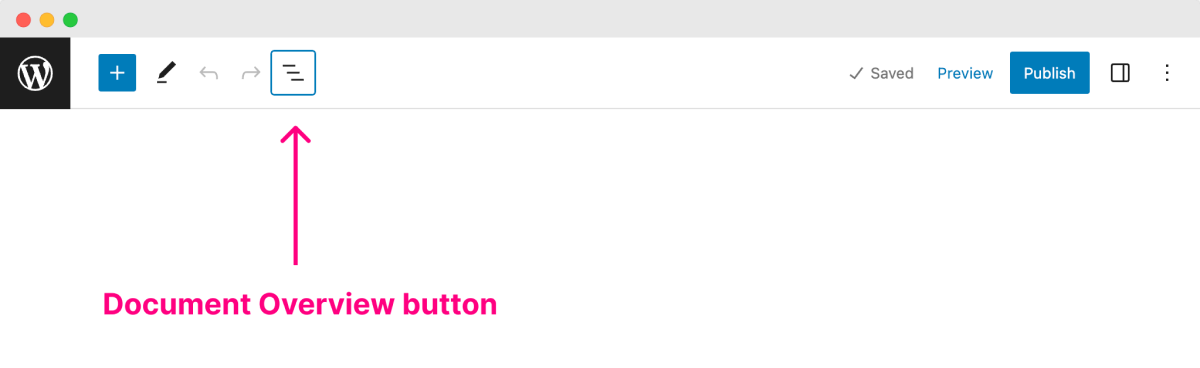
If you click on it, it will open up the “Document Overview” section on the left-hand side of the post editor.
The “Document Overview” section contains the list of all the blocks that we have added to the Block editor so far.
It helps us select the blocks.
It also helps us add, delete, and change the order of the blocks.
Simply put, it helps us manage the entire block editor.
And if you notice, there is no dropdown arrow on the left for the “Paragraph” block and the “Heading” block.
This tells us that they are simple blocks with no child blocks.
But for the “List” block, there is a tiny arrow on the left.
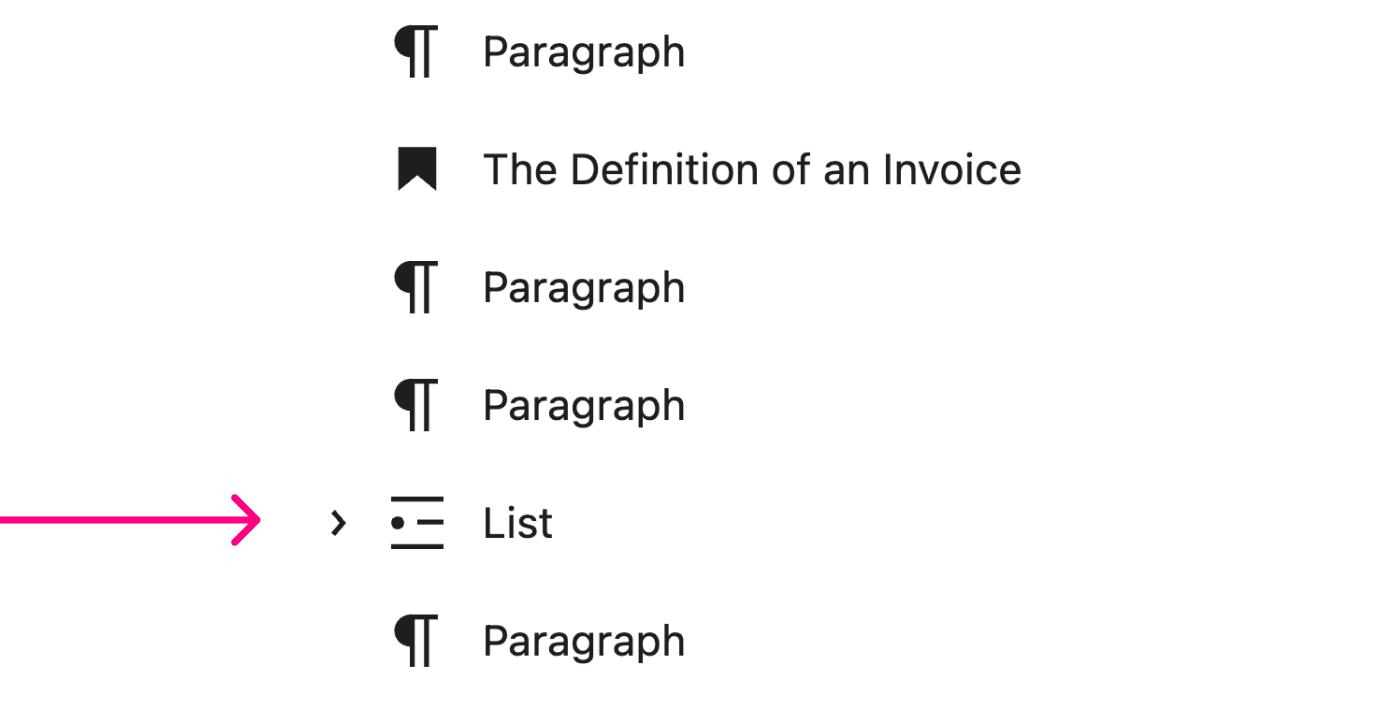
This arrow indicates that the “List” block is a parent block.
And if you click on that arrow, the child blocks of the “List” block will get revealed.
Each child block represents an individual bullet point.
Did you see that?
The parent “List” block contains four “List item” blocks as child blocks.
The “List” block acts as a container that is holding the individual “List Item” blocks.
We can select the parent block and its child blocks independently.
For example, in the “Document Overview” section, when we click on the “List” block, only the “List” block is selected, and we can see the options toolbar that is specific to it.
If you notice, the children of the “List” block are not selected.
The thing is, WordPress Block Editor treats all the blocks individually.
Even if they are parent and child blocks.
This is important because some settings only make sense at the parent level and others at the child block level.
For example, when we select the parent “List” block, this “Ordered” list option transforms the entire bullet points into numbered points.
But we can’t find the same option for the child blocks because they are not “List” blocks. They are “List item” blocks.
This differentiation helps you look for the right options in the right place and don’t get confused.
Adding a nested list
So far, we have seen how to select the parent “List” block.
Now let’s select one of its child items and add a nested list inside it.
We can easily create a nested list using the “Indent” option that we get when we select one of the child items.
In the above video, we have created a nested list under the “Design a website” list item.
And if you have noticed, the “Indent” option is only available on the list item rather than the parent “List” block.

So, keep an eye on whether you are adding a parent block or a simple block.
If you are adding a parent block, remember that the parent block will have its own options that are different from its children.
And, if you can’t find a particular option on the parent block, look for it by selecting the child block if it makes sense for the child to have it.
That’s all.
In the next lesson, we will learn how to upload and add images to your blog post.

Previous Article

 © 2026 UsableWP. A project by Naresh Devineni.