Adding dynamic widgets to the sidebar
So far, we have only added static content to the sidebar.
We typed the text ourselves. We uploaded the images. We created the button.
But what if you want to display dynamic content inside the sidebar?
For example:
- List of blog categories and tags
- List of latest posts
- List of pages created
We call them dynamic content because WordPress pulls out that content from the database automatically without you typing them manually.
Now, it is not that we can’t type this dynamic content manually. But it is a lot of work and error-prone.
So, we better use widgets to output dynamic content.
Anyway, how do we add such dynamic content to the sidebar?
This is where “Widgets” come in.
So, what are Widgets?
Widgets are nothing but blocks that output dynamic content or functionality inside the widget areas of your website, such as the sidebar, footer, etc.
Here is the list of widgets that you can use to save time:
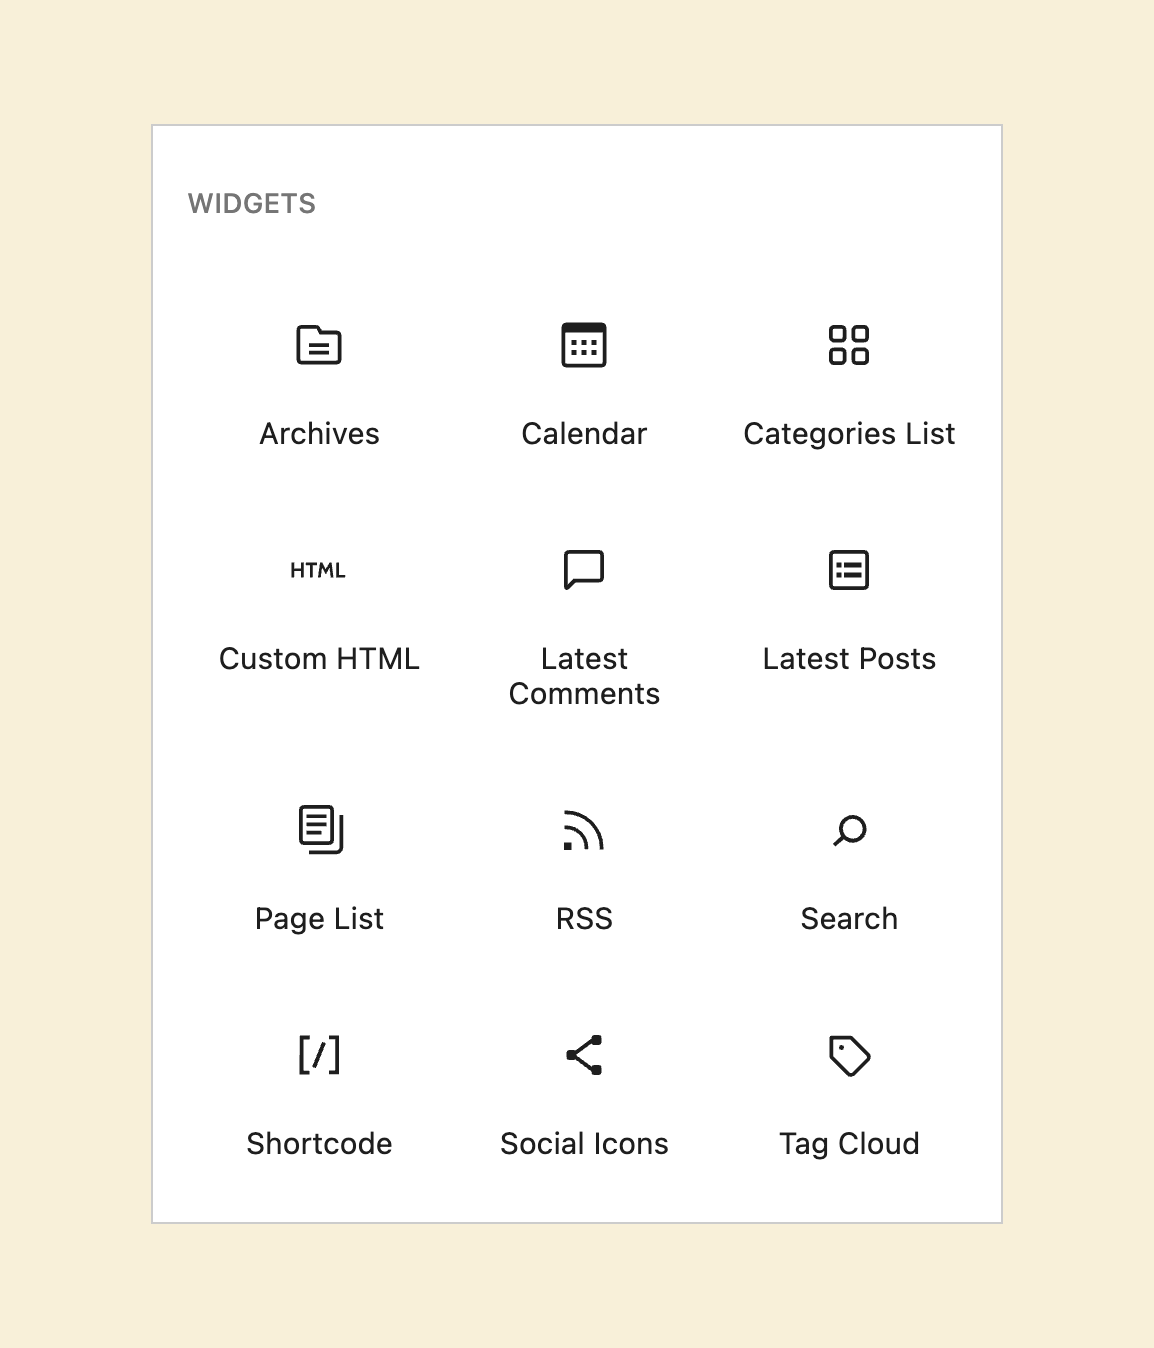
If you notice the above list of widgets, there are two types of widgets:
- Dynamic data widgets – These widgets output your website’s data, such as the list of blog categories, tags, the latest blog posts, archive page links, etc.
- Functionality Widgets – These widgets allow you to output a small piece of functionality such as a search form, social links, custom HTML code, etc.
As you can see, by adding widgets to your sidebar, you can make your sidebar dynamic and interactive.
Come on, let’s try out some widgets.
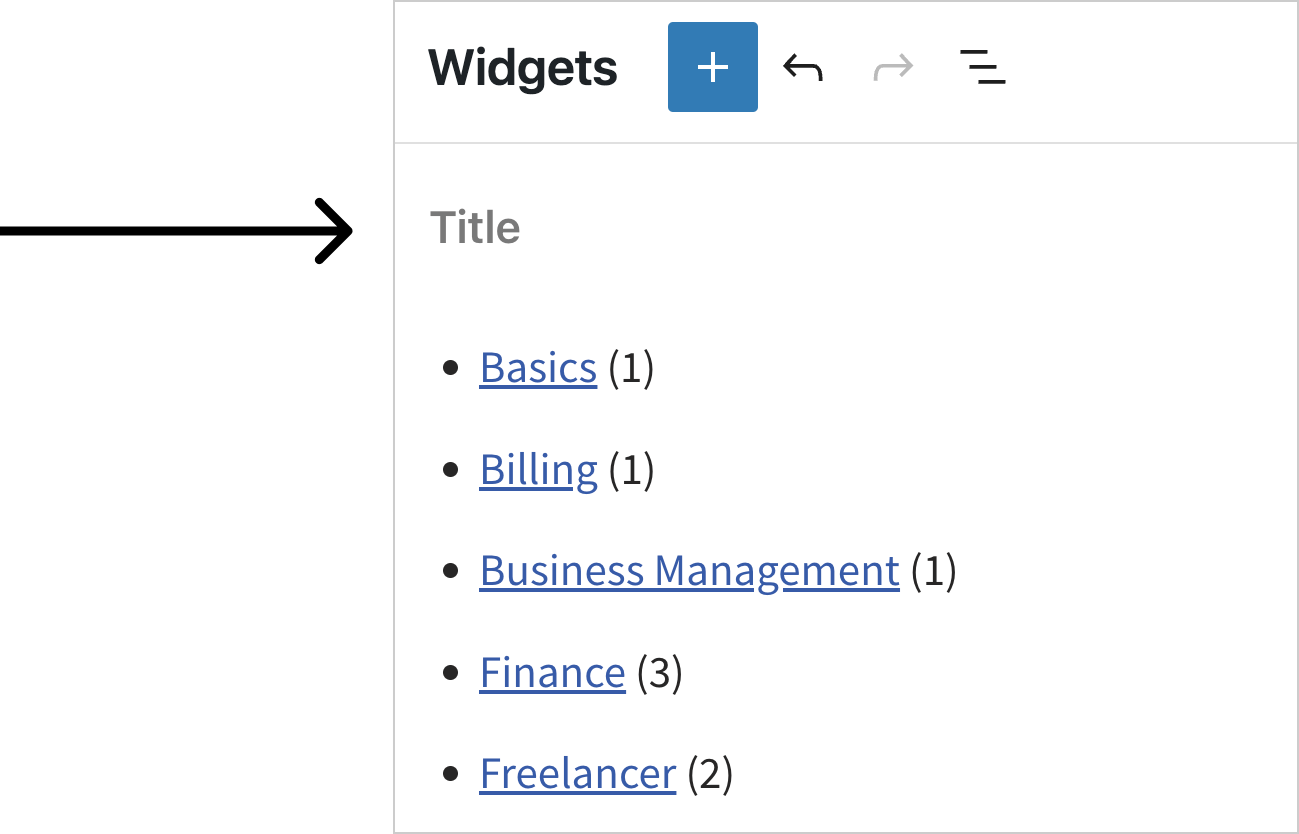
First, let’s add the “Categories” widget
Remember that Widgets are blocks too.
So, let’s start adding the “Categories” widget by clicking on the “Add Block” button.
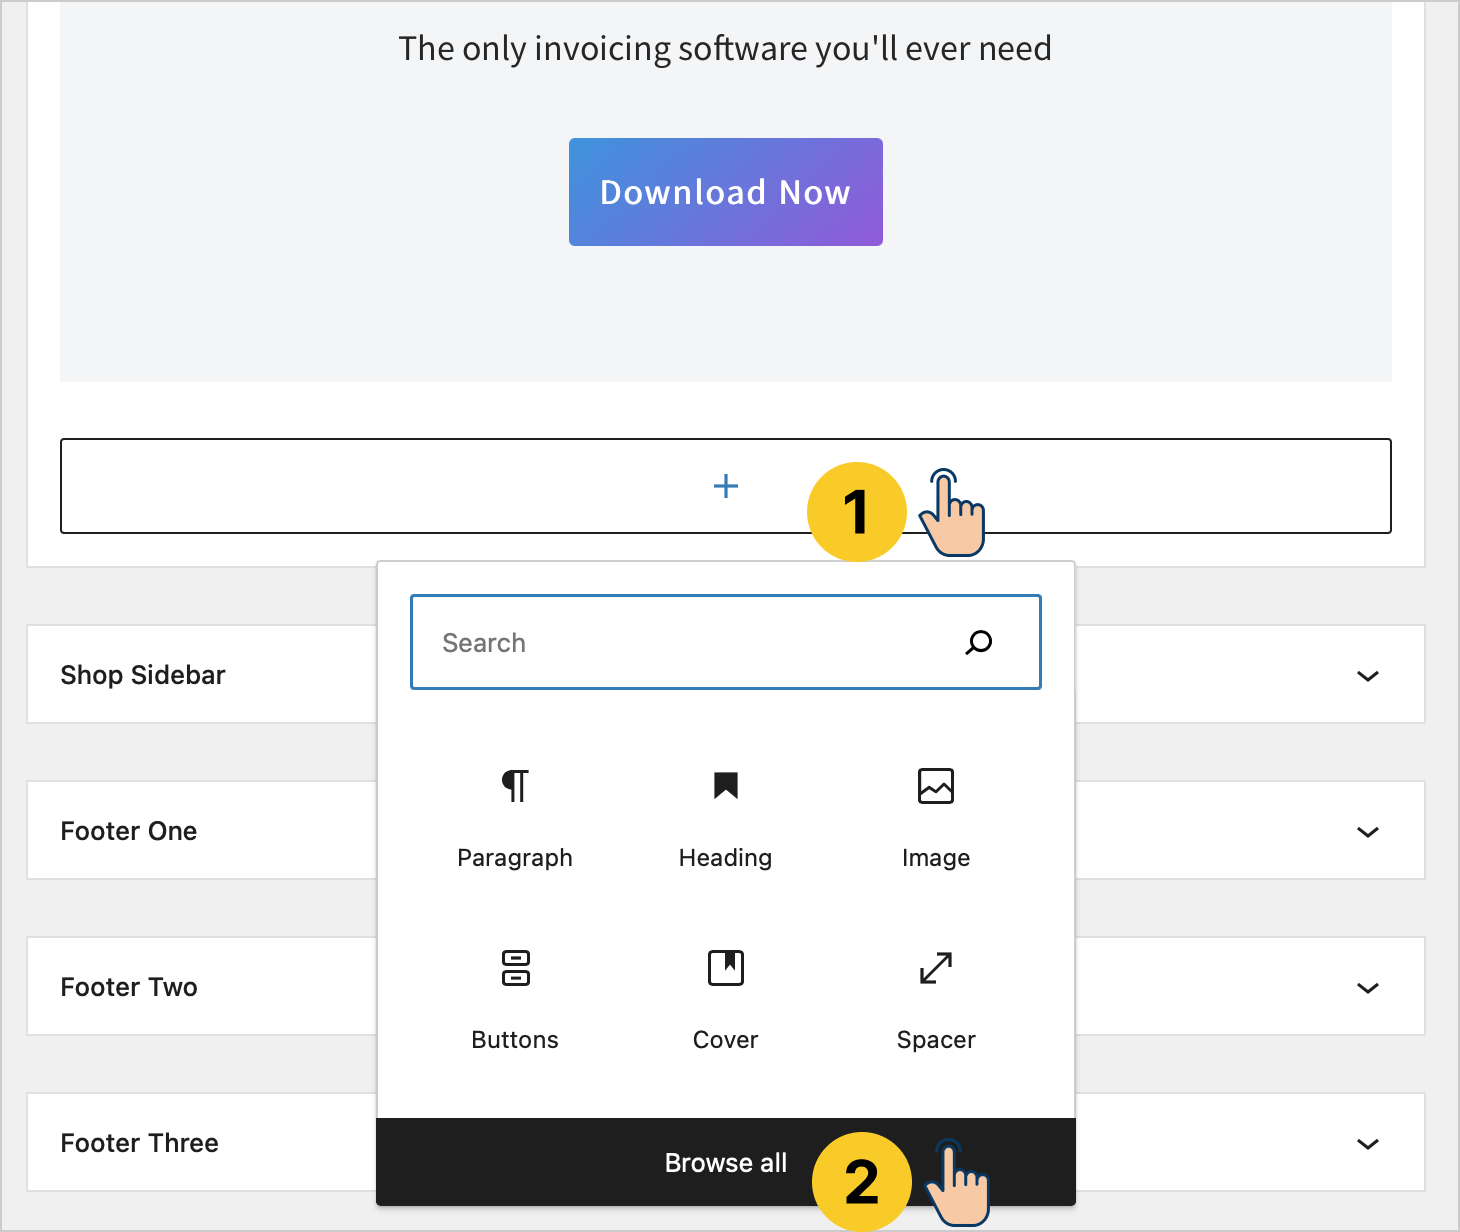
Next, click on the “Browse all” button.
This will open the “Blocks” sidebar with all the blocks you can add to the “Sidebar” widget area:
Next, scroll through the “Blocks” sidebar until you find the “Widgets” section.
Finally, choose the “Categories List” from the list of available widgets by clicking on it.
This will add the “Categories List” widget to the “Sidebar” widget area.
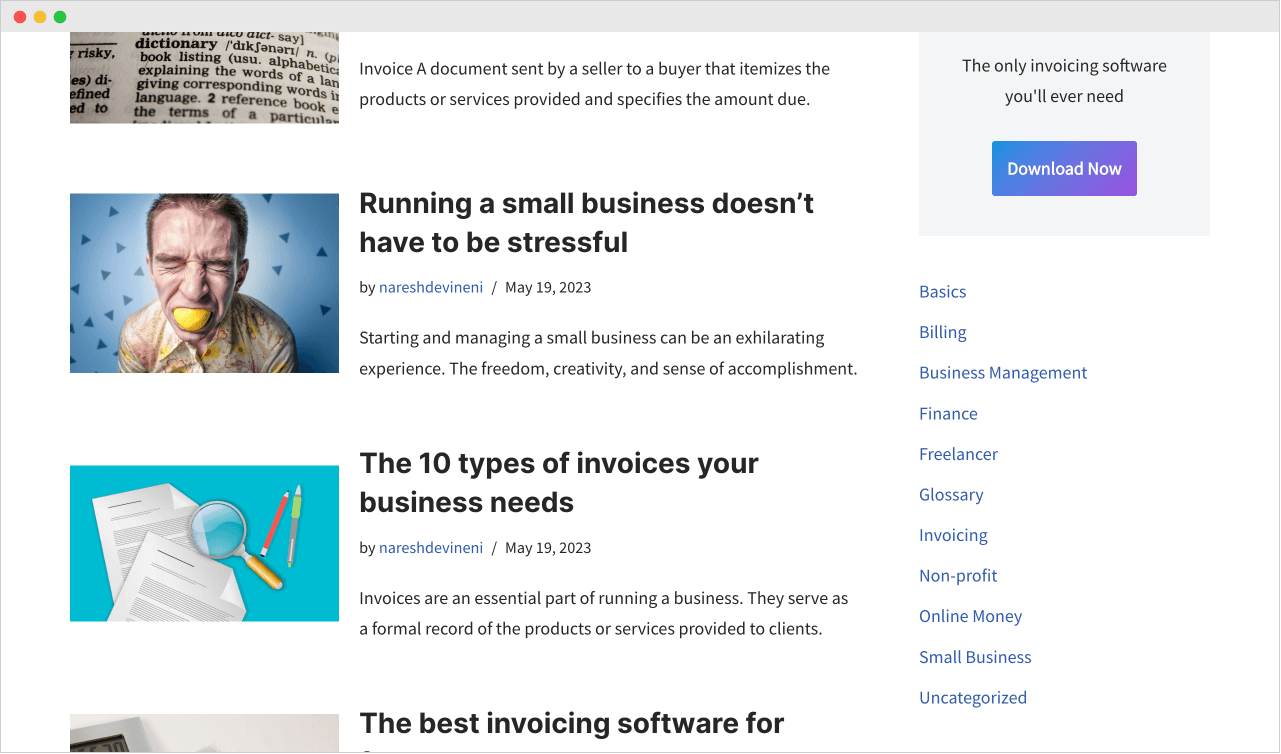
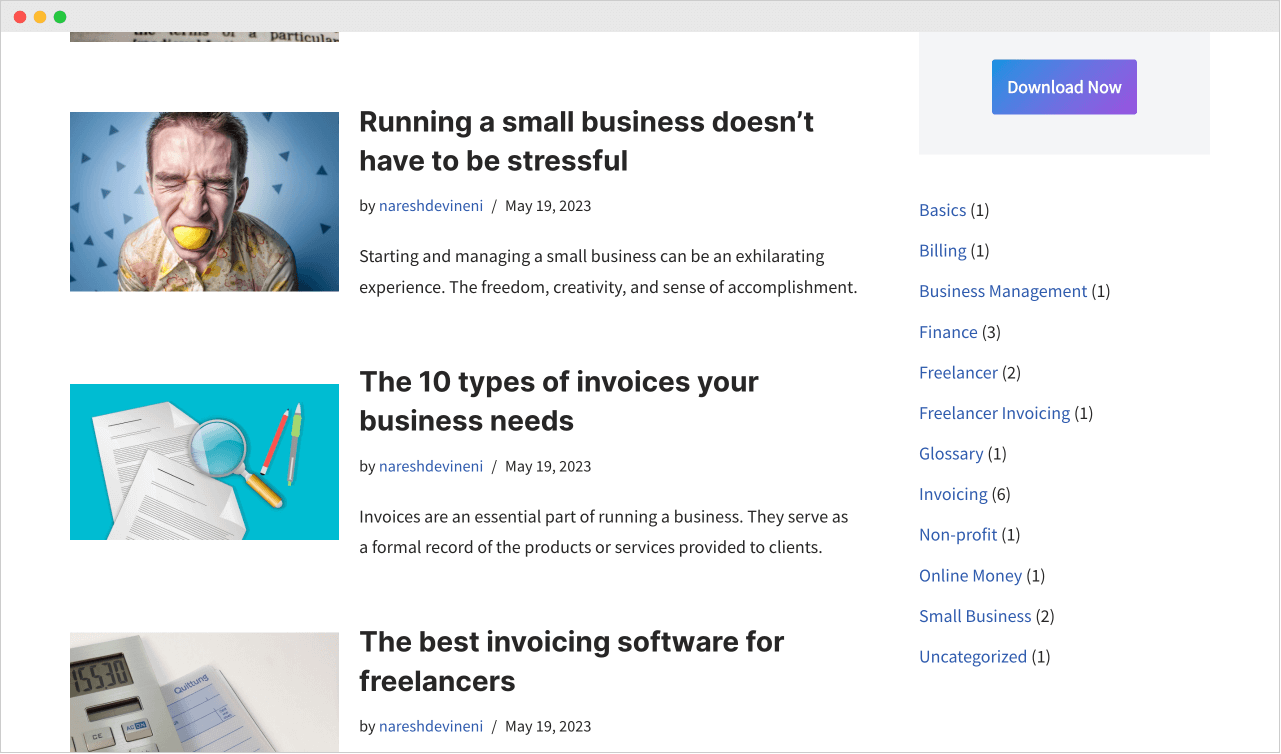
And here is how it looks on the frontend:
You can configure the widget blocks.
If you notice the sidebar in the above screenshot, the “Categories List” section is displayed nicely.
But what if I want to display the blog post count for each category?
How do we do it?
Don’t worry!
You don’t have to write any code.
Widgets are configurable and come with dynamic settings to help you tweak the widget according to your needs.
And these dynamic settings are part of the block-specific “Settings” you can access on the right.
Come on, let’s see how to add the post count for each category:
First, make sure that the “Settings” sidebar is open.
Next, select the “Categories” list widget by clicking on it.
This will bring up its configuration options inside the “Settings” sidebar.
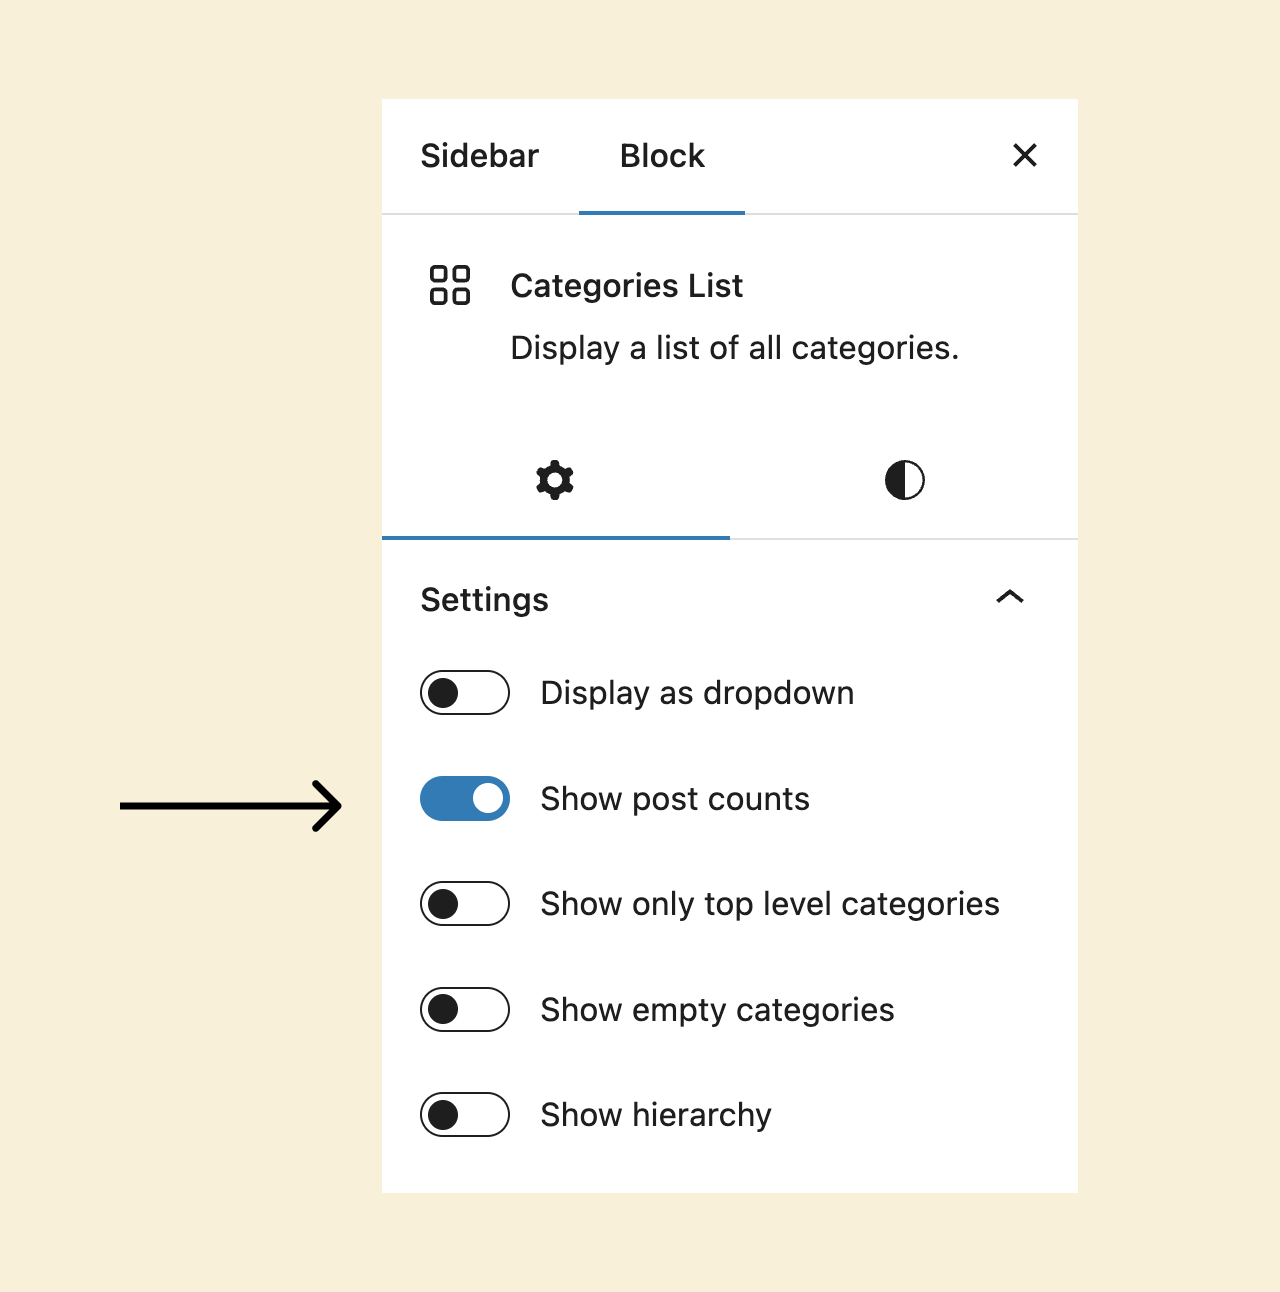
Next, enable the “Show post counts” option from the settings and click the “Update” button to save the changes.
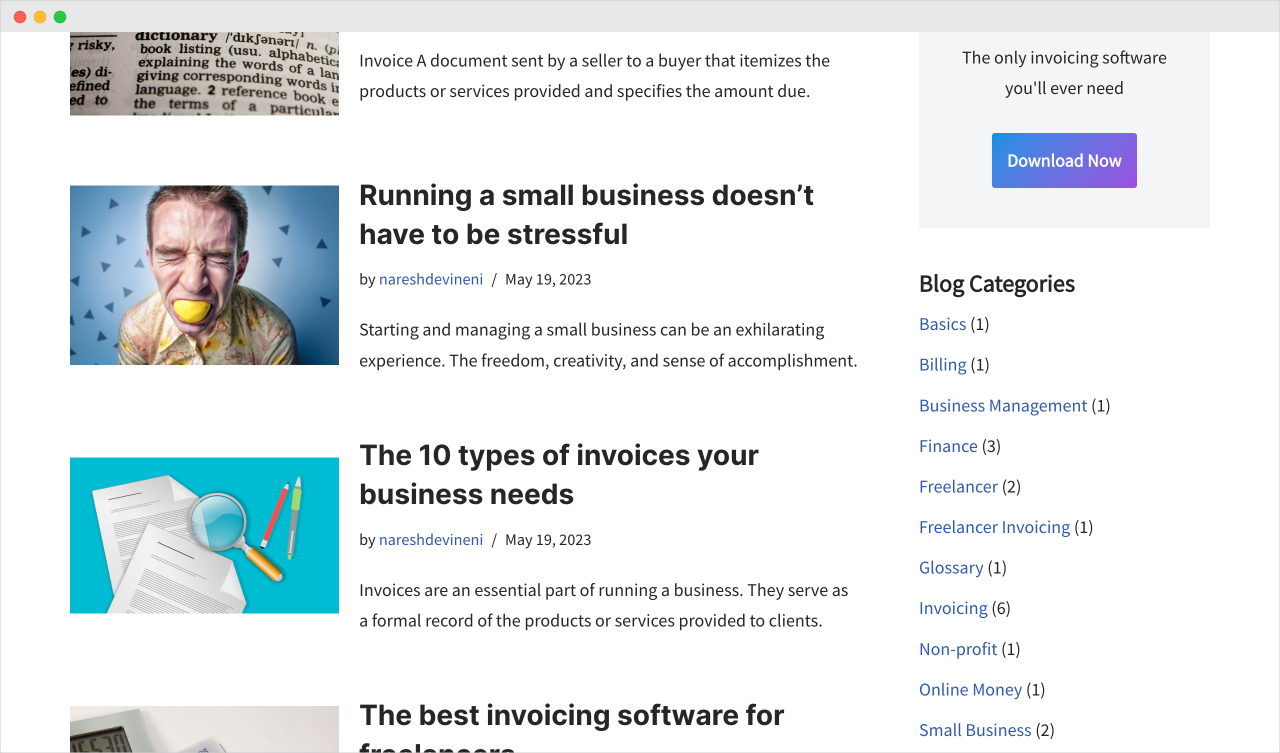
If you now visit the frontend, you’ll see the post count for each category:
Do you now understand what I meant by saying that widgets output dynamic data?
There is no way you could output the post count like that manually by content statically.
And by the way, the post count and the categories list will get updated automatically.
You don’t have to manually add new categories or update the post count.
The “Categories List” will take of it automatically.
This applies to any widget.
That’s why we are calling them dynamic, right?
Anyway, one problem I see with the categories list on the frontend is it doesn’t have a section title.
When the user sees that category list, how would they know if it is a category list for the blog?
To remove this ambiguity, we need to add a section title above the list of categories saying “Blog Categories”.
This will help the users understand that if they click on one of those links, they will be taken to the respective archive page for the category.
So, let’s add the section title.
Now, you already know how to do this.
You could:
- Insert a “Heading” block before the “Categories List” block
- Type “Blog Categories” for the heading
- Finally, group the “Heading” block and the “Categories List” block to transform them into a section
There is nothing wrong with this approach.
But there is a reliable shortcut:
Instead of adding a headline block separately and grouping it with the “Categories List” widget, we could just use the “Widget Group” block.
The purpose of the “Widget Group” block is to add the heading field automatically.
The “Group” block doesn’t do this.
So, the “Widget Group” saves us from performing an additional step.
I am not saying it is a live-saver. But it’s just a neat little trick.
Anyway, here is how to use it:
First, select the “Categories List” widget and transform it into a “Widget Group”.
You can achieve this:
- By clicking on the “Categories List” block icon
- And then clicking on the “Widget Group”
And as soon as you transform any widget into a widget group, WordPress enables a neat little “Title” field above the widget’s content.
Fill in the “Blog Categories” title and hit the “Update” button to save the changes.
That’s all. Here is how the title looks on the frontend:
This is nice.
But one downside is we now don’t have control over the appearance of the title.
It looks like the shortcut comes with a price.
Yikes!
Anyway, we will conclude this module in the next lesson.

 © 2026 UsableWP. A project by Naresh Devineni.