Exercise: Installing a free contact form plugin
We have a situation here.
We didn’t create a “Contact Us” page for our website yet!
Can you believe that?
But I had a good reason.
I postponed it because we need to place a contact form on the “Contact Us” page, and we can’t do that without learning about plugins.
Now that you understand plugins, let’s fix this situation.
Here are the tasks for this and upcoming lessons:
- Find a reliable contact form plugin and install it
- Create a contact form using the plugin
- Create a “Contact Us” page and embed the contact form in it
- Configuring the form’s notifications correctly
If you want to create a contact form for your website, there are at least ten plugins that let you do that
A good thing about WordPress plugins is there are many plugin alternatives for each functionality.
On the negative side, this also means decision fatigue 🙈
So, it is recommended to install a plugin that is:
- Highly rated – Read the reviews and see what problems other users are facing
- Has all the features you want – Don’t try to install multiple plugins that do the same job
- Has been receiving regular updates – Just like Core WordPress software, plugins get regular software updates
Not every plugin will have all these qualities.
So, you can filter out a lot of bad plugins using this process.
Anyway, based on the above recommendations, I prefer to use a premium plugin called Gravity Forms on all my client sites because of its:
- High email delivery rate
- Reliable nature
Gravity Forms allow us to create complex forms in minutes with many field types and an easy-to-use drag-and-drop form builder interface.
But for this course, I will use the WPForms plugin’s free version.
It is also a good plugin.

We are going with the free version of WPForms because:
- Not everybody can afford a premium plugin
- The free version allows me to create a basic contact form that fits the purpose of my website
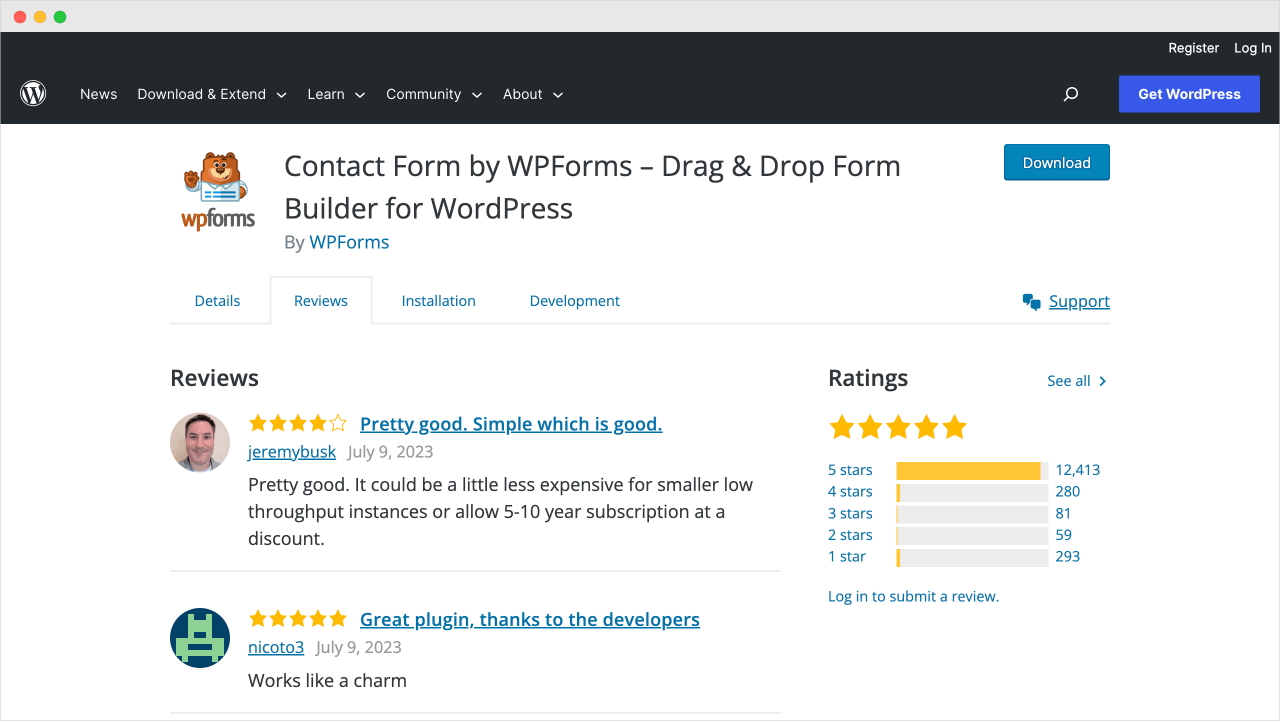
It is also highly rated, has positive reviews, and is regularly updated.
You can check this out by visiting the plugin’s review tab on the WordPress.org repository:
 jeremybusk
Anyway, let’s install the free version WP Forms plugin to create a contact form.
How to install a free plugin
We can install any free plugin in four easy steps:
Step 1: Go to the “Plugins” screen and then click on “Add New”
Admin Dashboard -> Plugins -> Add New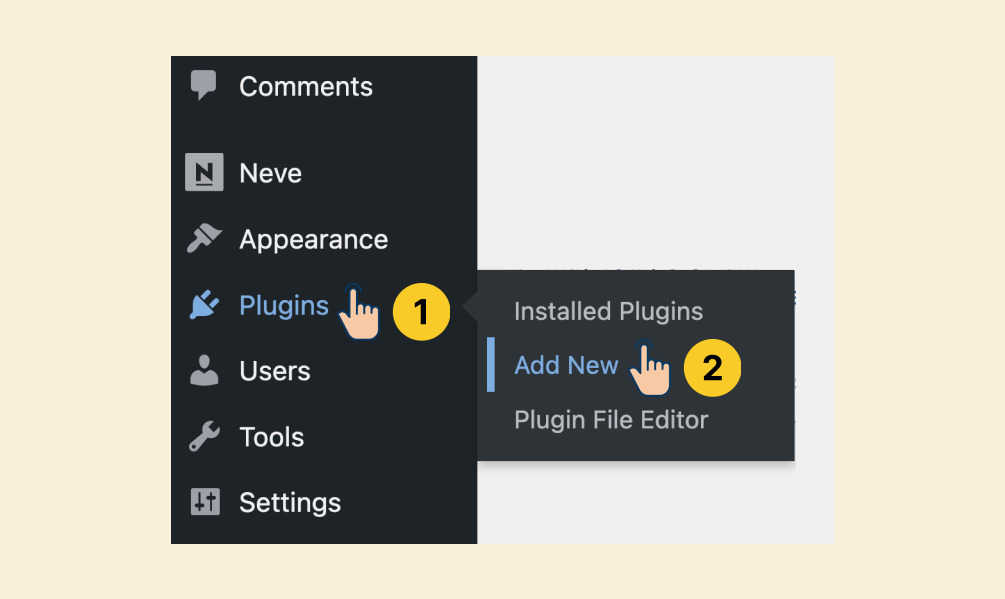
This will take us to the “Add New Plugin” screen.
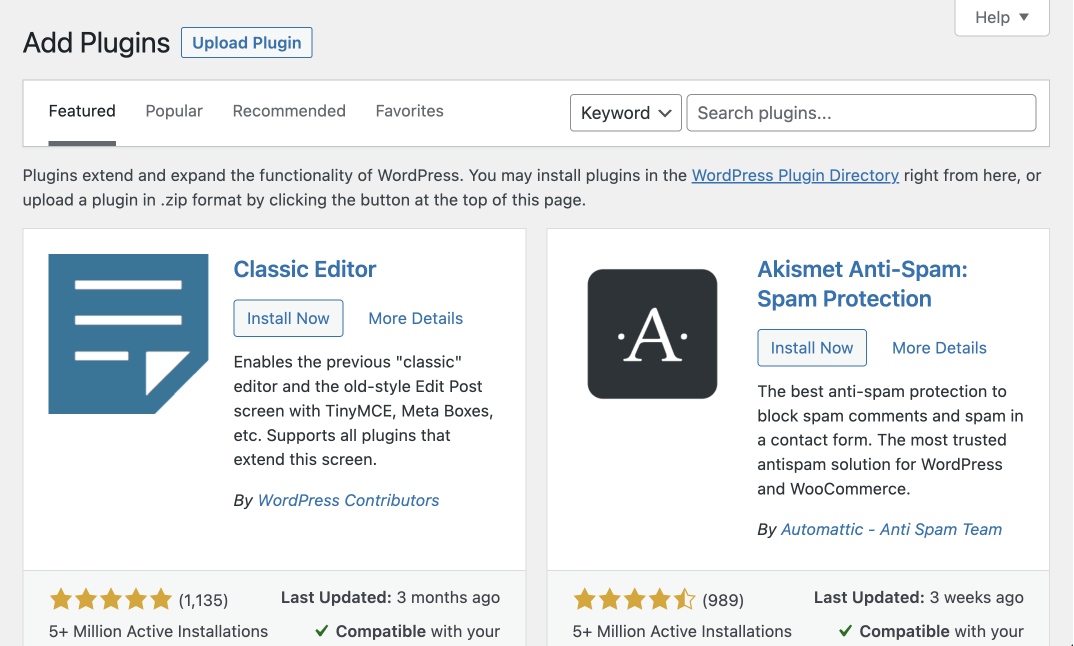
Step 2: Search for the plugin
We already know we want to install the “WPForms” plugin, right?
So, instead of using a generic search term like “Contact form”, search using the plugin’s name directly.
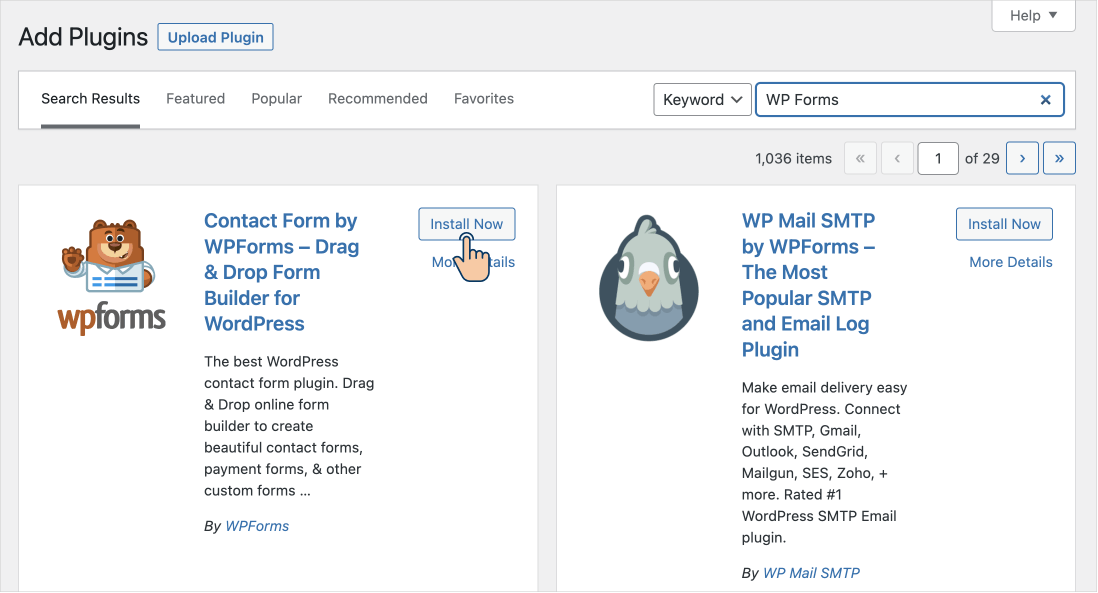
When you use a plugin’s name, it usually appears as the first result saving us some time.
Next…
Step 3: Install the plugin
If you notice, each plugin’s box has an “Install Now” button.
We want to install the “WPForms” plugin, right?
So, click the “Install Now” button in the “WPForms” box.

When you click the install button, the plugin will be downloaded from the WordPress.org plugin repository.
That’s why it could take some time to get installed.
Finally, once the plugin is installed, the “Install Now” button transforms into the “Activate” button.
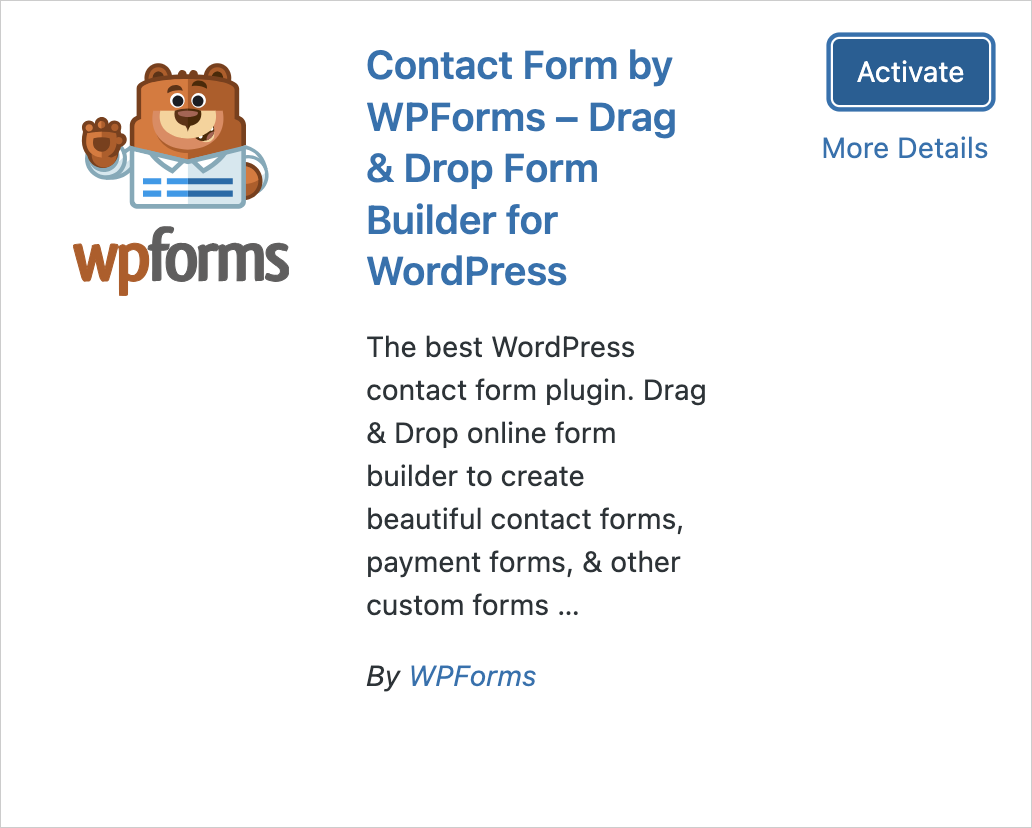
Step 4: Activate the plugin
Installing the plugin is not enough.
You need to activate it to make use of it.
So, click on the “Activate” button to finish the installation.
That’s all.
In the next lesson, we will learn how to access the settings of the “WPForms” plugin, or any other plugin for that matter.
 © 2026 UsableWP. A project by Naresh Devineni.