Building sections with parent blocks and child blocks
I want you to read this lesson carefully because it lays a strong foundation for building complex, well-designed landing pages using just the Block Editor.
So, if you get this lesson right, you can build any landing page design using the Block Editor.
Understanding how a landing page is structured
If you observe any landing page on the internet, it is divided into multiple sections.
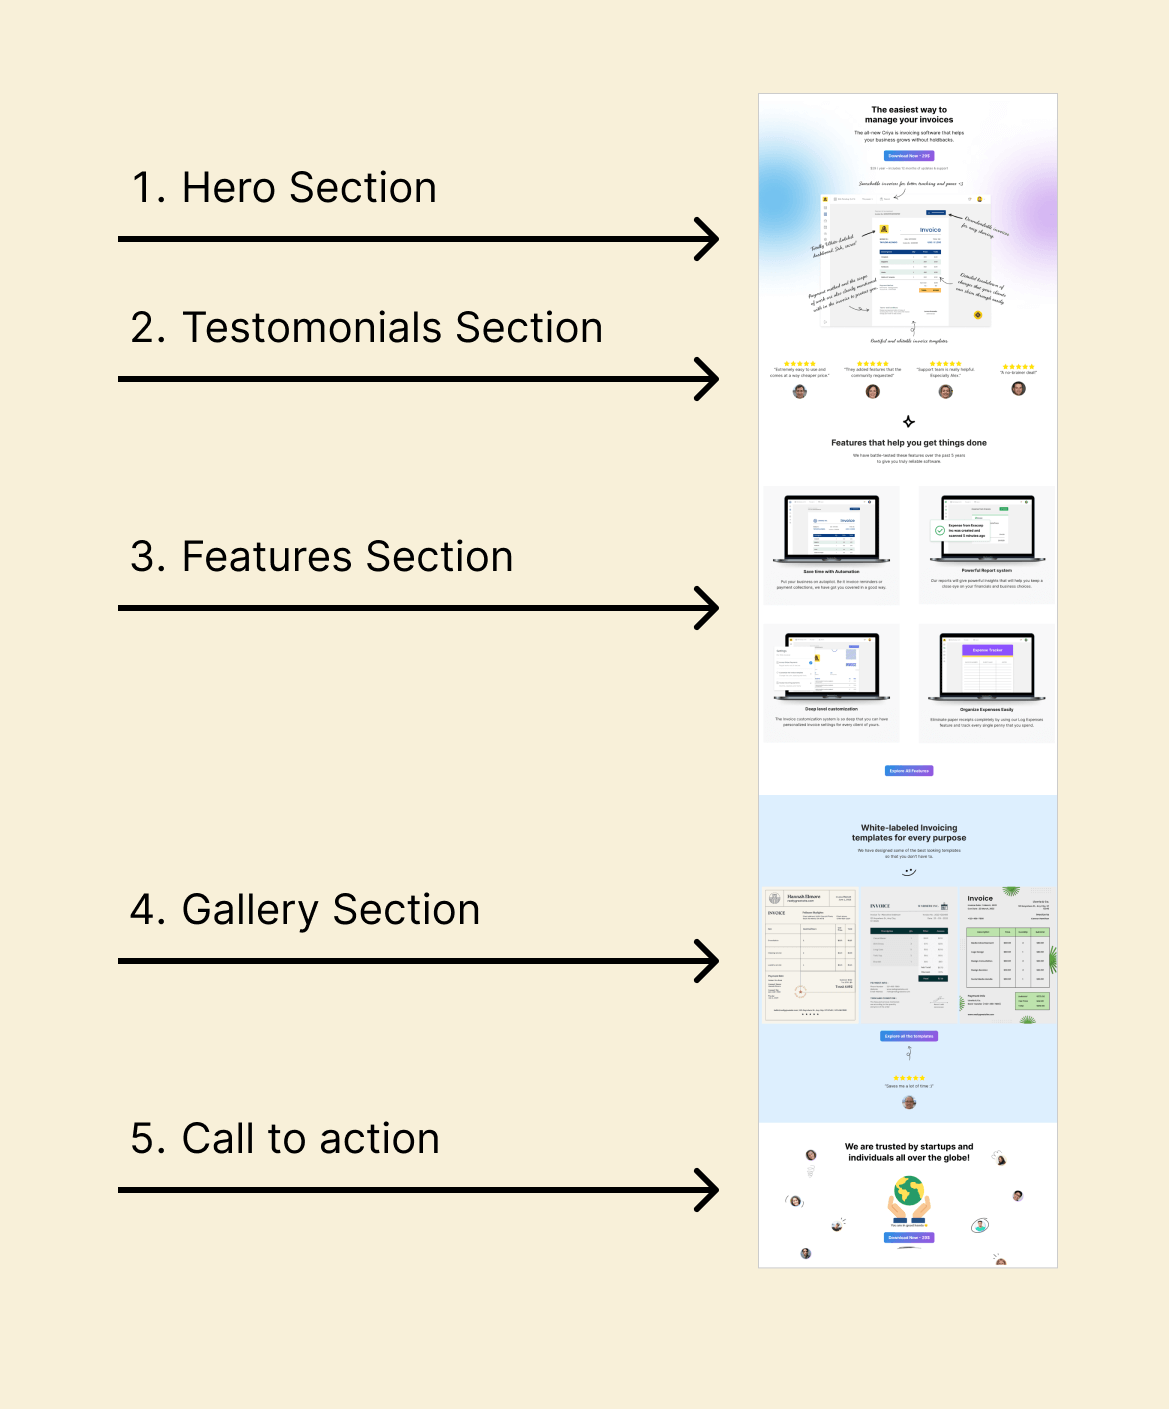
For example, in the case of the Homepage we are building, there are five sections.
And if you notice, each section has multiple elements inside it.
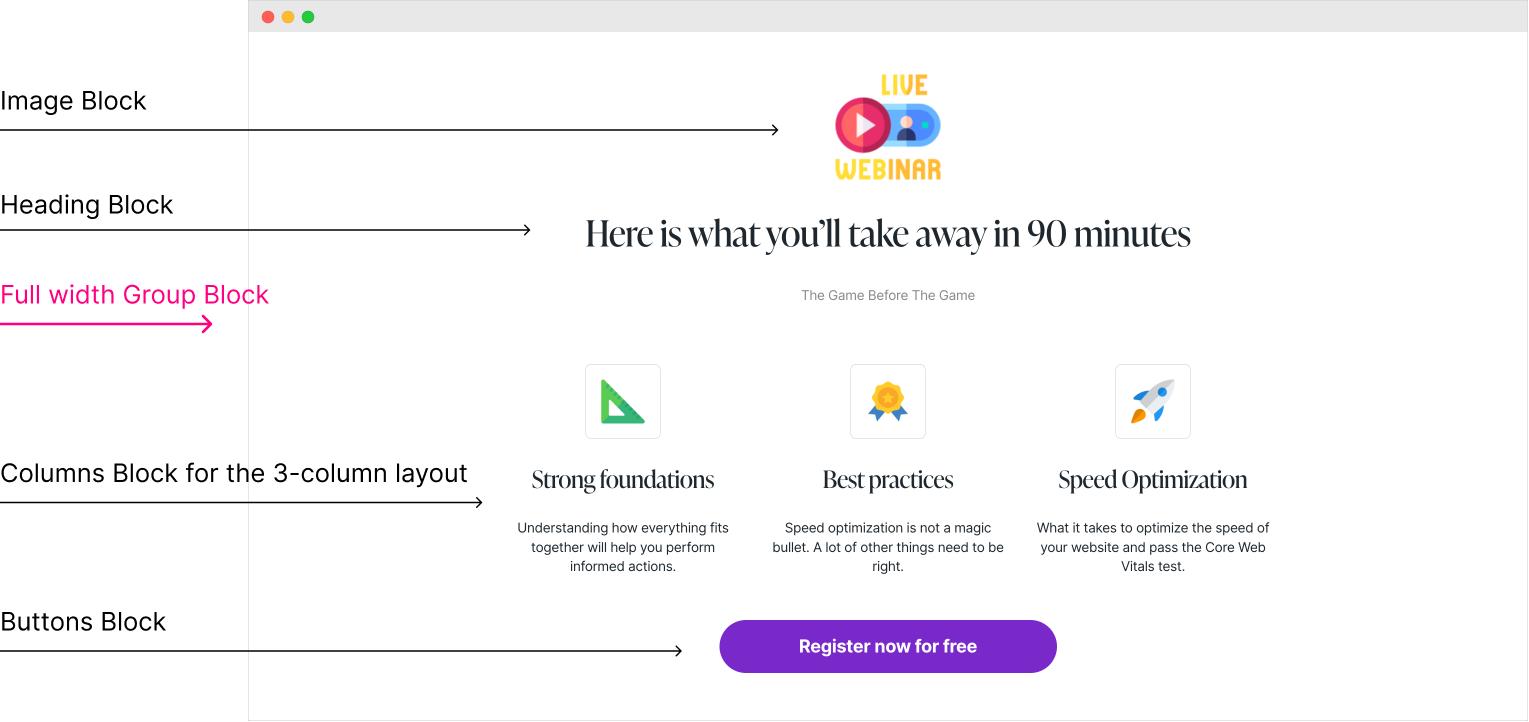
For example, the Hero section of the above Homepage has five elements:
- One heading
- Two paragraphs
- One button
- One image
Long theory short, a landing page is usually divided into multiple sections, and each section could have multiple elements inside it.
Once you realize this, it becomes easy for you to build any landing page using the Block Editor.
The thing is, when building a landing page using the Block Editor, we shouldn’t see it as a whole.
Instead, we should break it down into multiple sections and build each section individually.
Building an individual section is easy with the Block Editor
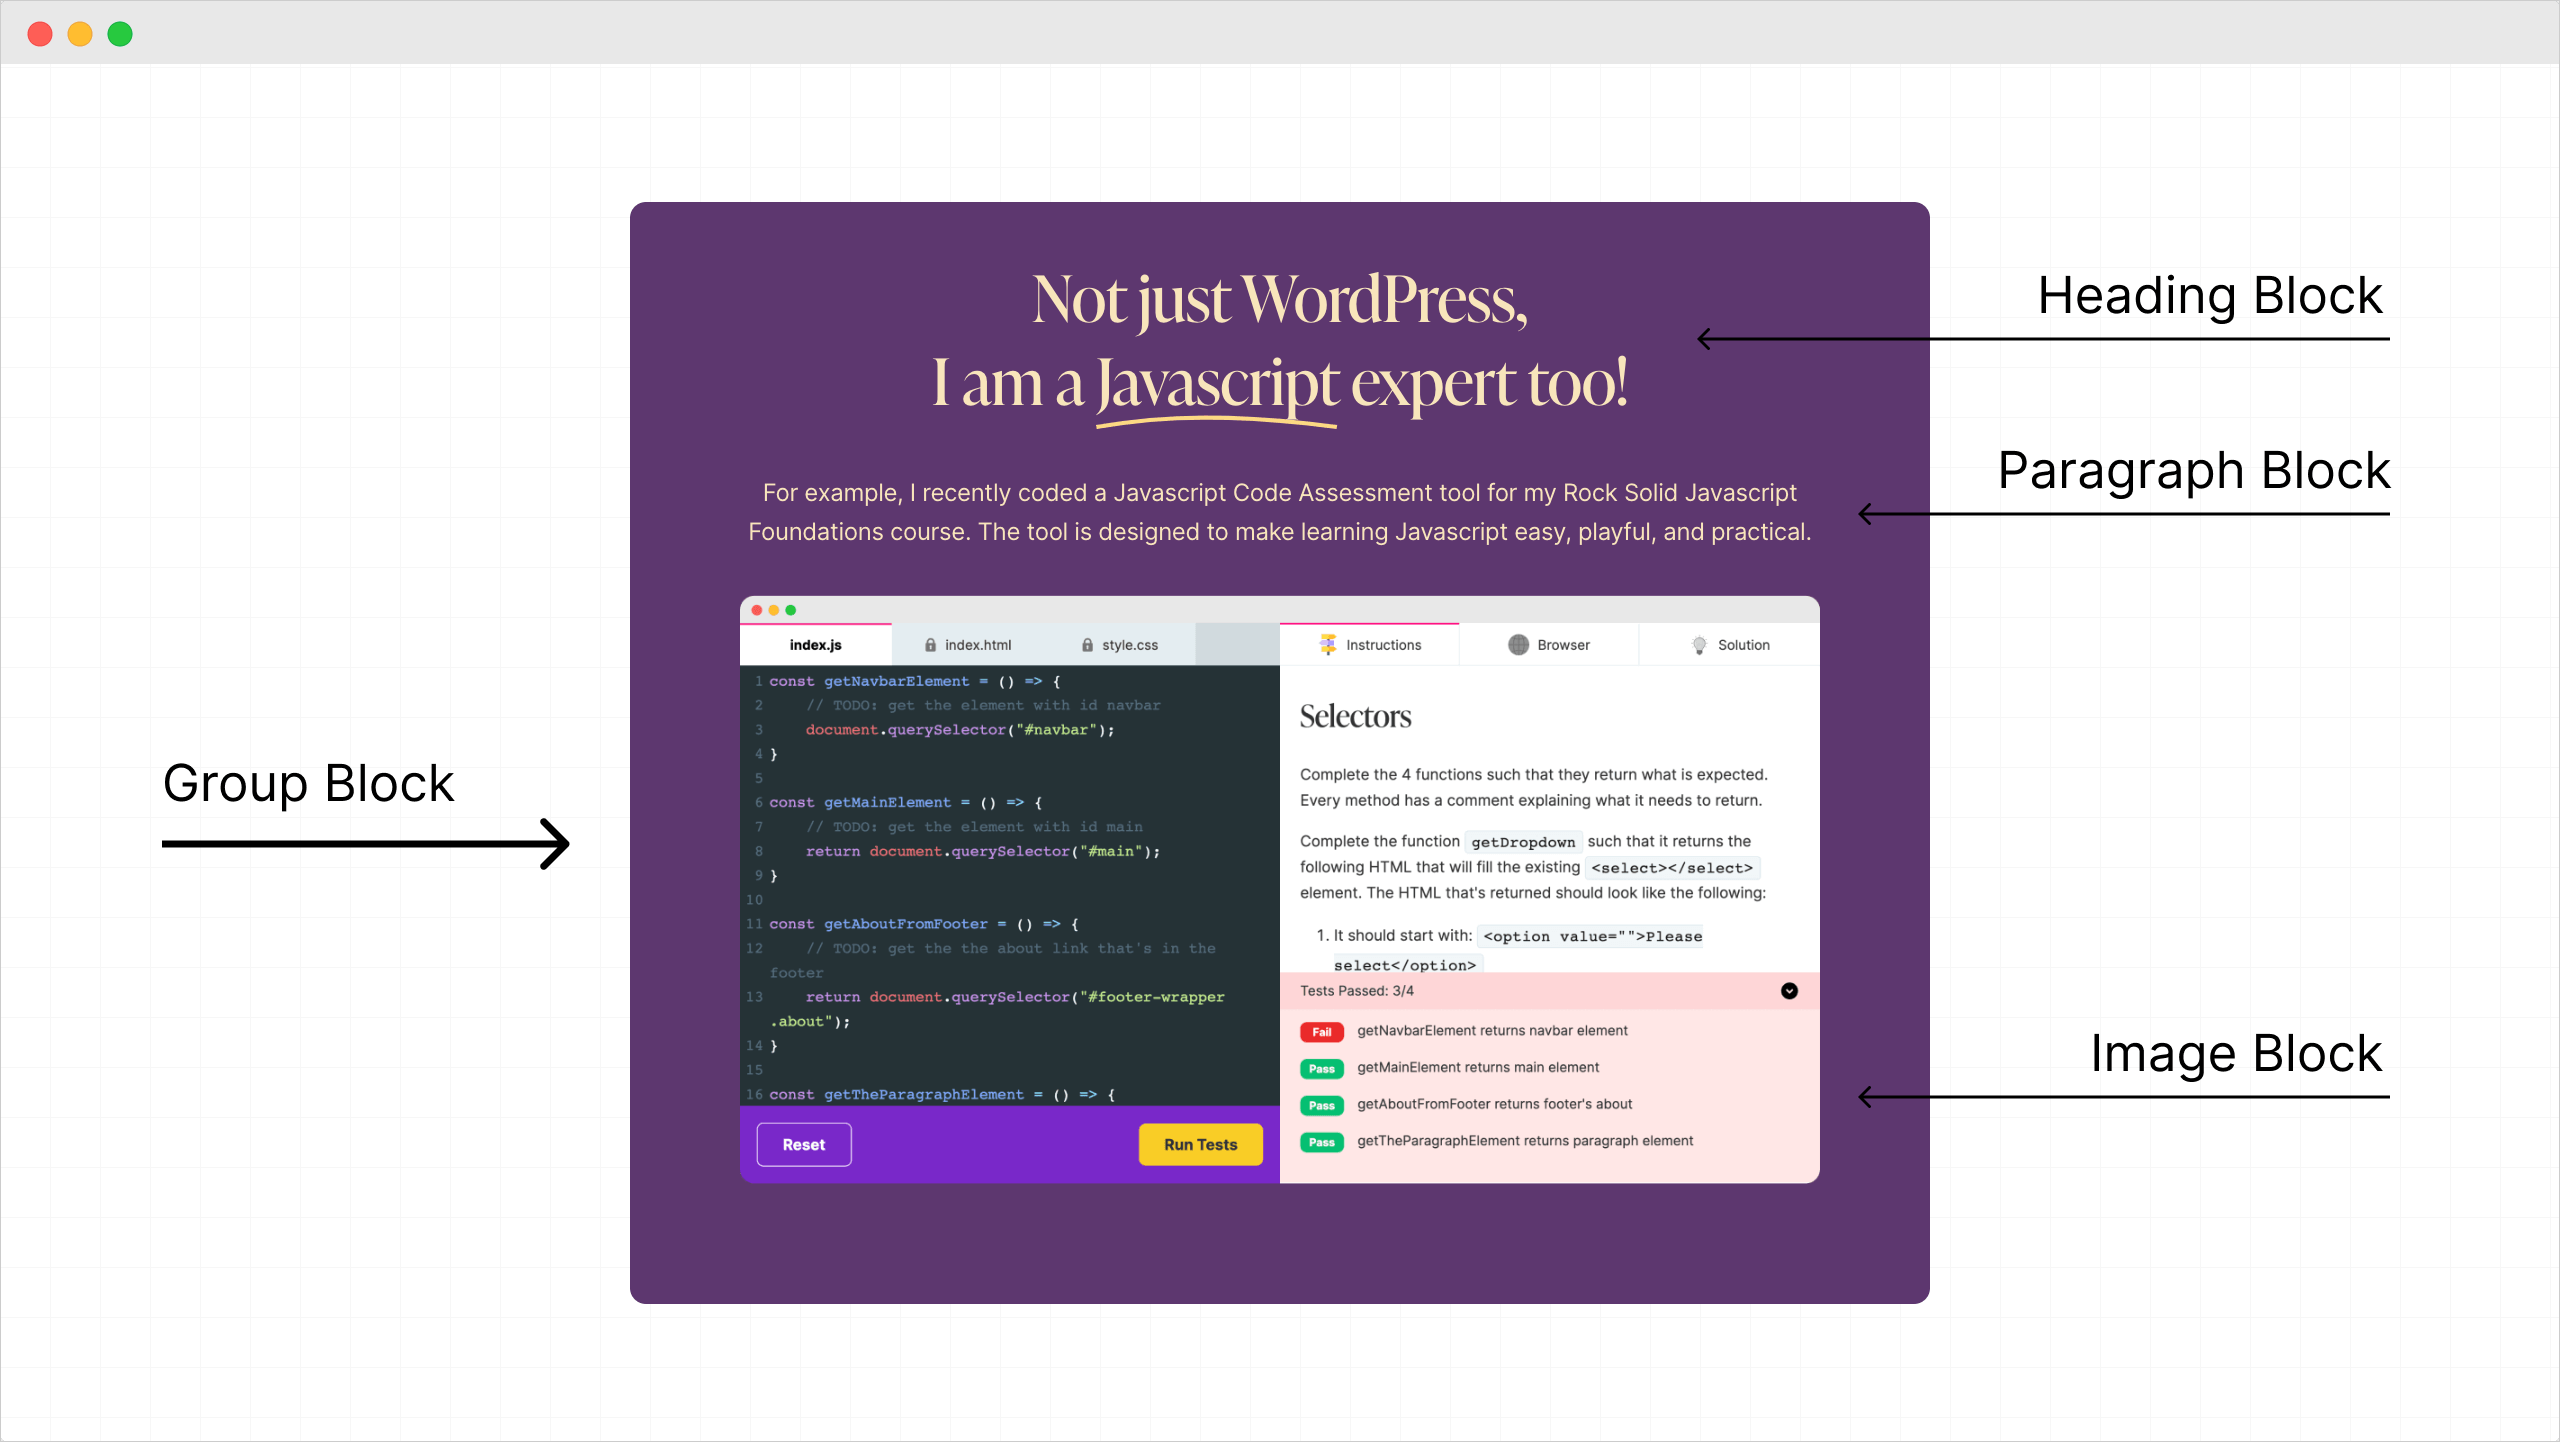
For creating a section, first, we should add a parent block to the Block Editor.
The “Group” block is a good example of a parent block.
And then, we should add multiple child blocks inside the parent block to build the section’s content.
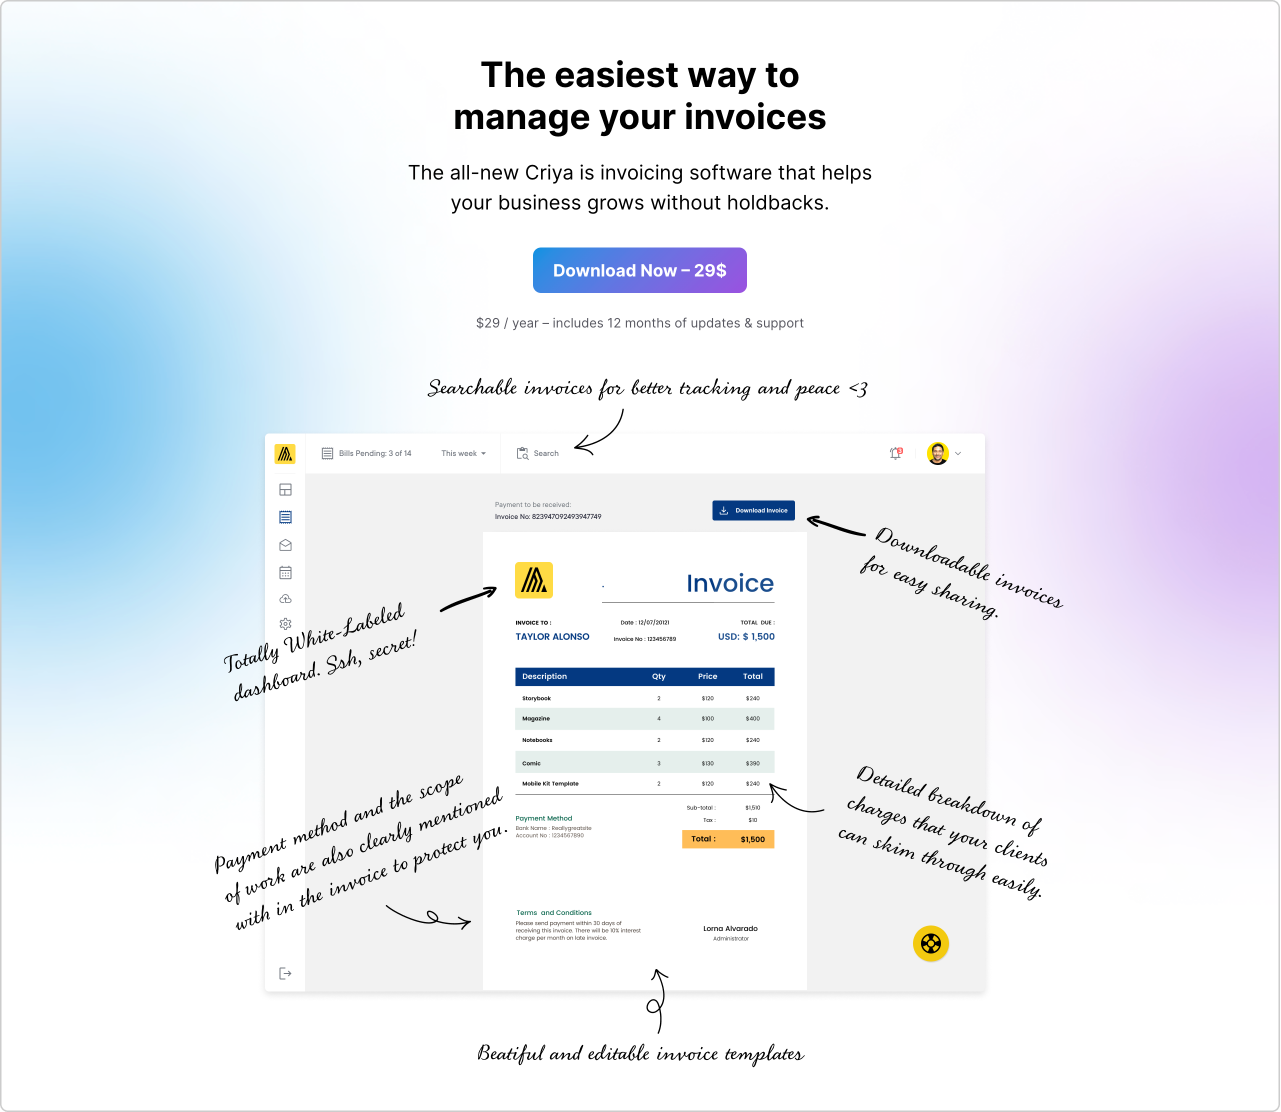
For example, for building the above section, first, I added a parent block called the “Group” block to the Block Editor.
Then, I build the content of the section by adding the following blocks inside the “Group” block:
- A “Heading” block
- A “Paragraph” Block
- And an “Image” block
Finally, I added a velvet background color to the entire section by adding the background color to the parent “Group” block.
If there is no parent block, there is no way we could apply a background color to the entire section.
And we can follow the same process for building any section using the Block Editor.
For example, I used the same steps for creating the following “Testimonials” section:

First, I used the “Group” block to create the section and added the light-background color to the “Group” block.
Then, I added the remaining blocks inside the “Group” block to build the section’s content.
The same tactic here for building this section as well:
This time, it is a full-width section that occupies the entire screen.
And the same tactic for building the following section as well:
Can you see the pattern here?
The point I am trying to convey is the strategy for building any section of a landing page is the same:
- First, create a section by adding a parent block
- Then, add appropriate blocks inside the parent block for building the content of the section
I can’t stress this strategy enough, and I want you to remember this forever.
Anyway, if you notice, the “Group” block is quite a handy parent block for building any section inside the Block Editor.
But there is a small limitation to it.
The “Group” block doesn’t let us add a background image to the section.
In other words, it only allows us to add a plain or gradient-based background color to the section we are creating.
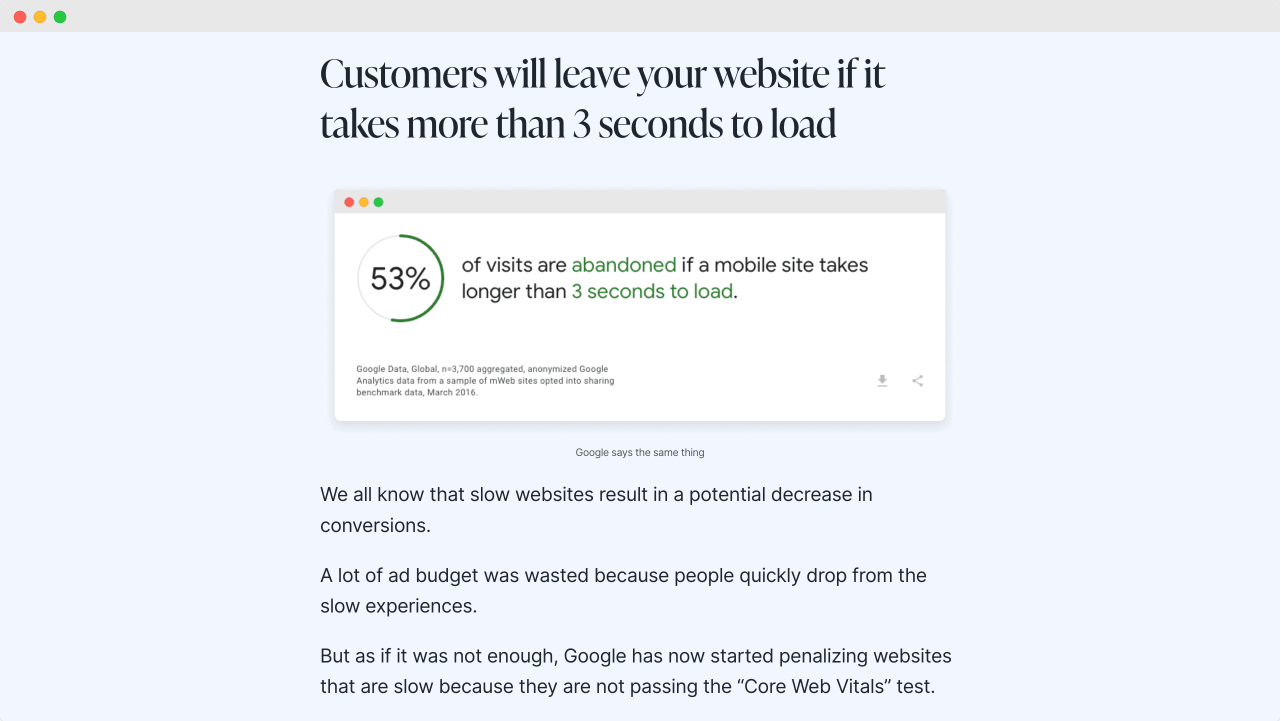
This is okay, but what if you want to build a section with a background image like this:
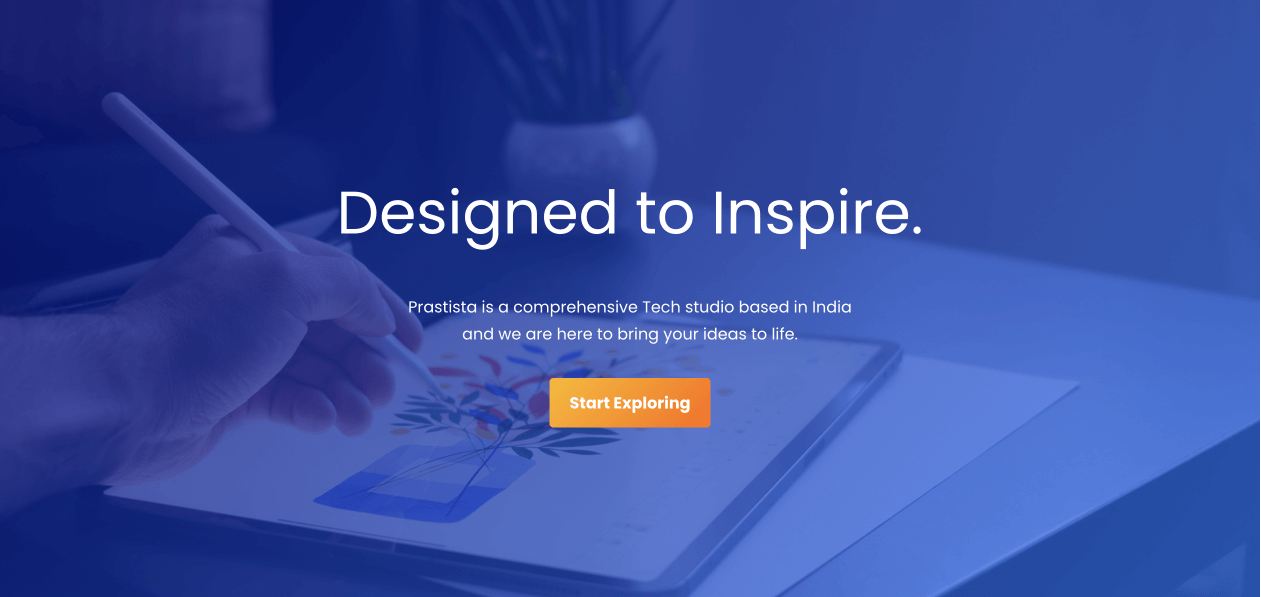
This is where another parent block called the “Cover” block comes in.
The “Cover” block is designed to help you build a section with a background image.
Not just that, but it also helps you center the section’s content automatically. Centering the content vertically is not possible with the “Group” block.
To recap: WordPress Block Editor gives us access to two-parent blocks:
- T
he “Group” Block – It only lets us a background color to the section - The “Cover” block – It allows us to add a background image and also centers the content of the entire section no matter how tall the section becomes.
We will learn how to use both these parent blocks in detail.
But before that, I want to clear up a small confusion.
Parent blocks could have nested parent blocks to create sub-sections
For example, take a look at this section:
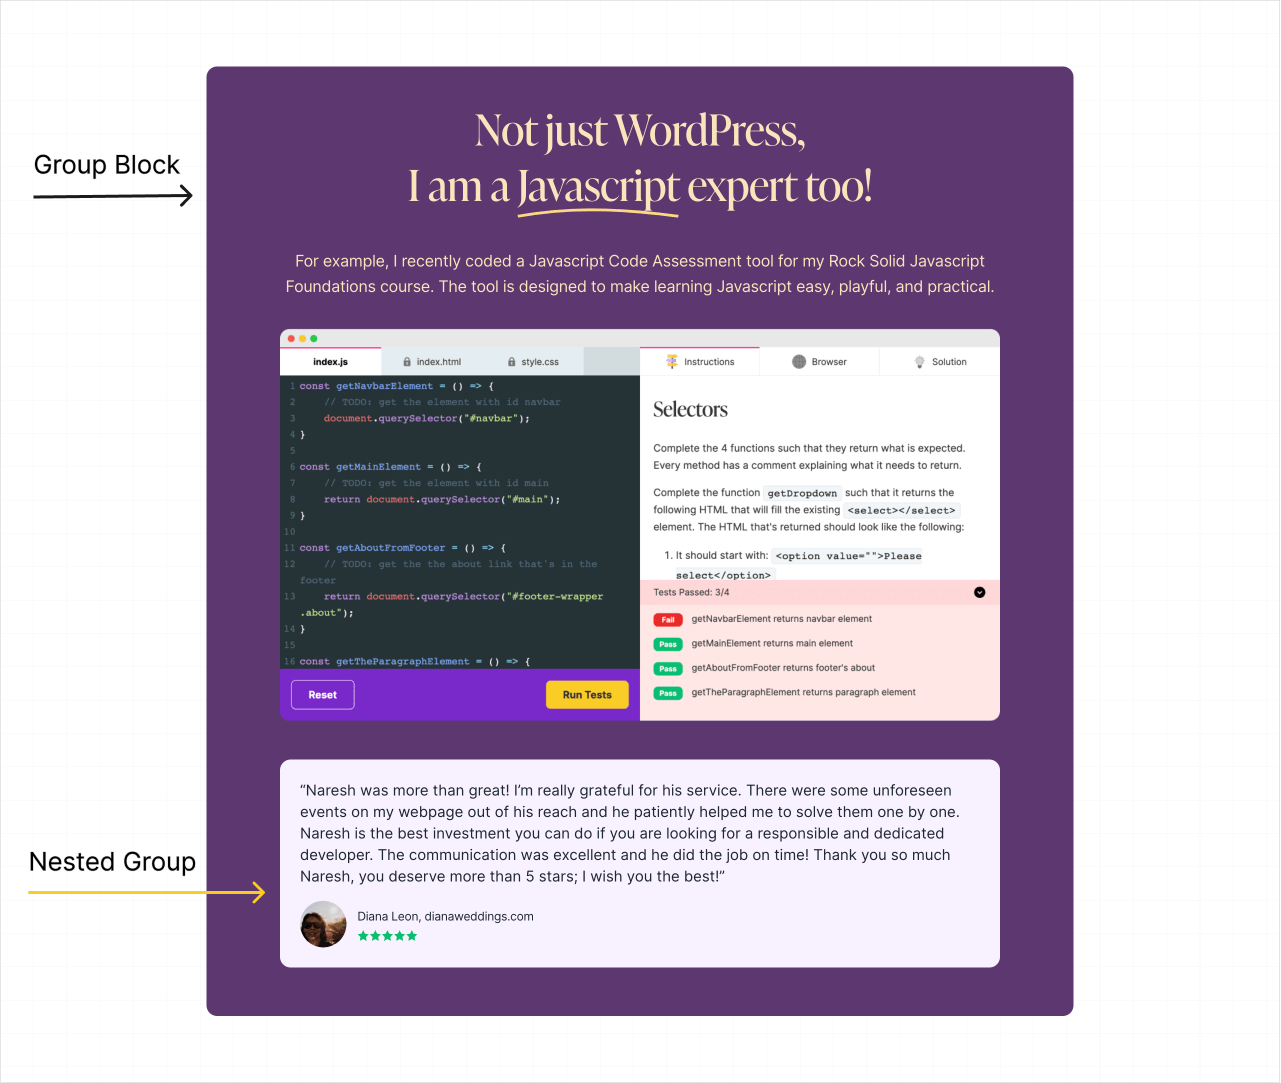
- First, I created the main section using the “Group” block
- Next, I added the headline, paragraph, and the image inside the main section
- Finally, I created the “Testimonial” sub-section by using another “Group” block
This tells us that you could build complex sections by placing one parent block inside another.
This also tells us that you should use the “Group” block whenever you want to group multiple blocks and give them a background color logically.
Anyway, that’s all I wanted to tell you before building the Homepage of our fictional website.
Starting from the next lesson, we will build our static Homepage piece by piece.
 © 2026 UsableWP. A project by Naresh Devineni.