Exercise: Replacing the default Heading block with a third-party block

The task is to restrict the width of the main heading of the Homepage to 400px.
We will use the “Headline” block from the GenerateBlocks plugin to achieve this.
Ready?
We can achieve this in three easy steps.
Step 1: Install the free version of the GenerateBlocks plugin
The GenerateBlocks plugin comes in two versions—free and premium.
The free version of the plugin is more than enough for building complex layouts with the Block Editor.
So, let’s install the free version.
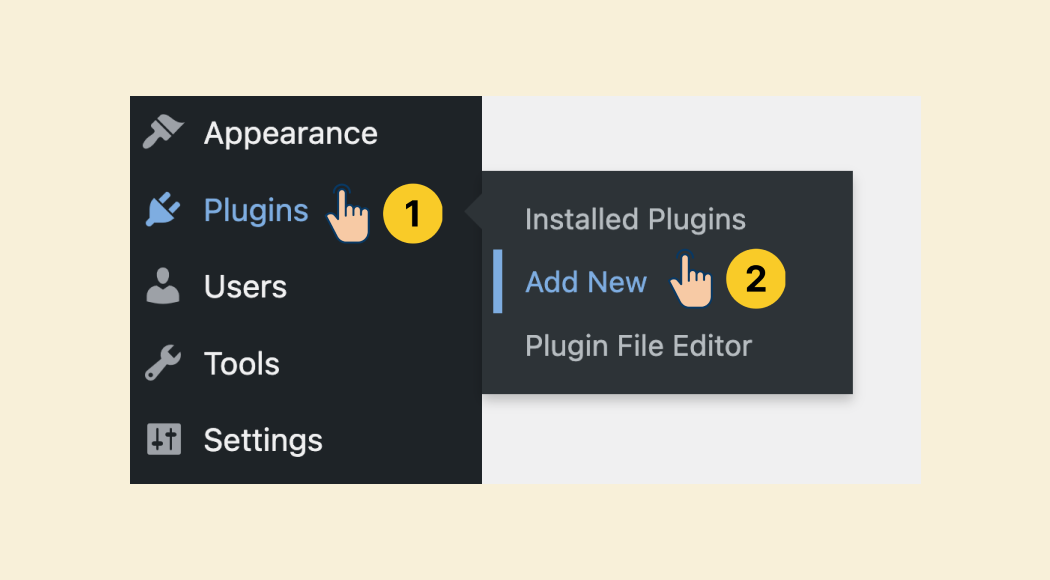
Make sure you’re inside the WordPress Admin Dashboard and go to the “Add New Plugin” screen:
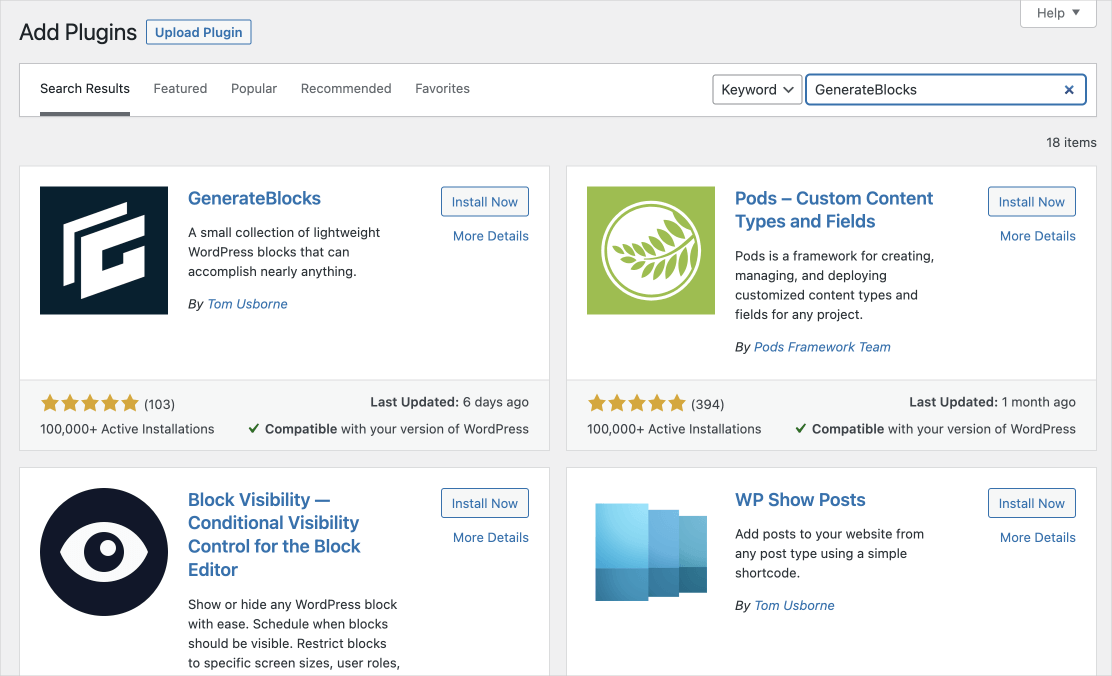
Next, using the plugin search bar on the top-right-hand corner, search for “GenerateBlocks”:
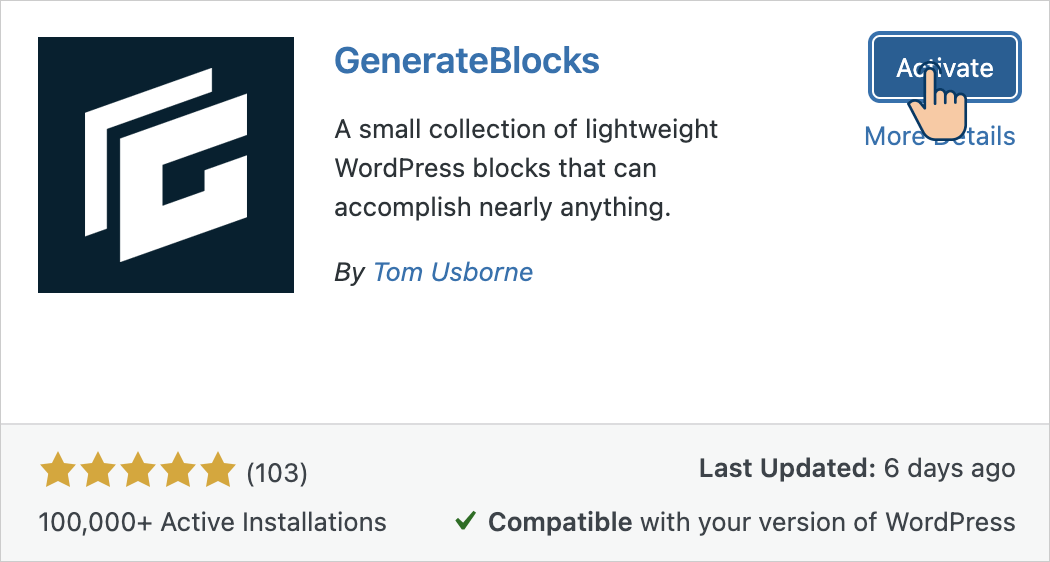
Finally, Install and activate the plugin:
Once the plugin is activated, the blocks provided can be used just like any other blocks and are accessible from within the Block Editor.
So…
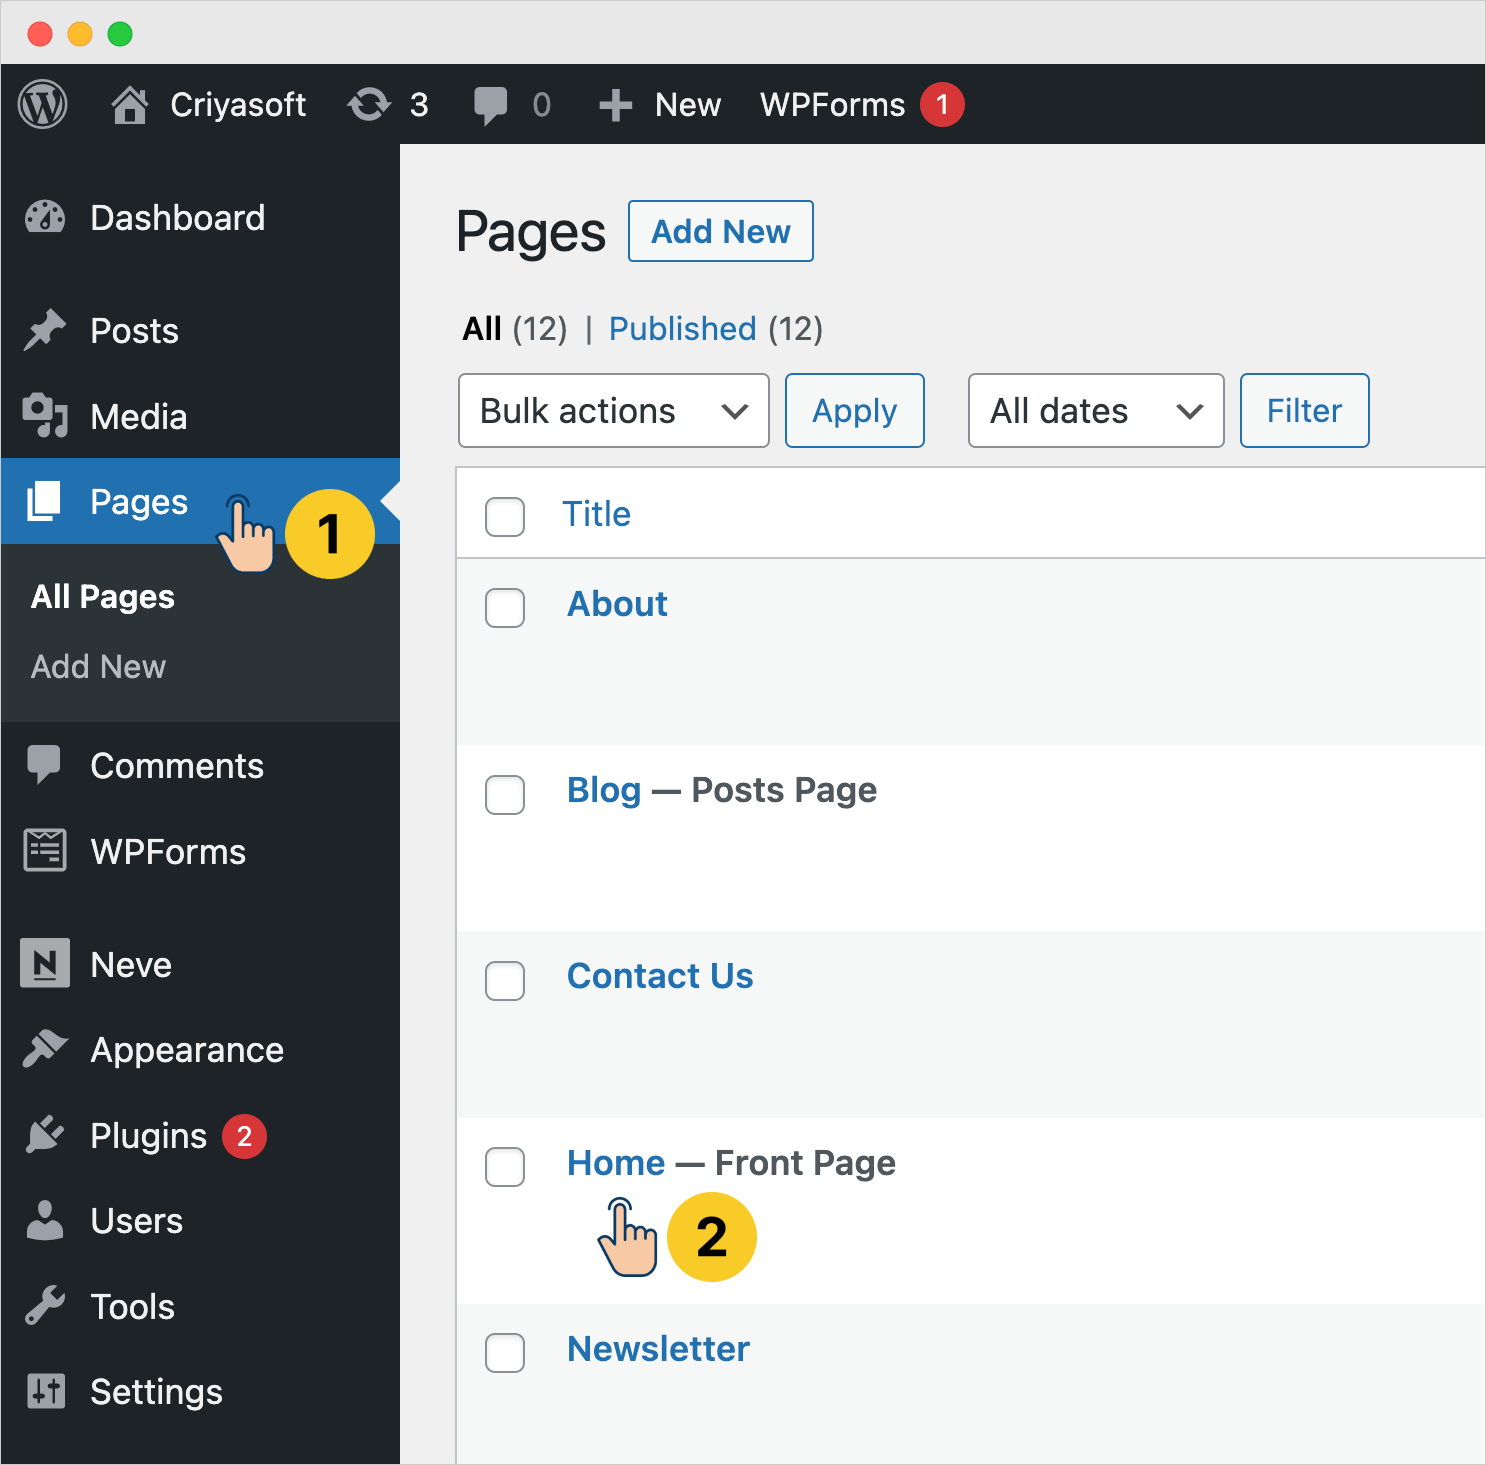
Step 2: Go to the edit screen of the “Home” page
To achieve this, click on “Pages” from the admin menu and then click on the “Home” page:
This will take us to the editing screen of the Homepage:
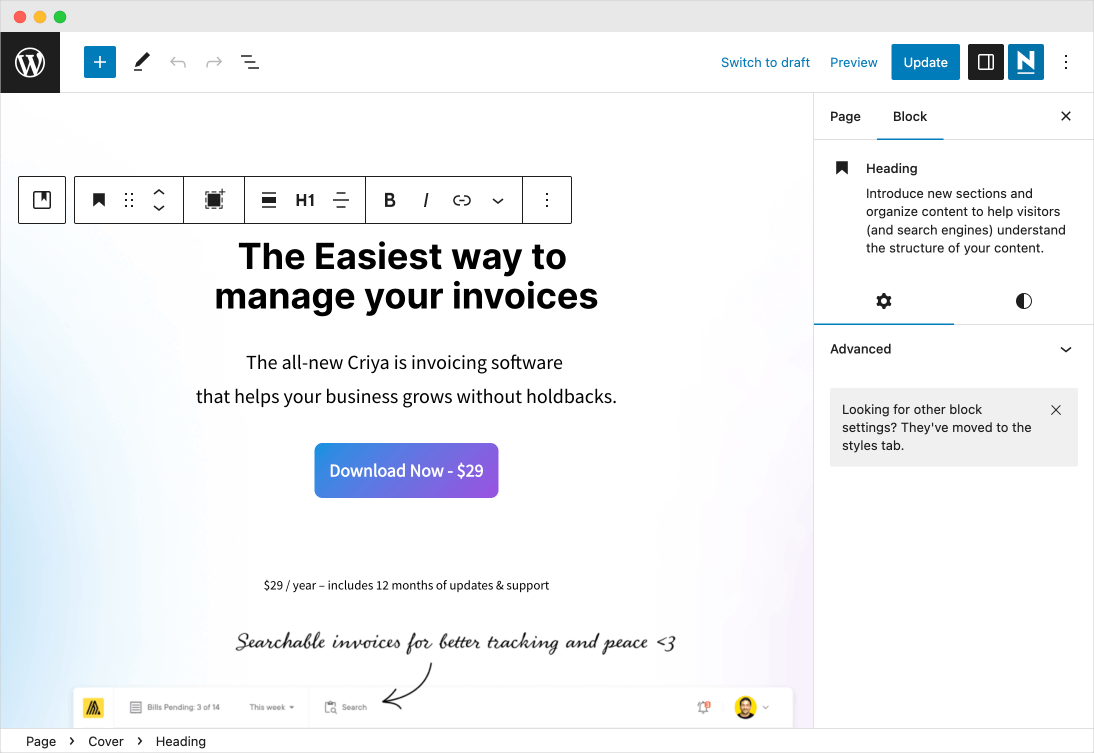
Step 3: Replace the “Heading” block with the “Headline” block
Once you are inside the “Edit” screen, click and select the main headline inside the “Cover” block.
If you notice, we are currently using the default “Heading” block for this headline.
But the default “Heading” block doesn’t let us set an explicit width.
So, we need to replace it with the “Headline” block from the GenerateBlocks plugin because it allows us to set an explicit width to the headline.
Otherwise, the default “Heading” block is great, and we should continue to use it all the time.
Use the plugin-dependent blocks such as the “Headline” block only when it is absolutely necessary.
Anyway, to perform the replacement, first, select the existing “Heading” block and from its options, choose “Insert After”:
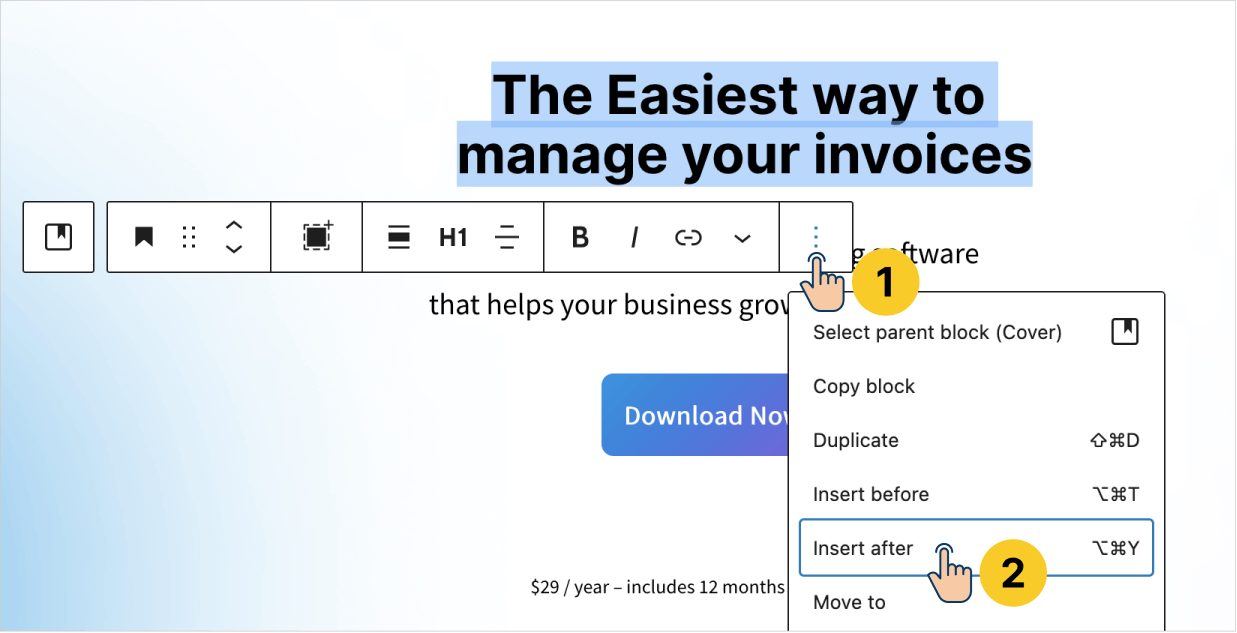
This will add a new empty block below the heading:
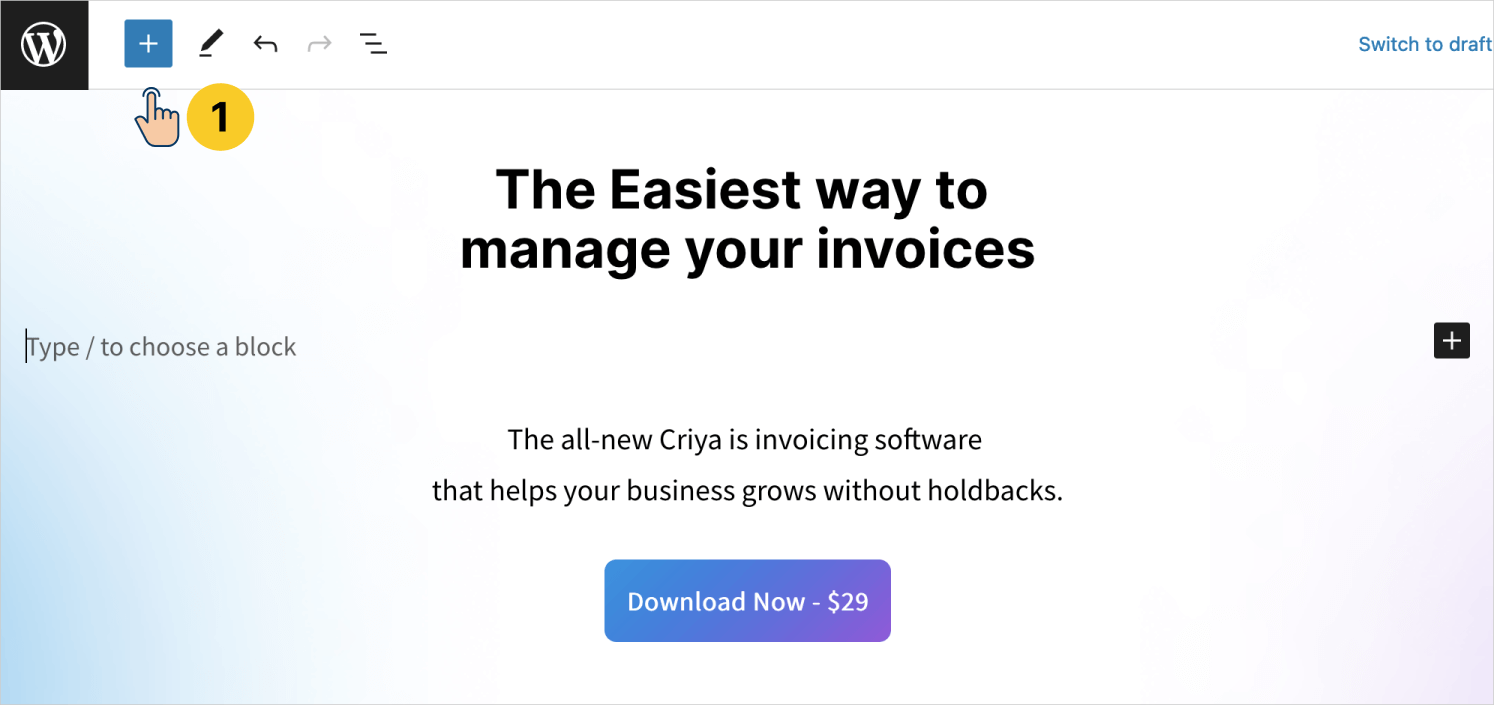
Now, be it a default block or a plugin-based block, the process for adding them to the Block Editor is the same.
You can still use the “Type /” technique or the “Add Block” buttons to add the custom block to the Block Editor.
So, click on the blue “Add Block” button to open up the “Blocks Inserter” sidebar:

If you notice, the Blocks sidebar now contains a new section called “GenerateBlocks”. This section only appears because we have installed the “GenerateBlocks” plugin.
Anyway, from the “GenerateBlocks” collection, we are interested in the “Headline” block, right?
So click on it to add it to the Block Editor:
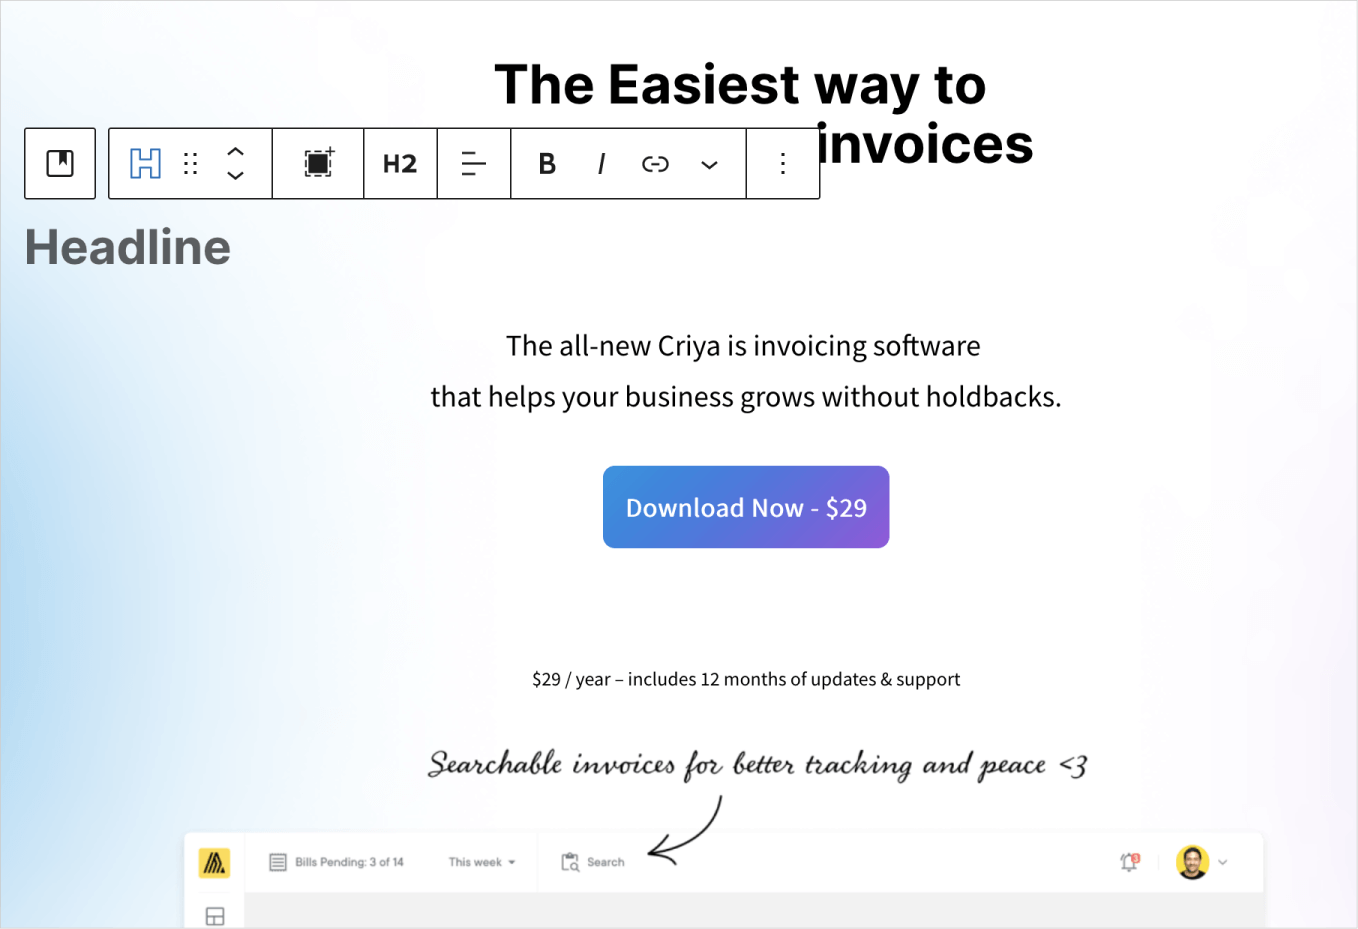
Did you see that?
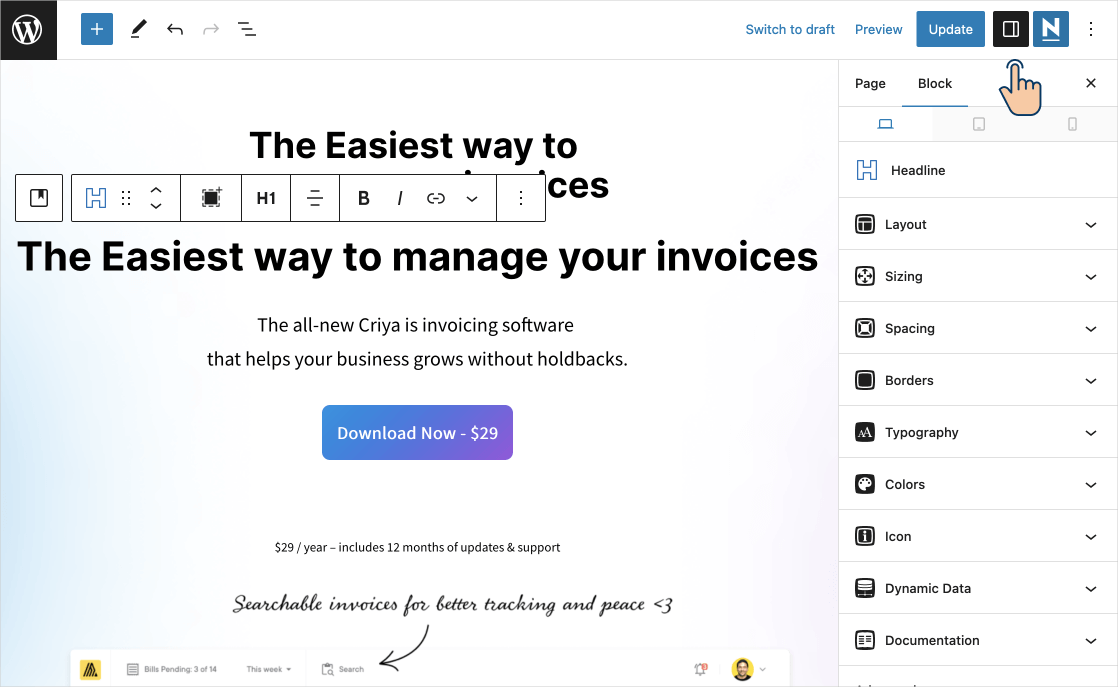
The “Toolbar” options of the “Headline” block are pretty much similar to the default “Heading” block, and they work in the same way too.
So, type the headline text again, center align it, and choose “H1” for the heading level:

Now comes the moment we have been waiting for.
The next job is to set a maximum width of 400px for the headline.
To achieve this, keep the “Headline” block selected and open up its advanced settings if they are not already open:
Wow!
Did you see those settings?
They are pretty advanced and give you ultimate control over the appearance of your block.
These settings are the actual difference between a custom third-party block and the default WordPress block.
Anyway, if you notice the advanced settings of the “Headline” block, there is a section called “Sizing”.
Open it up and set the “Max Width” option to 400px:
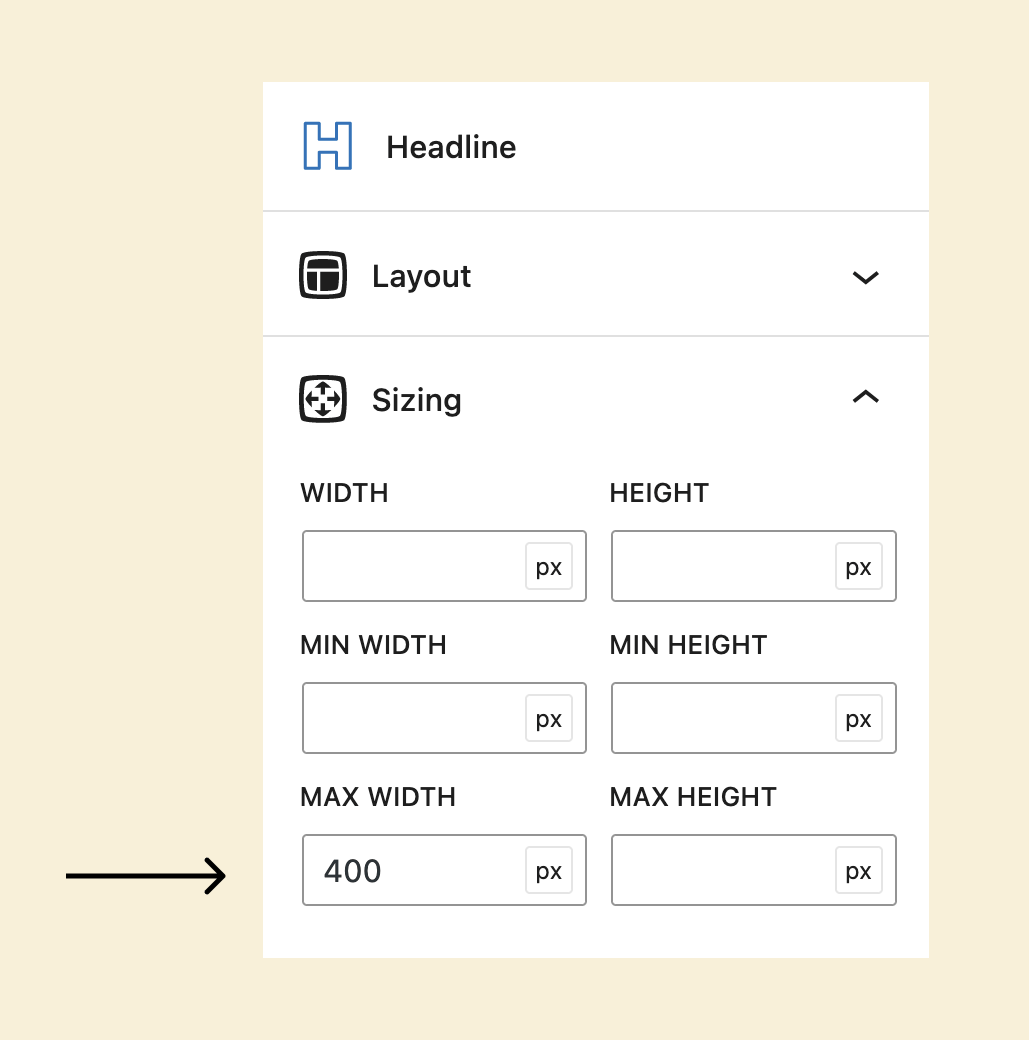
This will tell the browser that:
“Hey! The maximum width this heading could occupy is 400px or less. But not more than 400px under any circumstance”.
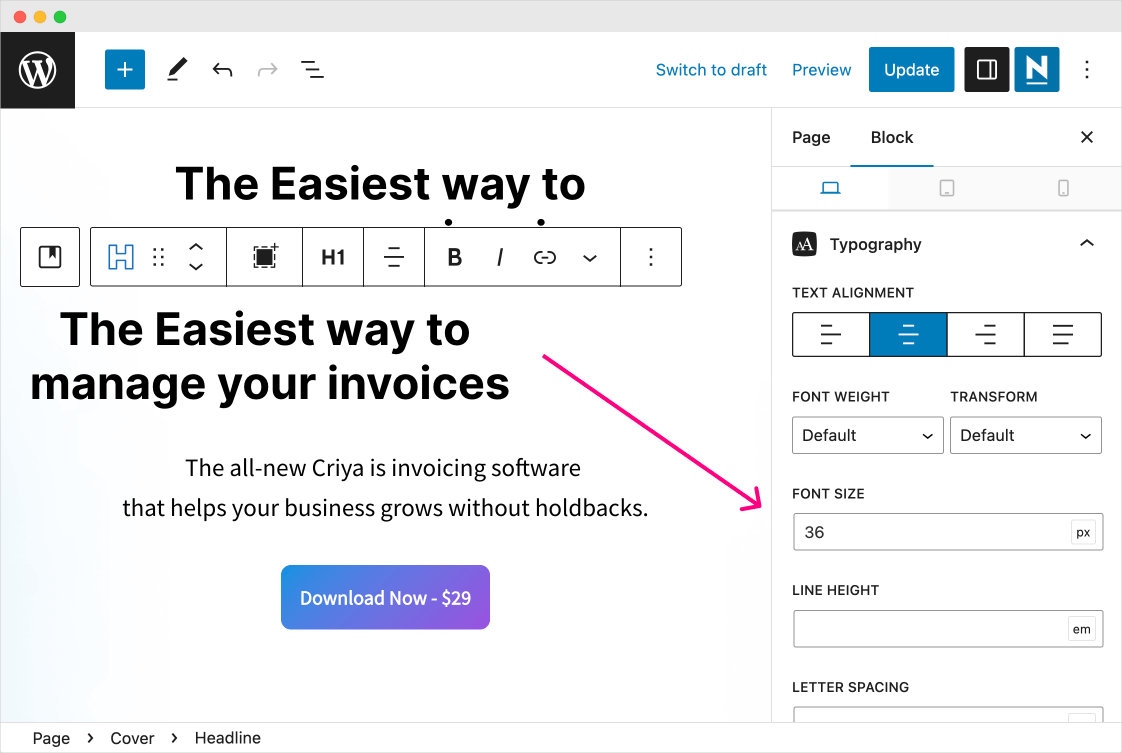
Next, if you notice, the font size is too large compared to the previous headline.
So, open up the “Typography” section and enter the “Font size” as 36px:
And there is one last problem to fix.
The entire headline is now appearing on the left-hand side of the screen.
This is because we have instructed the browser to make the headline occupy only 400px.
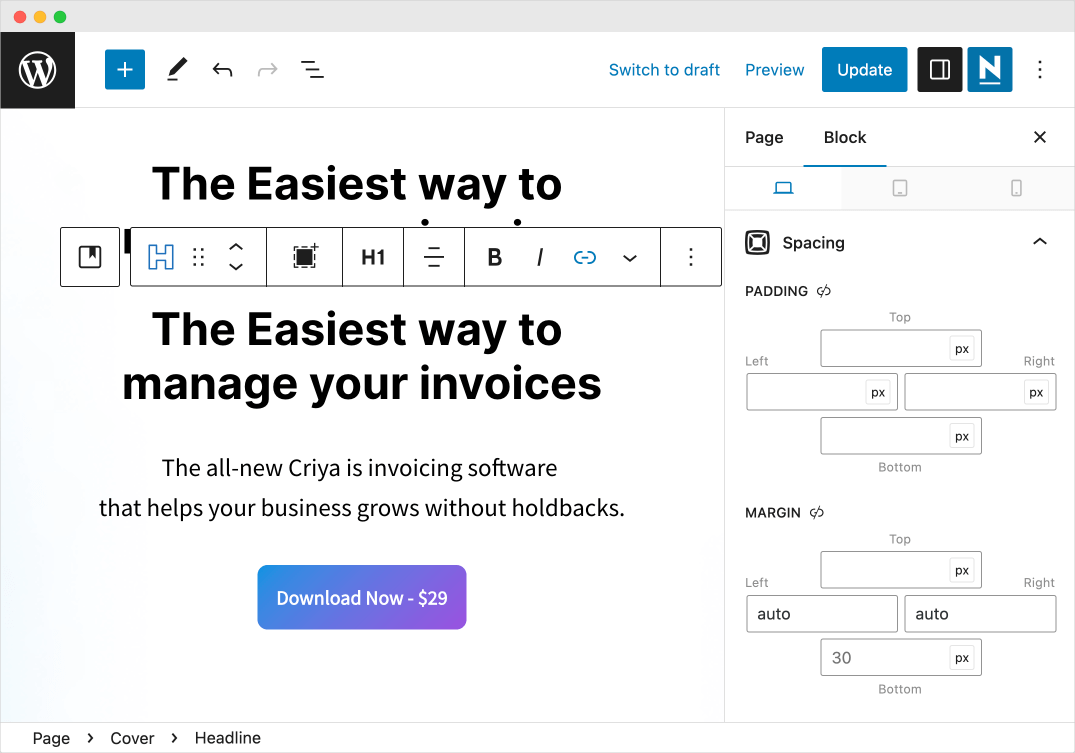
To fix this, from the advanced settings of the “Headline” block, open up the “Spacing” section:
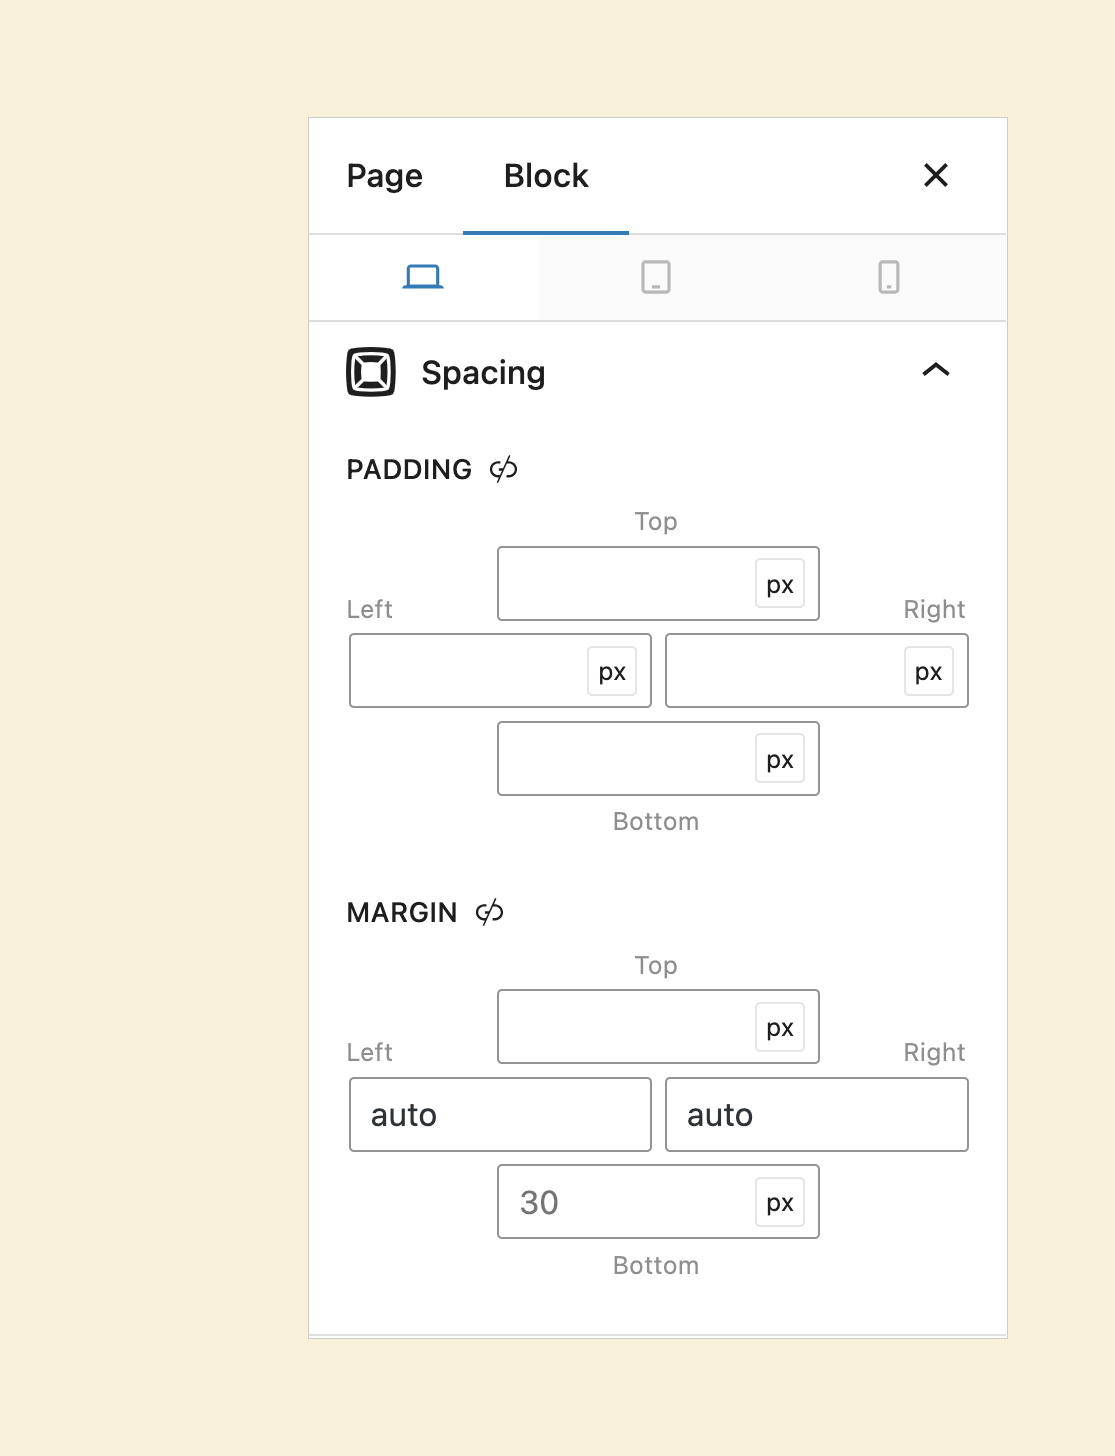
And inside the “Spacing” section, there is a setting called “Margin”.
This “Margin” setting allows us to add white space around the block.
And it provides four options for adding white space in all directions.
Now the trick here is, if you enter the value “auto” for both the “Left” and “Right” directions, the “Headline” block will get centered like this:
Neat trick, right?
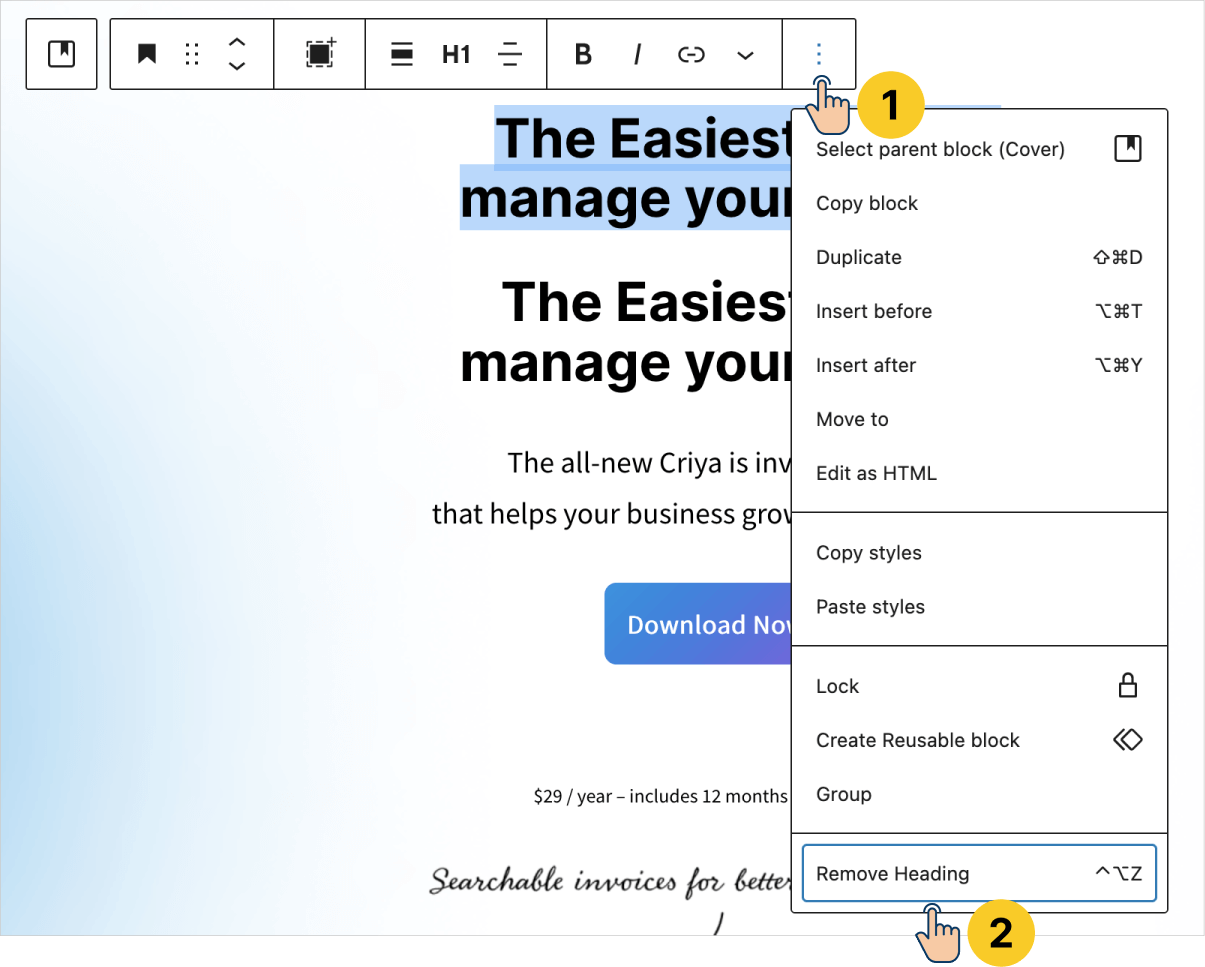
Finally, remove the old “Heading” block and click the “Update” button to save our changes to the Homepage.
That’s all. We have now completed the exercise.
Easy, right?
Come on, let’s preview how these changes look on the frontend:
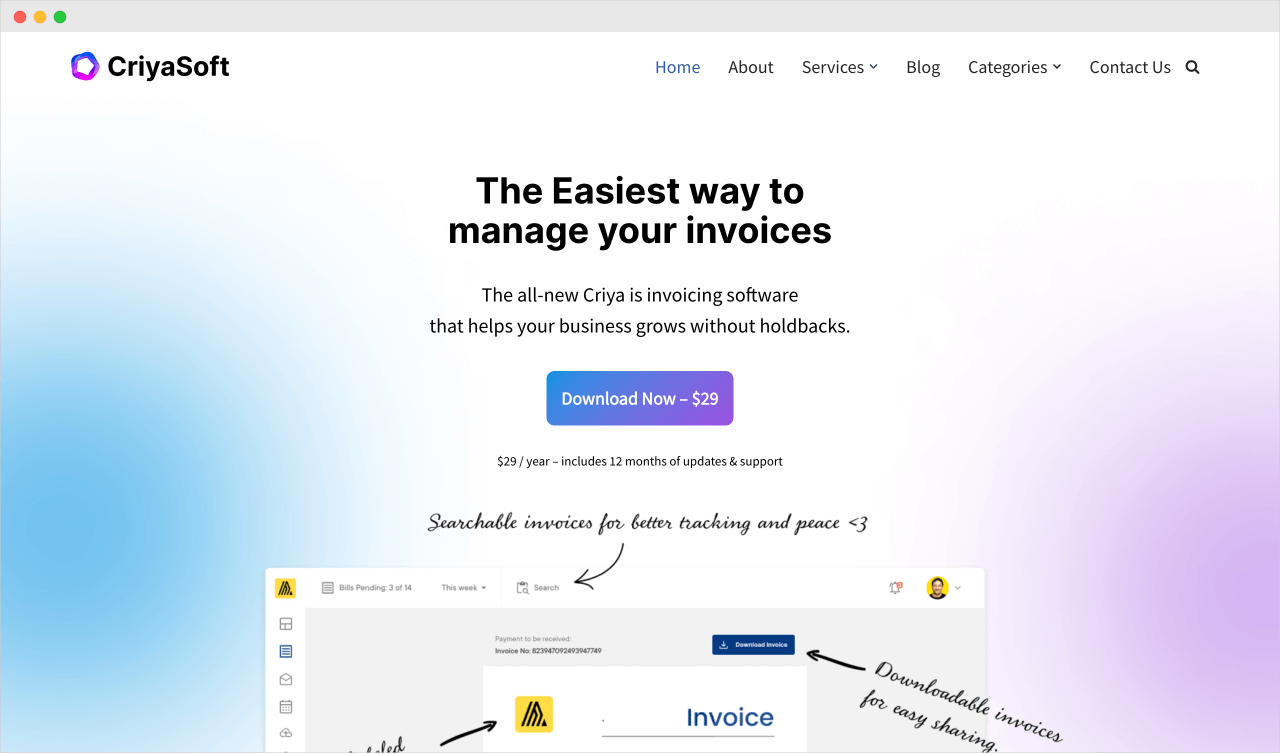
The headline is looking the same way as it did before.
Our actual achievement is the mobile version is looking great too:

As you can see, there are no uneven line breaks. The headline can be read with continuous flow.
That’s exactly how you use any custom block inside the Block Editor.
It doesn’t matter if the custom block is from a particular plugin. They all can be used in pretty much the same way.
In the next lesson, I will show you how to use the “Container” block that ships with the “GenerateBlocks” plugin.
 © 2026 UsableWP. A project by Naresh Devineni.