Exercise: Renaming a category
In one of the previous modules, while creating a category for a blog post, I misspelled its name.
Instead of “Glossary”, I mistyped “Glosary”.
I realized the mistake immediately, but because I created this category from within the post editor screen, there was no option to rename it.
Now, we can create a new category with the correct spelling (some clients do this).
But then we should delete the misspelled category so we don’t accidentally add it to another blog post.
So, the ideal solution here is to rename the category using the “Categories” screen.
That link between the post and the category stays intact.
How to rename a category
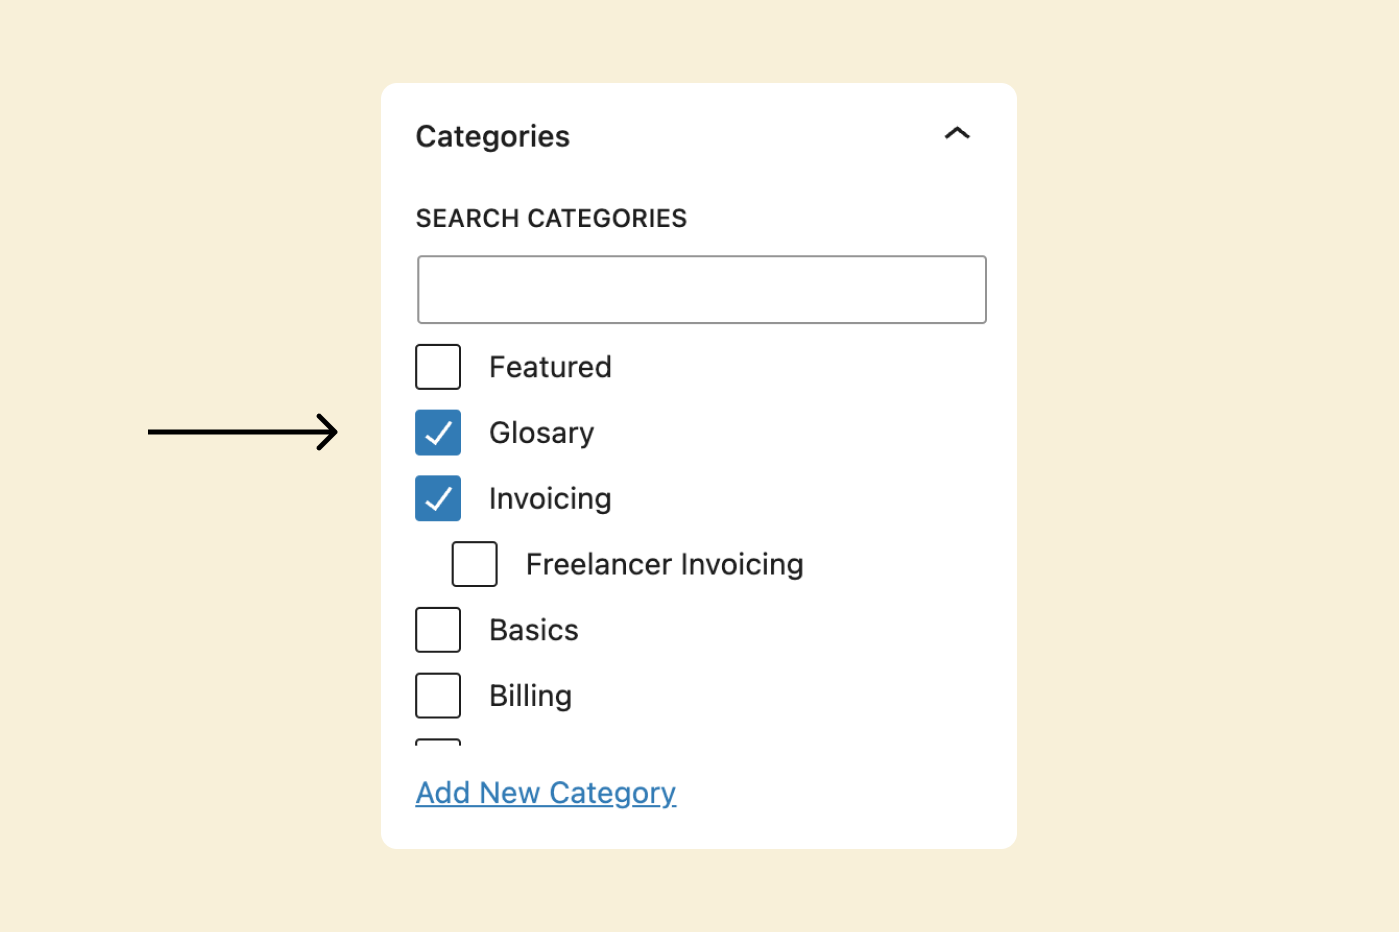
Make sure you’re inside the “Categories” screen.
Next, hover your cursor on the category that you want to rename.
This will bring up the “Quick Edit” and “Edit” links.
We can easily rename the category using any of them.
But for this exercise, let’s go with “Quick Edit”.
When you click on “Quick Edit” for a particular category, it will let us change two things:
- Category name
- Slug – Used for the archive page URL
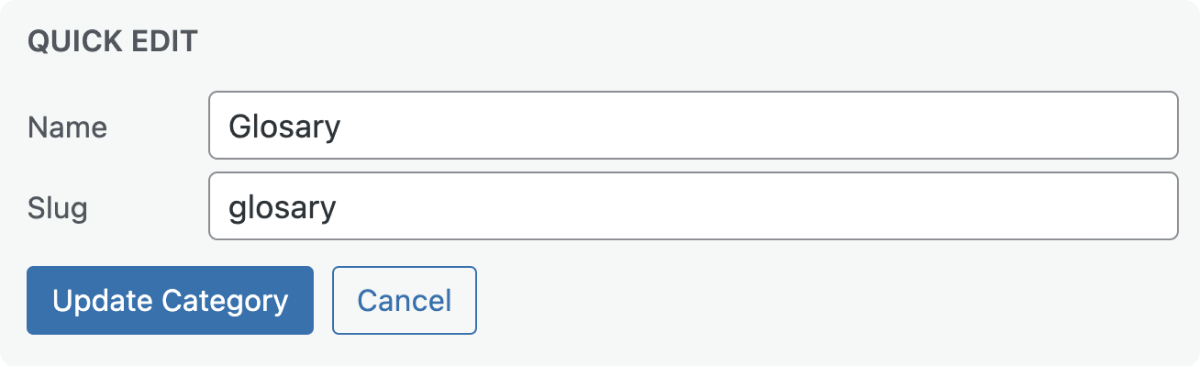
Correct the spelling mistake for the Name and Slug fields and hit the “Update Category” button.
That’s how easy it is to rename a category.
Consequences of deleting a category
When we rename a category, it doesn’t get unlinked from the blog posts it is currently assigned to.
That link between the post and the category stays intact.
This a good thing.
But when we rename the slug, WordPress updates the URL for accessing the archive page associated with the category.
Changing the category slug technically means giving a new URL to the category archive page by deleting the old URL.
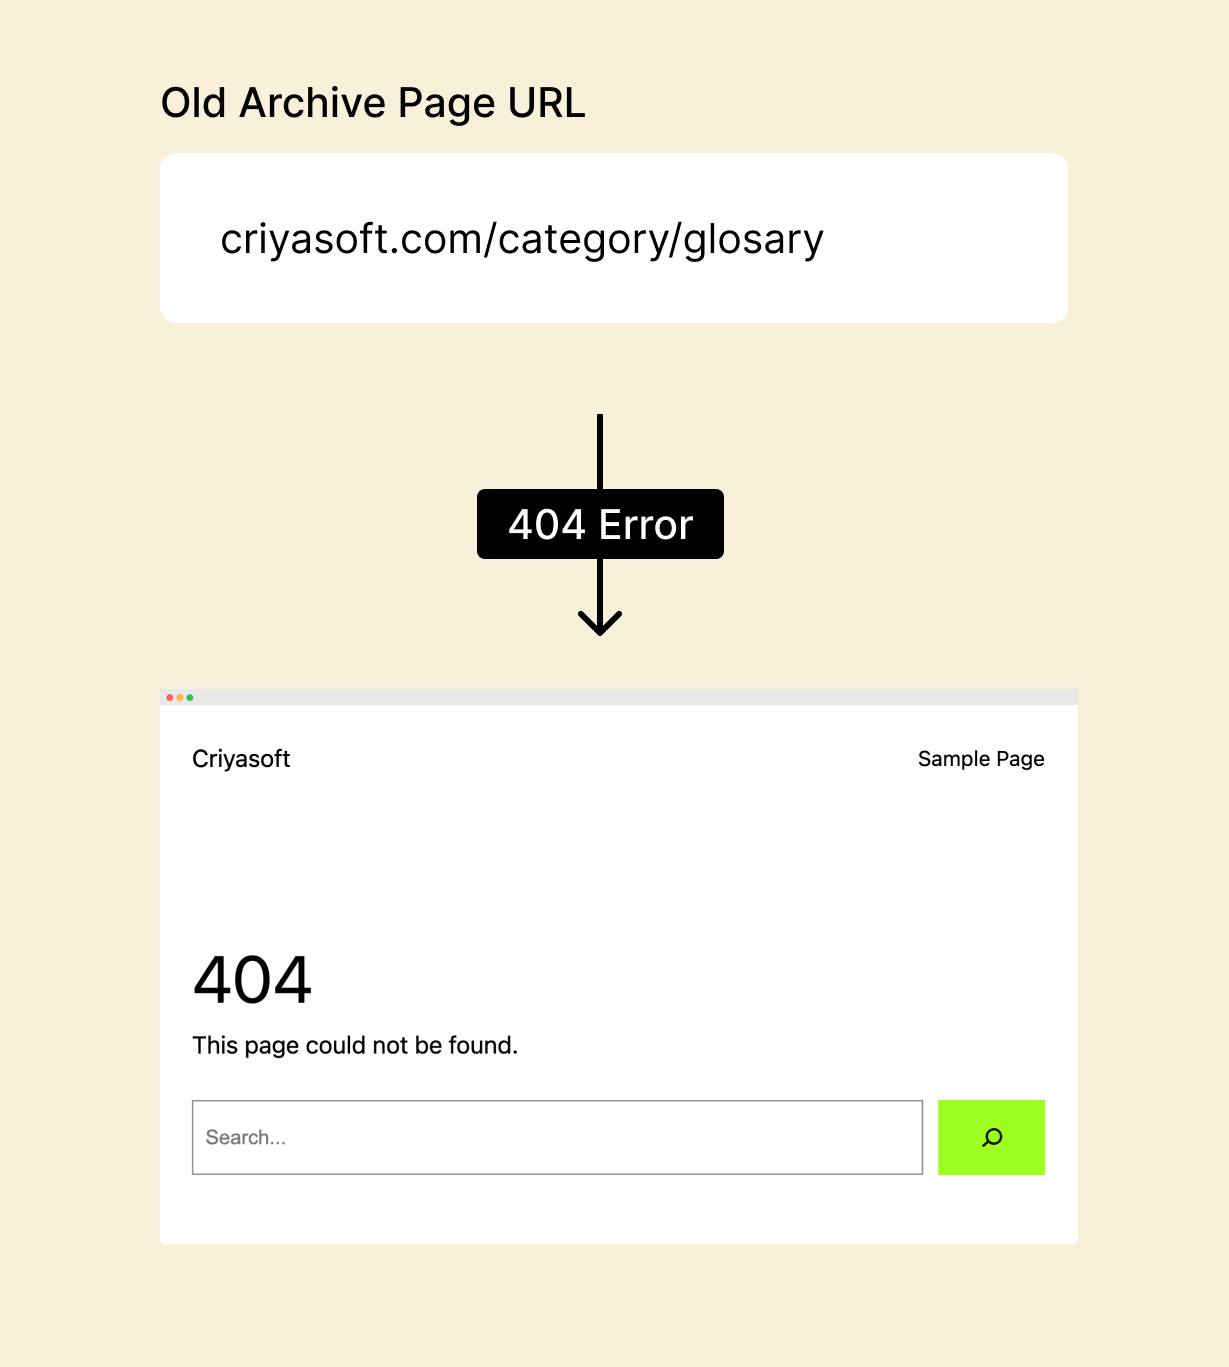
This also means that the archive page can now be accessed only through the newly updated URL and is no longer accessible through the old URL.
But if someone still tries to access the archive page with the old URL, WordPress will throw a 404 error, a.k.a “Page not found” error.
This is not a problem if you’re not getting any search traffic.
WordPress automatically updates the archive links in the navigation menu and other places on the website.
But, it is a problem if you’re getting search engine traffic.
If the archive page is already indexed by search engines and is getting some search traffic, you could easily lose website visitors.
Basically, you’ll have the same problem you faced while updating the permalink of a blog post.
This is because Search engines like Google rely on the URL of the archive page to send visitors to your website.
But, when we change the slug to produce a new archive URL, search engines like Google do not update the new URL in their index.
Also, to make things worse, search engines do not delete the old URL from their search results page either.
So, when someone clicks on your archive page from Google’s search results page, they will land on a page with an old URL.
But since that old URL got deleted when we changed the slug, WordPress shows an error page that says, “404 error, the blog post doesn’t exist”.
This is a big problem because your website loses trust in the eyes of Google and the visitor.
If you lose trust, you lose business.
But don’t worry.
All hope is not lost.
We need to do some extra hard work to make things right again with the search engines and the visitors.
301 Redirection as a solution
To not lose the visitors and the trust, the solution is to add a redirection from the old URL to the new URL.
Simply put, when someone accesses the old URL, they must be automatically redirected to the new URL.
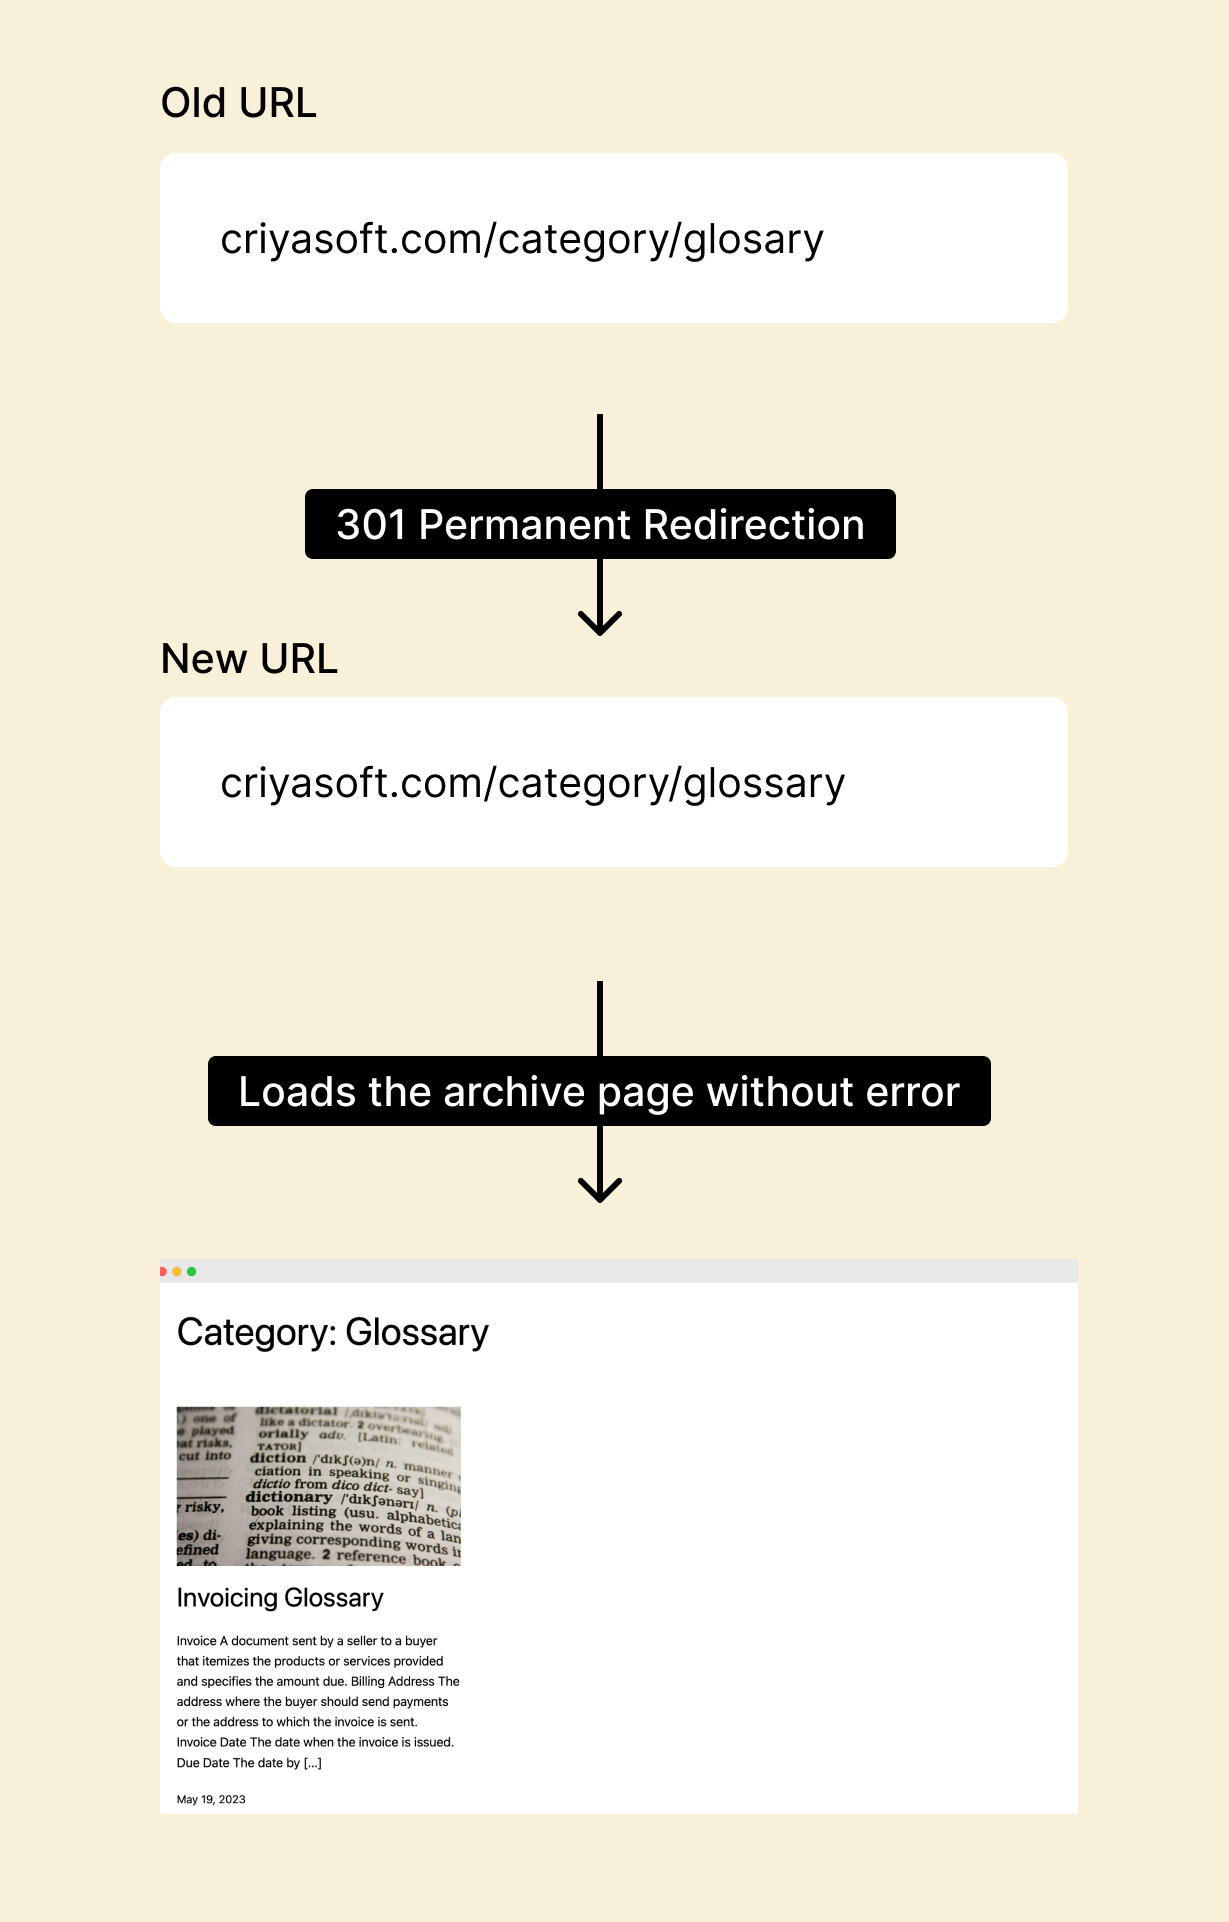
Regarding terminology, this kind of redirection is called “301 Permanent Redirection”.
301 is the code that indicates a permanent redirection from the old URL to the new URL.
In other words, when someone tries to access the blog post through an old URL, it internally shouts that:
“Hey! You’re trying to access an outdated URL of the archive page. The archive is permanently moved to a new address (new URL). So, I am taking you to the new URL”.
When the redirection is complete, the archive page becomes accessible again without a 404 error.

Got it, but how do we implement this 301 redirection?
By default, WordPress doesn’t have the functionality to implement 301 redirections.
So, we have to install a plugin to implement the redirection.
If you remember, a plugin is nothing but a custom code that extends the functionality of a WordPress website.
There are so many plugins that help you add 301 redirections, but the plugin that I regularly use is “Redirection”:
 Adam
Adam
When we learn how to install and use plugins, we will learn how to add 301 redirects using the “Redirection” plugin.
 © 2026 UsableWP. A project by Naresh Devineni.