Creating your first blog post
To create a blog post in WordPress, all you have to do is:
- Go to WordPress Admin Dashboard
- On the Admin navigation menu, put your cursor on “Posts”
- And then click on “Add new”
- Write content and add a featured image (if necessary)
- Categorize the post (if required)
- Hit the publish button

When you click “Add new”, you will be taken to the blog post editor screen.
If you are creating a blog post for the first time, WordPress could greet you with a popup saying: “Welcome to WordPress Block Editor”.
Just close the popup.
If you didn’t see the popup, just forget about it.
Anyway, here is what the post editor screen looks like:
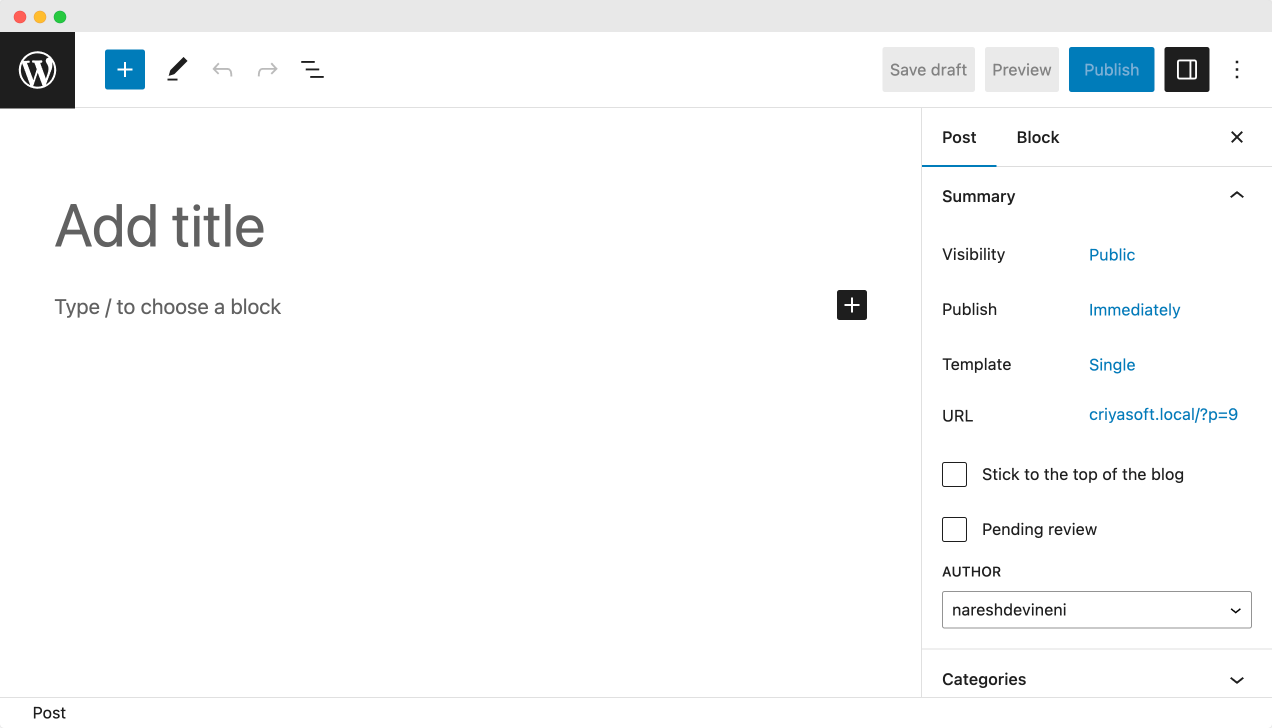
The tour of the post editor interface
If you notice, it is divided into three main sections.
- The top bar with a lot of action-taking buttons
- The content area
- The sidebar with Post settings and block-specific settings
Section: The top bar with a lot of action-taking buttons
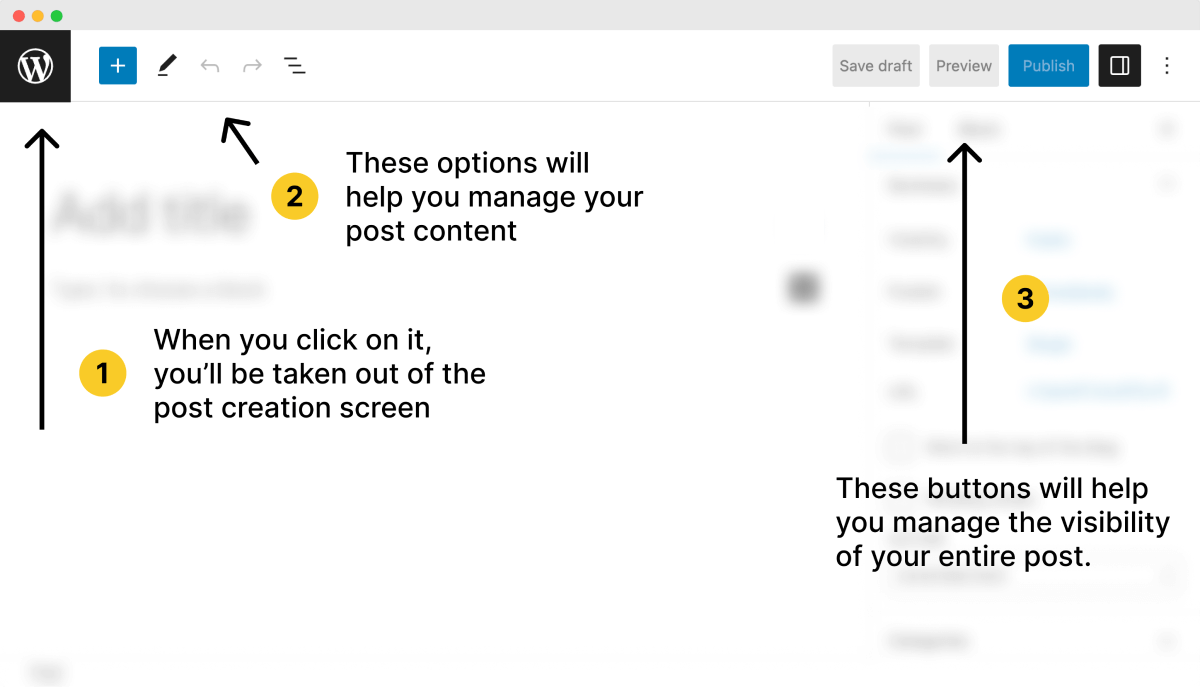
It has a lot of buttons :P
But if you notice, the buttons are divided into three sections:
- The WordPress icon on the far left helps you exit the post-editor screen.
- Content creation helper options on the left help you add and organize content.
- The post-publishing buttons are on the far right.
We will learn how to use these buttons properly when the time comes.
Next comes the main content creation section.
Section: The content area
The content area is located at the heart of the post-creation screen, and it contains only two elements:
- The “Add title” field – Your blog post title should go here
- The Block Editor – Your blog post content should go here
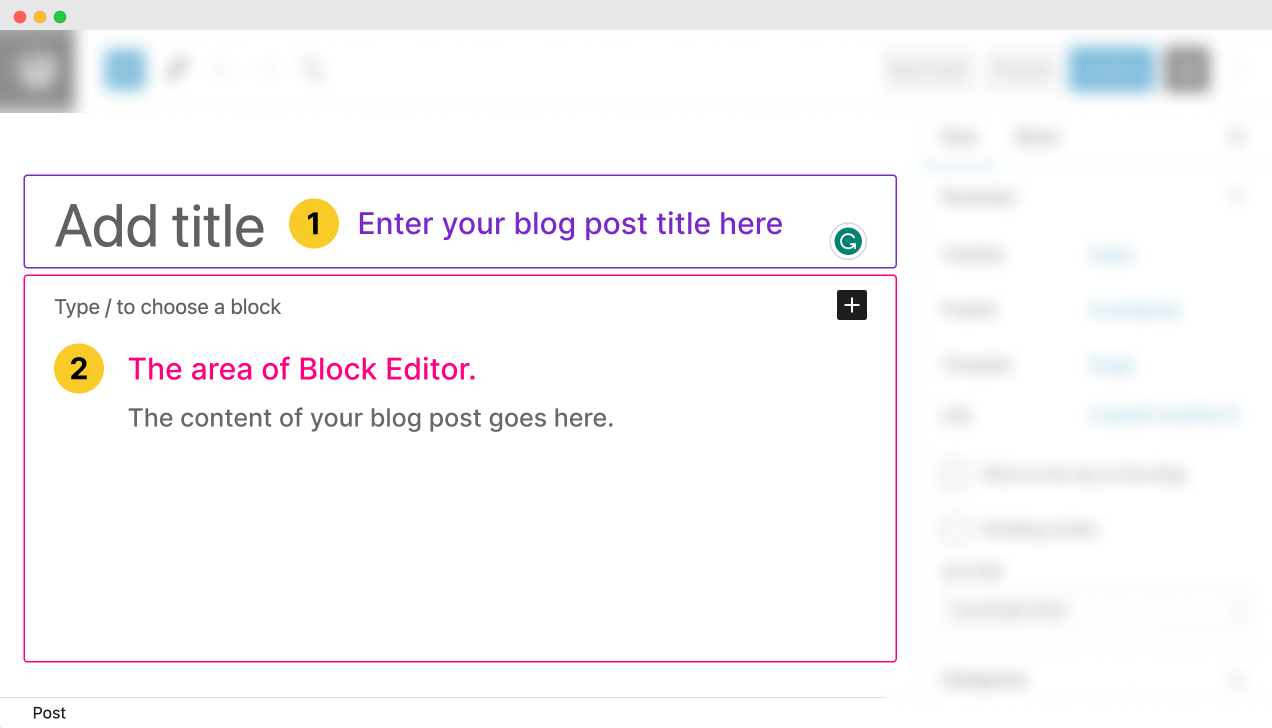
The placeholder that says “Type / to choose a block” marks the beginning of the WordPress Block Editor interface.
We will learn more about it in the next lesson.
Finally, let’s talk about the sidebar on the right.
Section: The sidebar with Post settings and Block settings
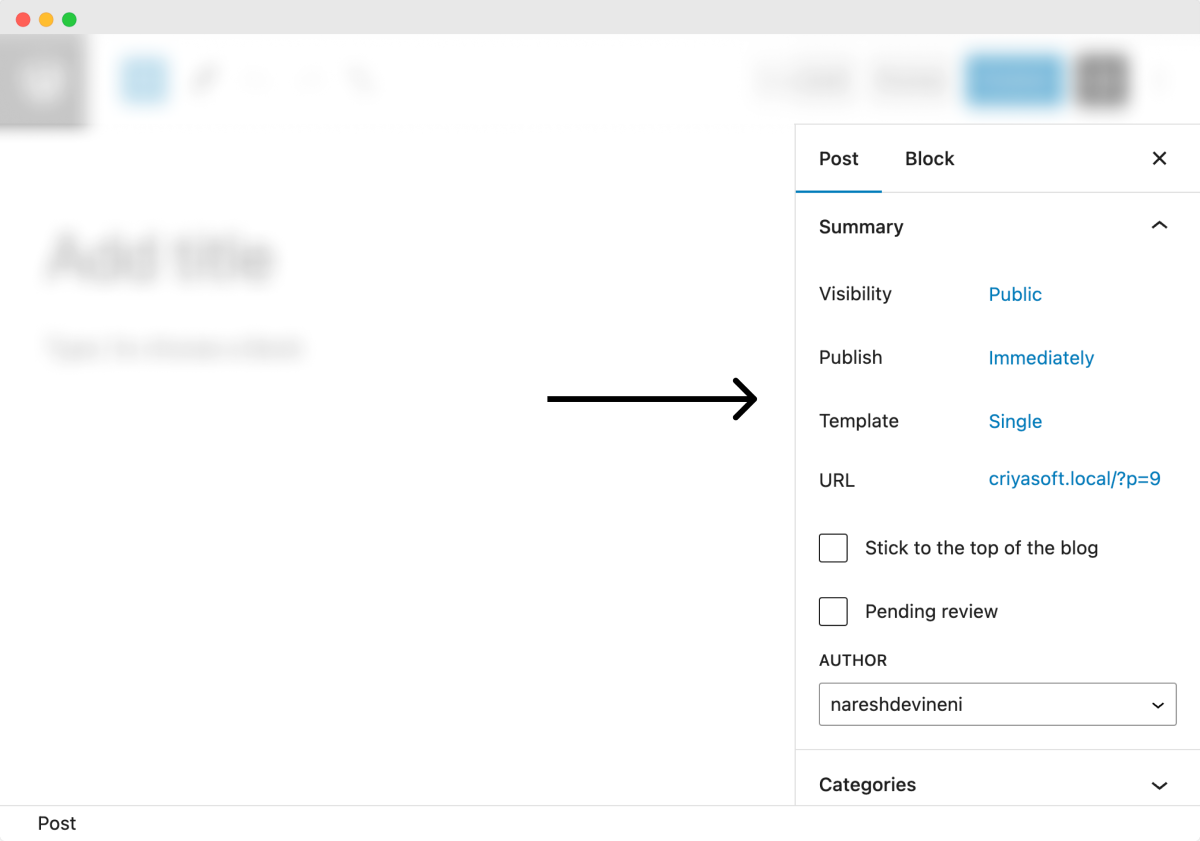
This sidebar has many options and is specific to the blog post we are currently creating.
These options will help us:
- Manage the public visibility of the blog post
- Classify the blog post into multiple categories
- Customize the design of individual pieces of post content
Ideally, we explore these options only after writing the blog post’s content.
So, let’s come back to these in a future lesson.
Anyway, enough theory!
Now, let’s create our first blog post for real.
Usually, here is my process for creating a good blog post (excluding SEO activities):
- I will start by adding a good title
- Then I start writing content, and while writing content, I use headings, paragraphs, images, video embeds (if necessary), tables (if necessary), and many other elements to make my content as interesting as possible.
- Once the writing part is done, I upload a featured image for my article
- Then I will add categories to my article to classify it
- Finally, I will check everything and then hit the publish button to make that article live.
Come on, let’s follow the same process for your first blog post as well.
We will follow this process throughout the next few lessons.
So, stay inside this post editor screen for the rest of this module.
And, to follow along with me, use this Word Document for the rest of this module:
Or you can use the Google Doc here:


In the next lesson, I will show you how to add a title for your blog post.
Previous Article

 © 2026 UsableWP. A project by Naresh Devineni.