Hitting the Publish button after reviewing the summary options
We did it.
We went through a lot to reach this far, and it was a necessary journey to produce a good blog post.
We are almost there. We will hit the publish button by the end of this lesson.
But before hitting the publish button, we need to review some settings that affect the visibility and reachability of the blog post.
Introducing…
The Summary settings
There are three Summary settings that we need to review before hitting the publish button.
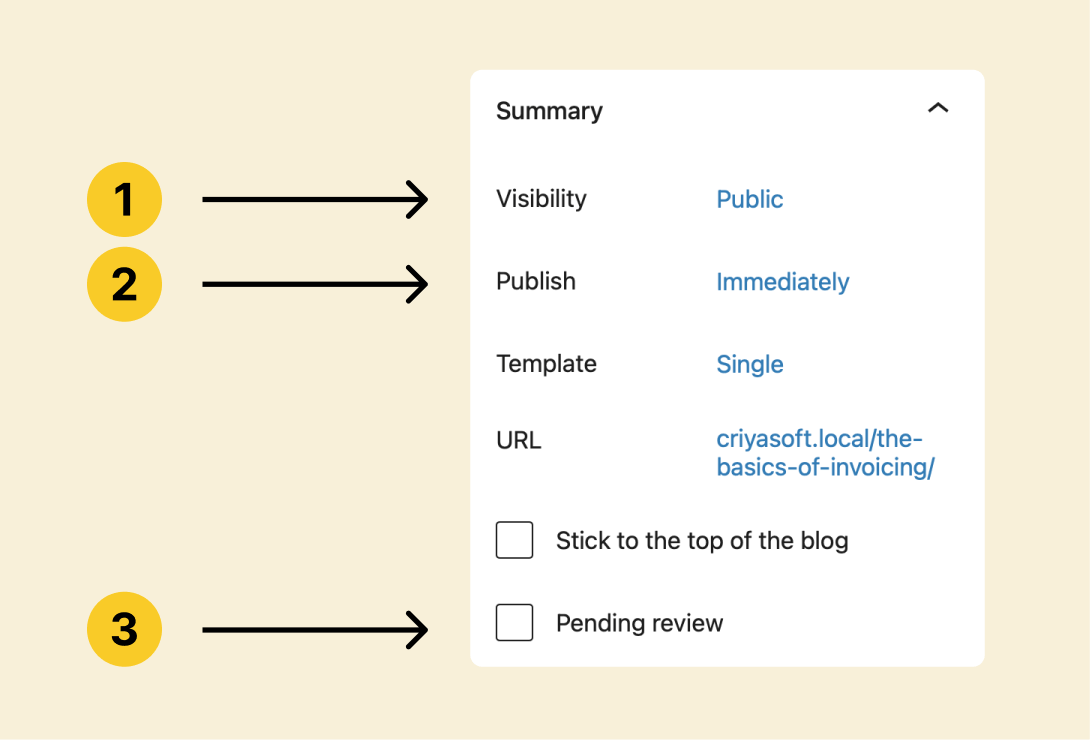
- Visibility option – Do you want this blog post to be Private? Password protected? or Public?
- Publish option – Do you want to make it live immediately? Or sometime in the future?
- Pending review option – Do you need permission from the main Administrator before the article goes live?
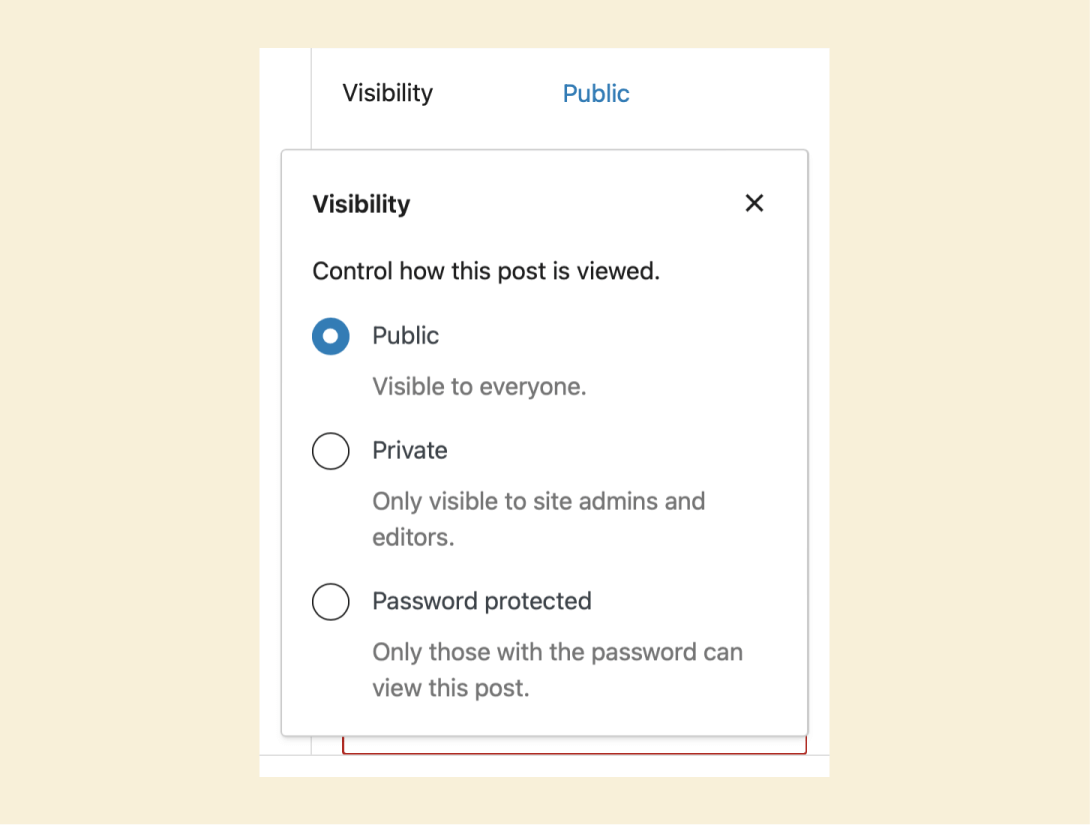
The Visibility option
By default, the “Visibility” option is set to “Public” because, most often, people want to publish their posts to the Public.
But sometimes, you might want to publish the post for limited visibility.
For example, you want only your website’s account holders or subscribers to read the blog post. This is a common scenario.
If that is the case, you have to change the default visibility from Public to:
- Private – Only visible to site admins and editors
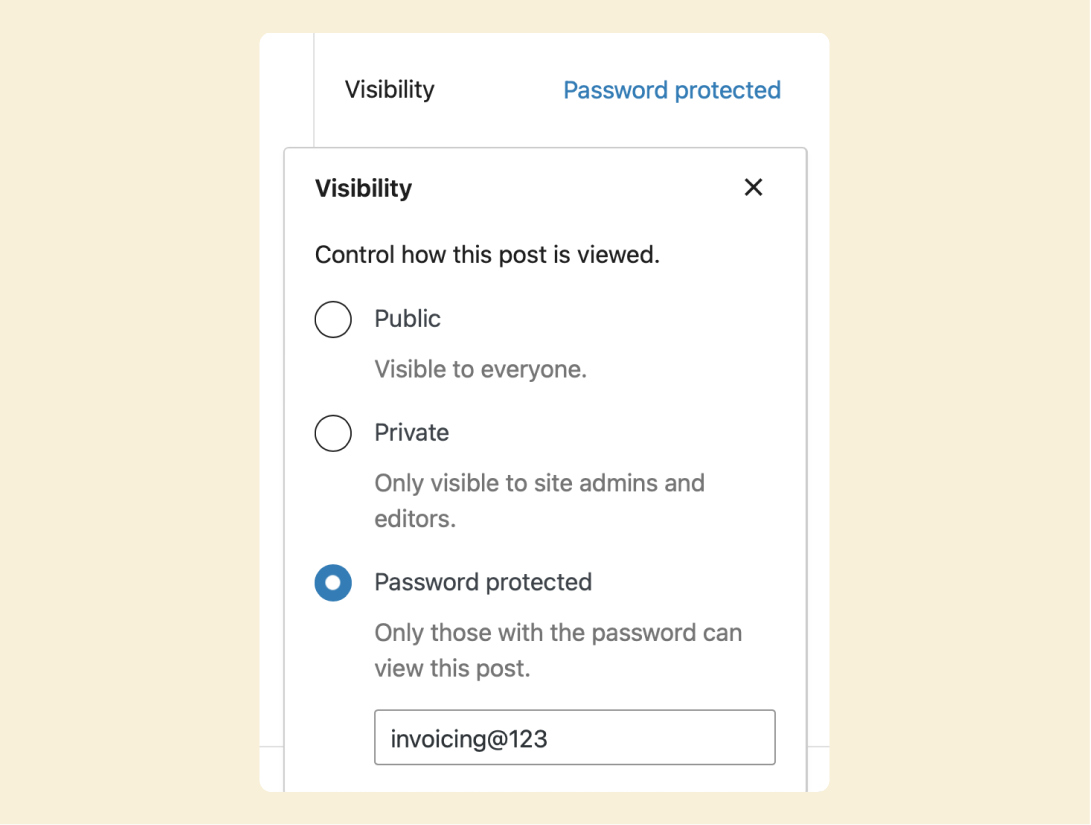
- Password protected – Only those with the password can view the post
My clients often go with the “Password protected” option and share that password via Newsletter and personal email.
Having said that, we will go with the “Public” option for our first blog post.
Next comes the “Publish” option
Our blog post is currently in “draft” mode, and by hitting the “Publish” button, we could make it live for everybody on the internet.
But when the post will go live depends on the option we choose for the “Publish” option.
By default, the “Publish” option is set to “Immediately” because people often want to make their posts immediately available to their audience.
But sometimes, you might want to make the post available at a future date.
If so, you must change your “Publish” setting from “Immediately” to a future date.
For example, you habituated your audience to four blog posts every month, but you must go on vacation next month.
On vacation, you’re scared you won’t find time to publish the posts.
If that is the case, writing those four posts upfront and setting their publishing date to future dates will solve the problem.
And when those future dates arrive, WordPress will publish the respective post automatically.
WordPress does this through a feature called “Cron Jobs”.
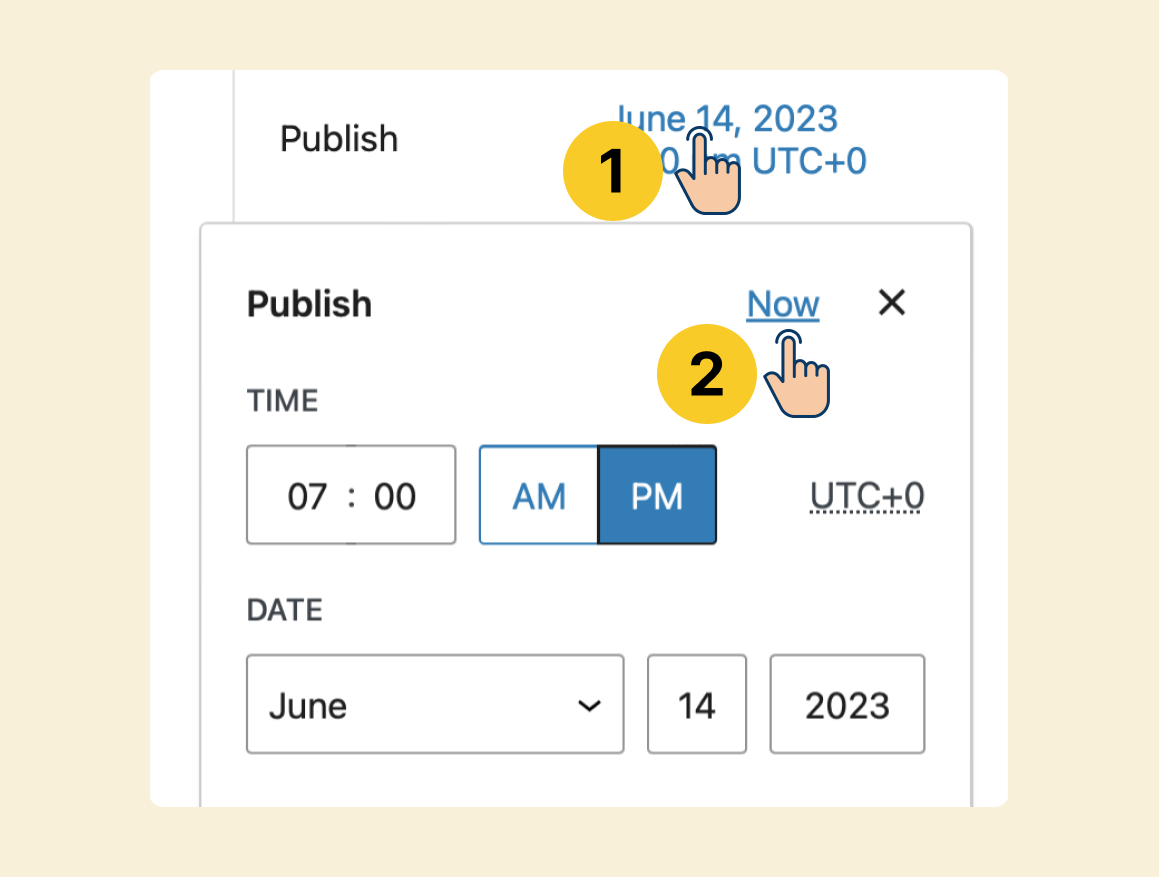
Anyway, for our first blog post, I want to publish it immediately, so that I will change the “Publish” setting from a future date to “Immediately” by:
- Clicking on the future date next to the “Publish” label
- And then by clicking on the “Now” button.
The “Pending review” setting
Finally, are you just a contributor to the blog post?
If so, check the “Pending Review” option to notify the website administrator that you are done writing the blog post.

If you check this option, the post will be scheduled to go public once the Administrator approves it.
For this course, we are the main person running the website.
So, I don’t want to send it for review.
I will just hit the publish button.
That’all.
It is always a pleasure to see our content go live, right?
In the next lesson, we will conclude this module by learning about the URL of the first blog post we published.
 © 2026 UsableWP. A project by Naresh Devineni.